
Overview
Resource Impersonation is a feature of the Autotask Integration API (1.6 and greater) that enables creating entities with the creating resource as the mapped resource in Tasky. Without Resource Impersonation certain entities (e.g. Ticket Notes) will be displayed as created by the resource configured for the Tasky API itself.
Enabling Resource Impersonation requires creating or updating an API User Security Level and assigning it to the Tasky API user. Additionally, all security levels assigned to Tasky users. must have Resource Impersonation enabled; which may require creating copies of system security levels.
Note: Completing the steps required to enable Resource Impersonation requires Administrator privileges on the Autotask database as well as an Admin user Role in Tasky.
Step by Step
1. Create an "API User" Security Level with required permissions
The first thing required is to copy the built-in "API User" Security Level and modify the copy to allow Resource Impersonation.
Resource Impersonation is enabled by adding specific permissions to the security level for the operations the Tasky integration requires.
This walkthrough specifies the exact permissions the Tasky integration requires.
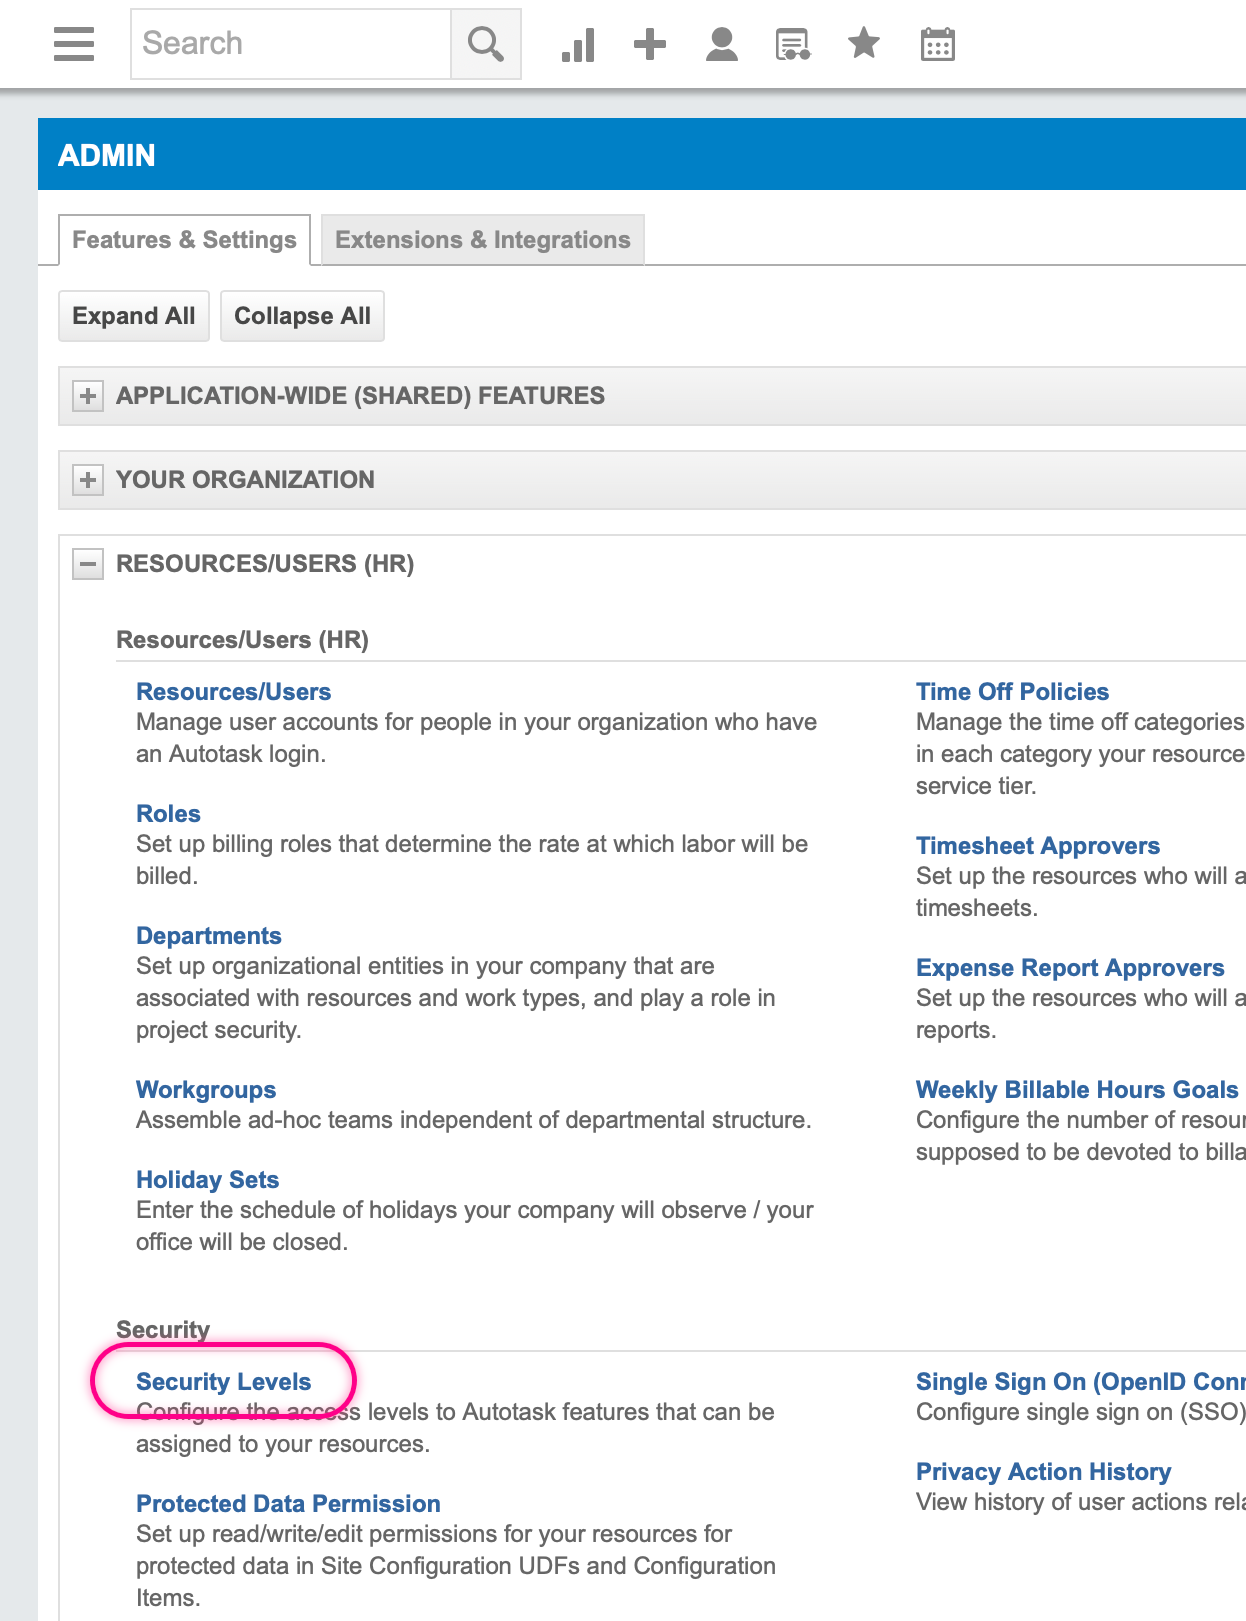
Open, by hovering over, the Autotask menu in the top left corner
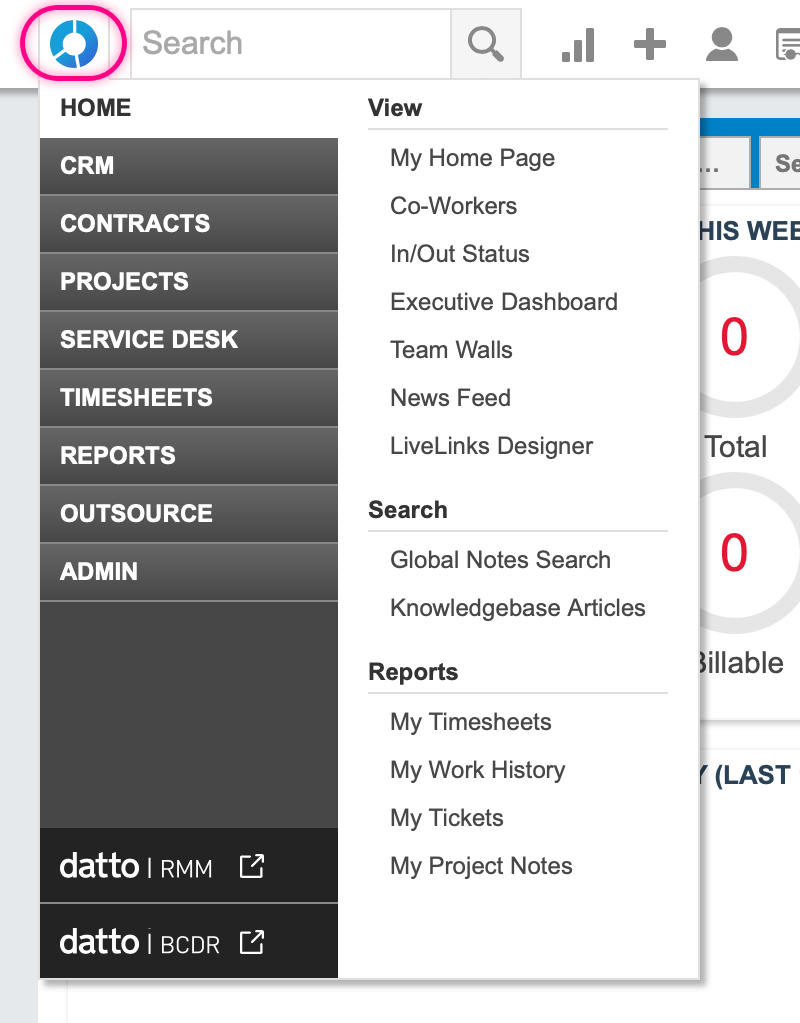
Select, by hovering over, the "ADMIN" menu option
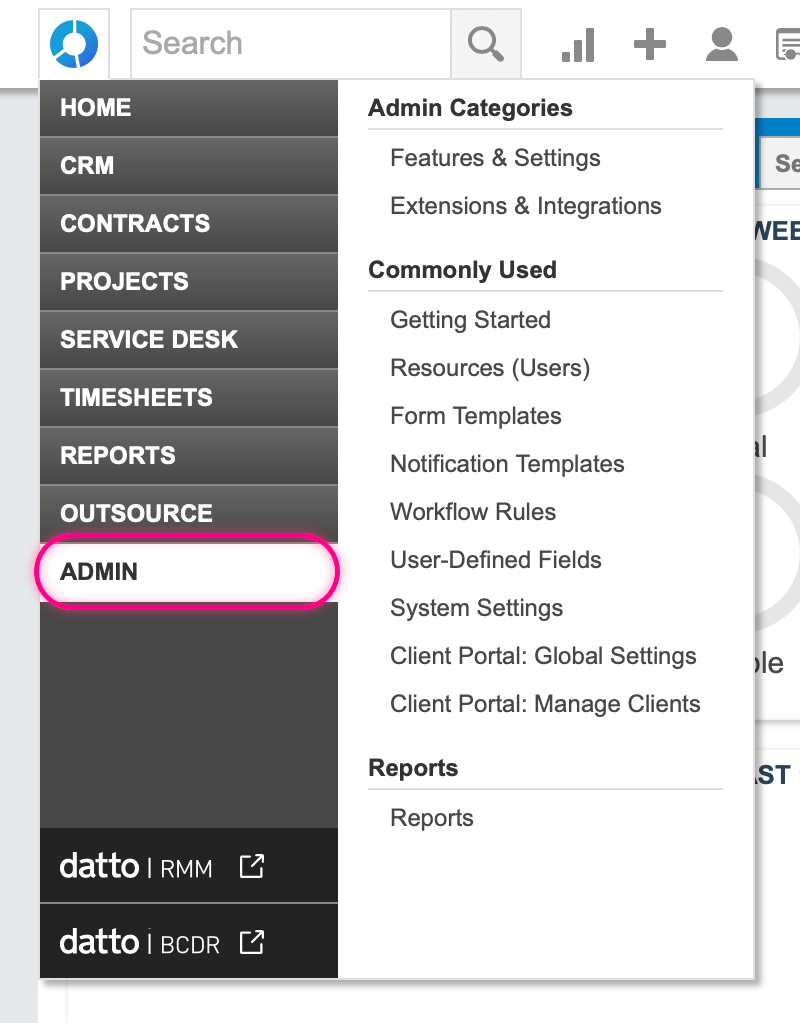
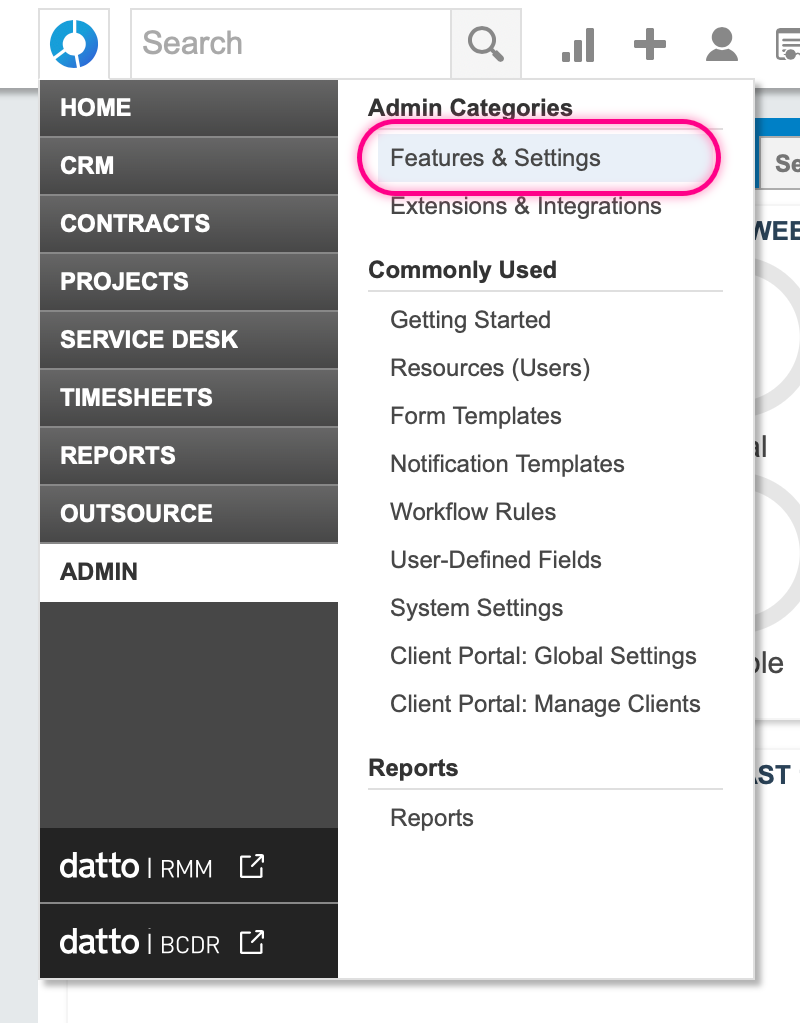
Select, by clicking, the "Features & Settings" menu option
Expand the "Resources/Users (HR)" group
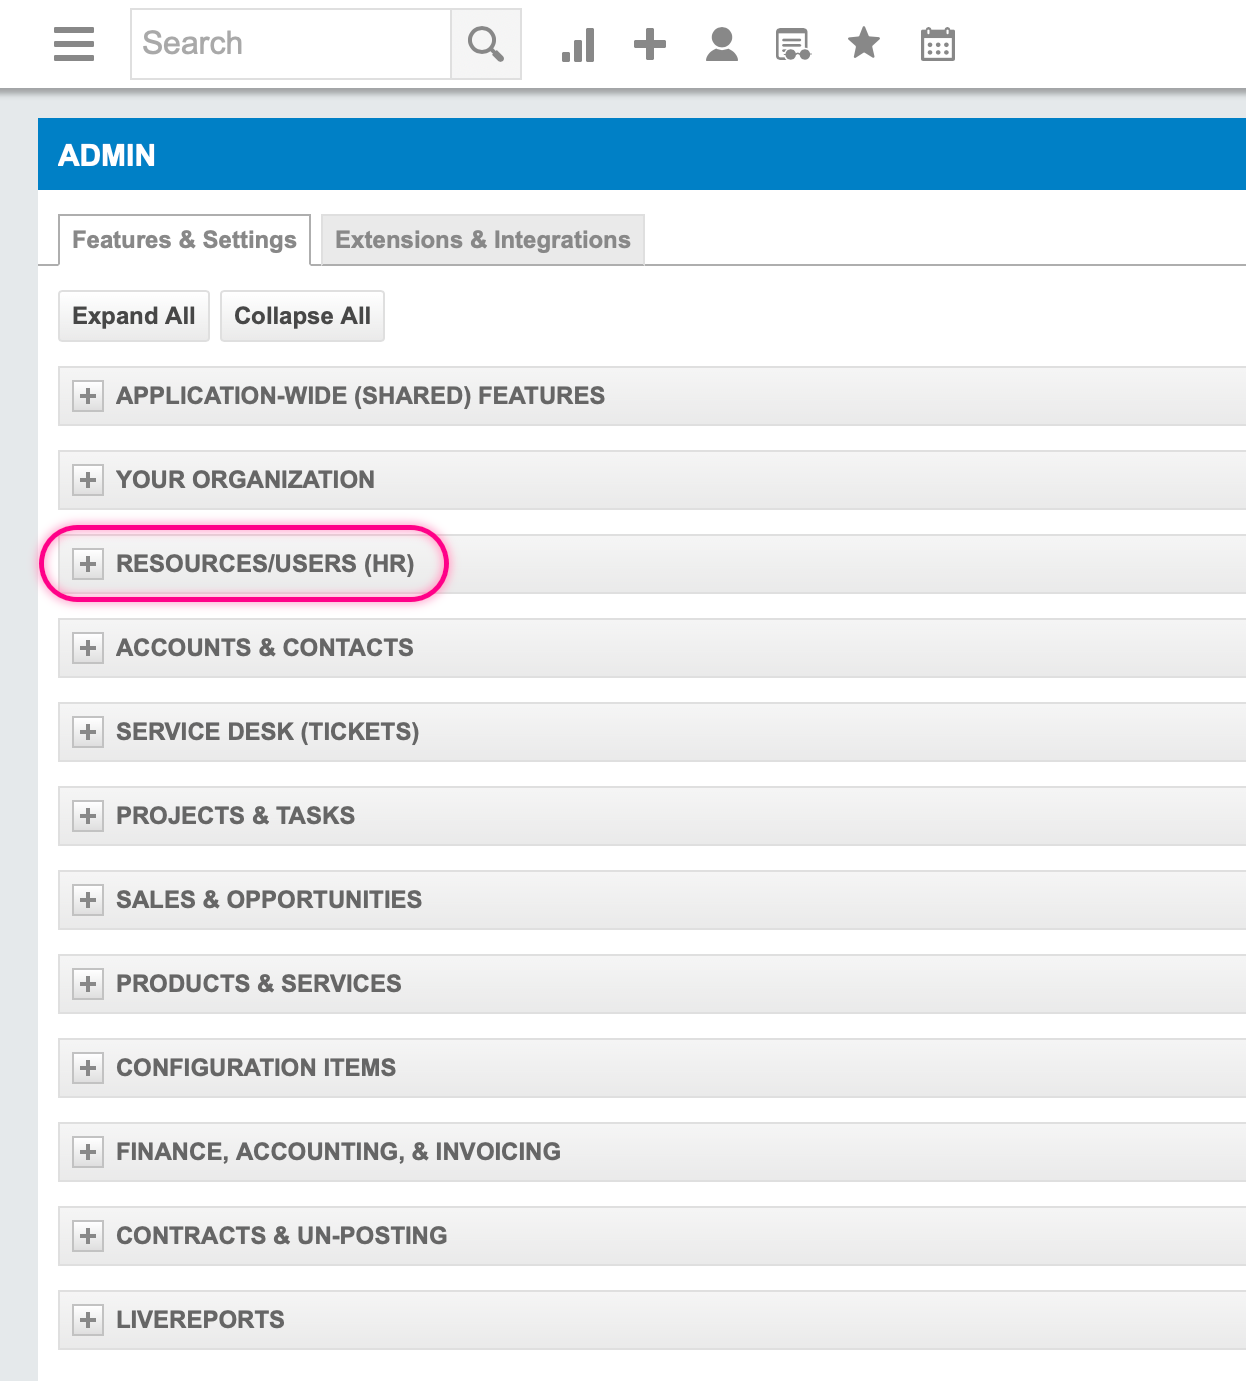
Click the "Security Levels" link
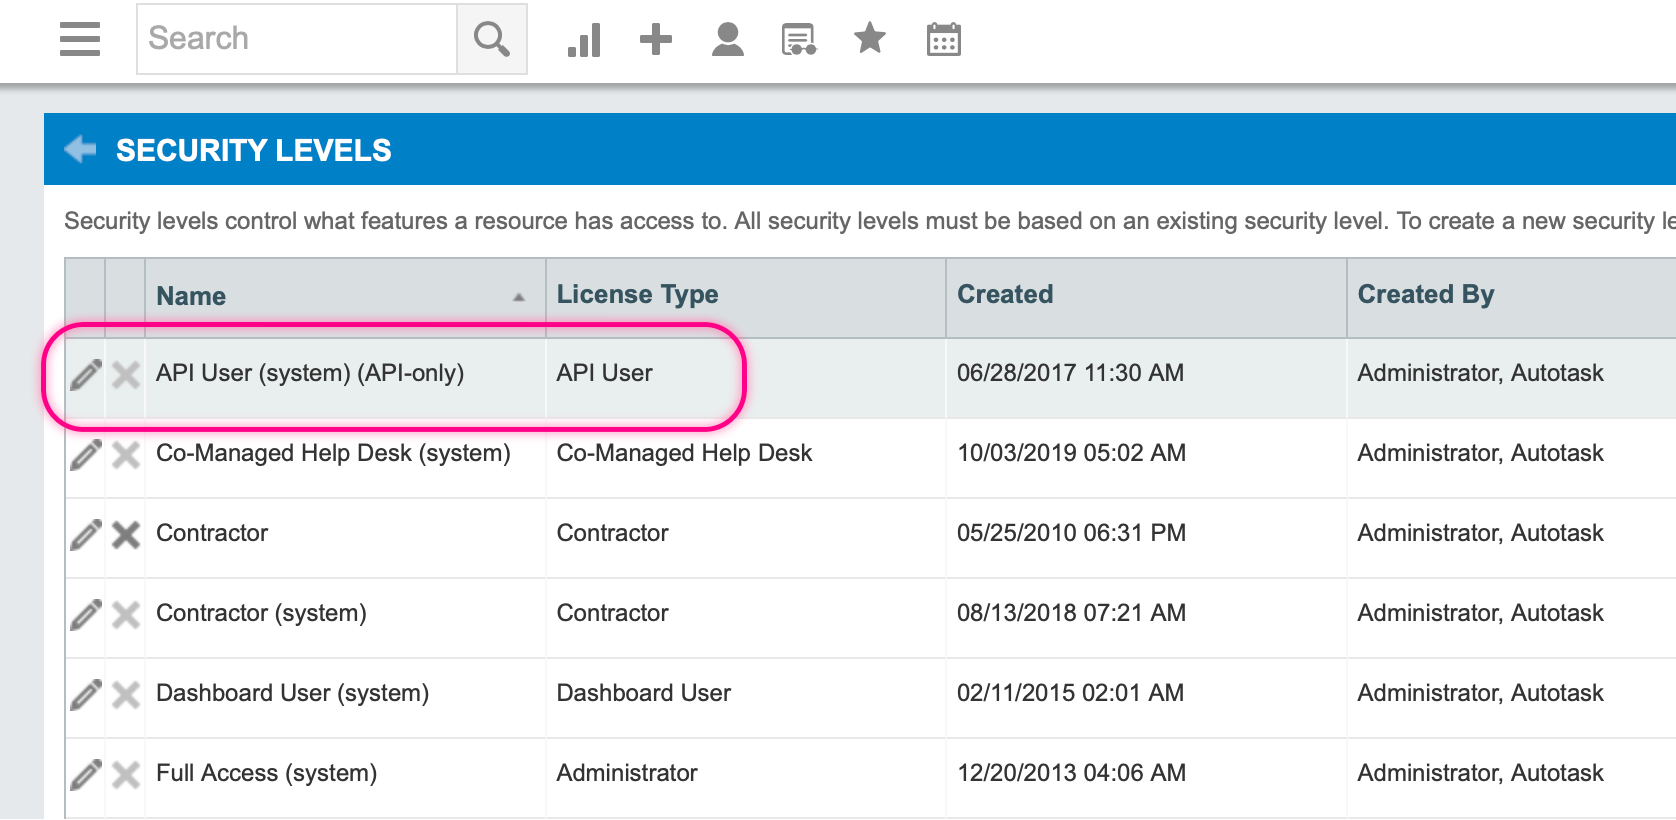
Locate the "API User (system)" built-in Security Level
Select the "Copy Security Level" menu option
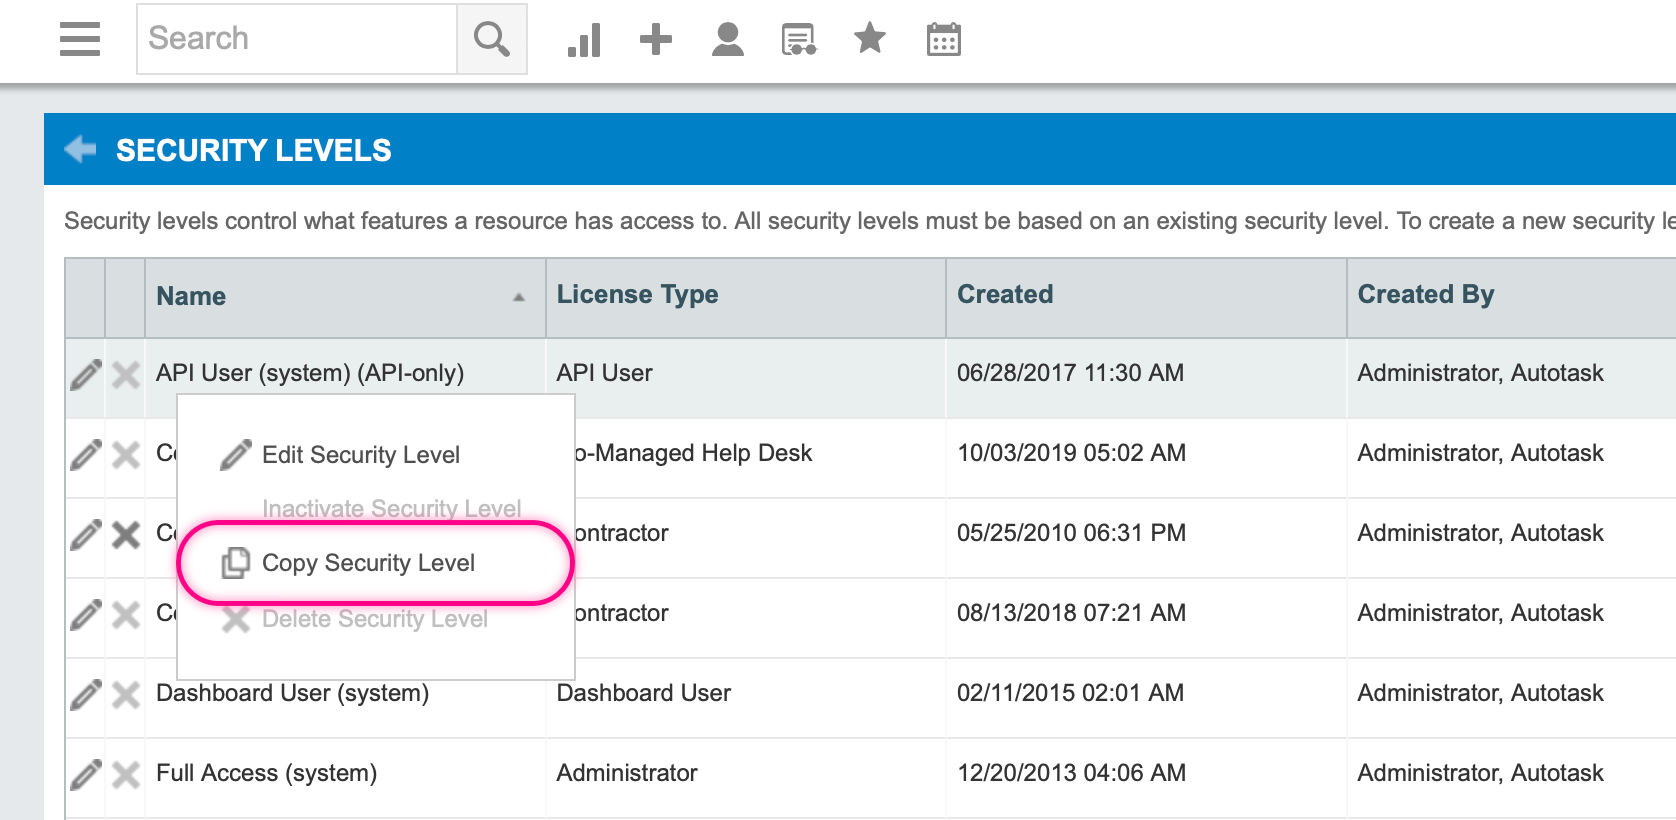
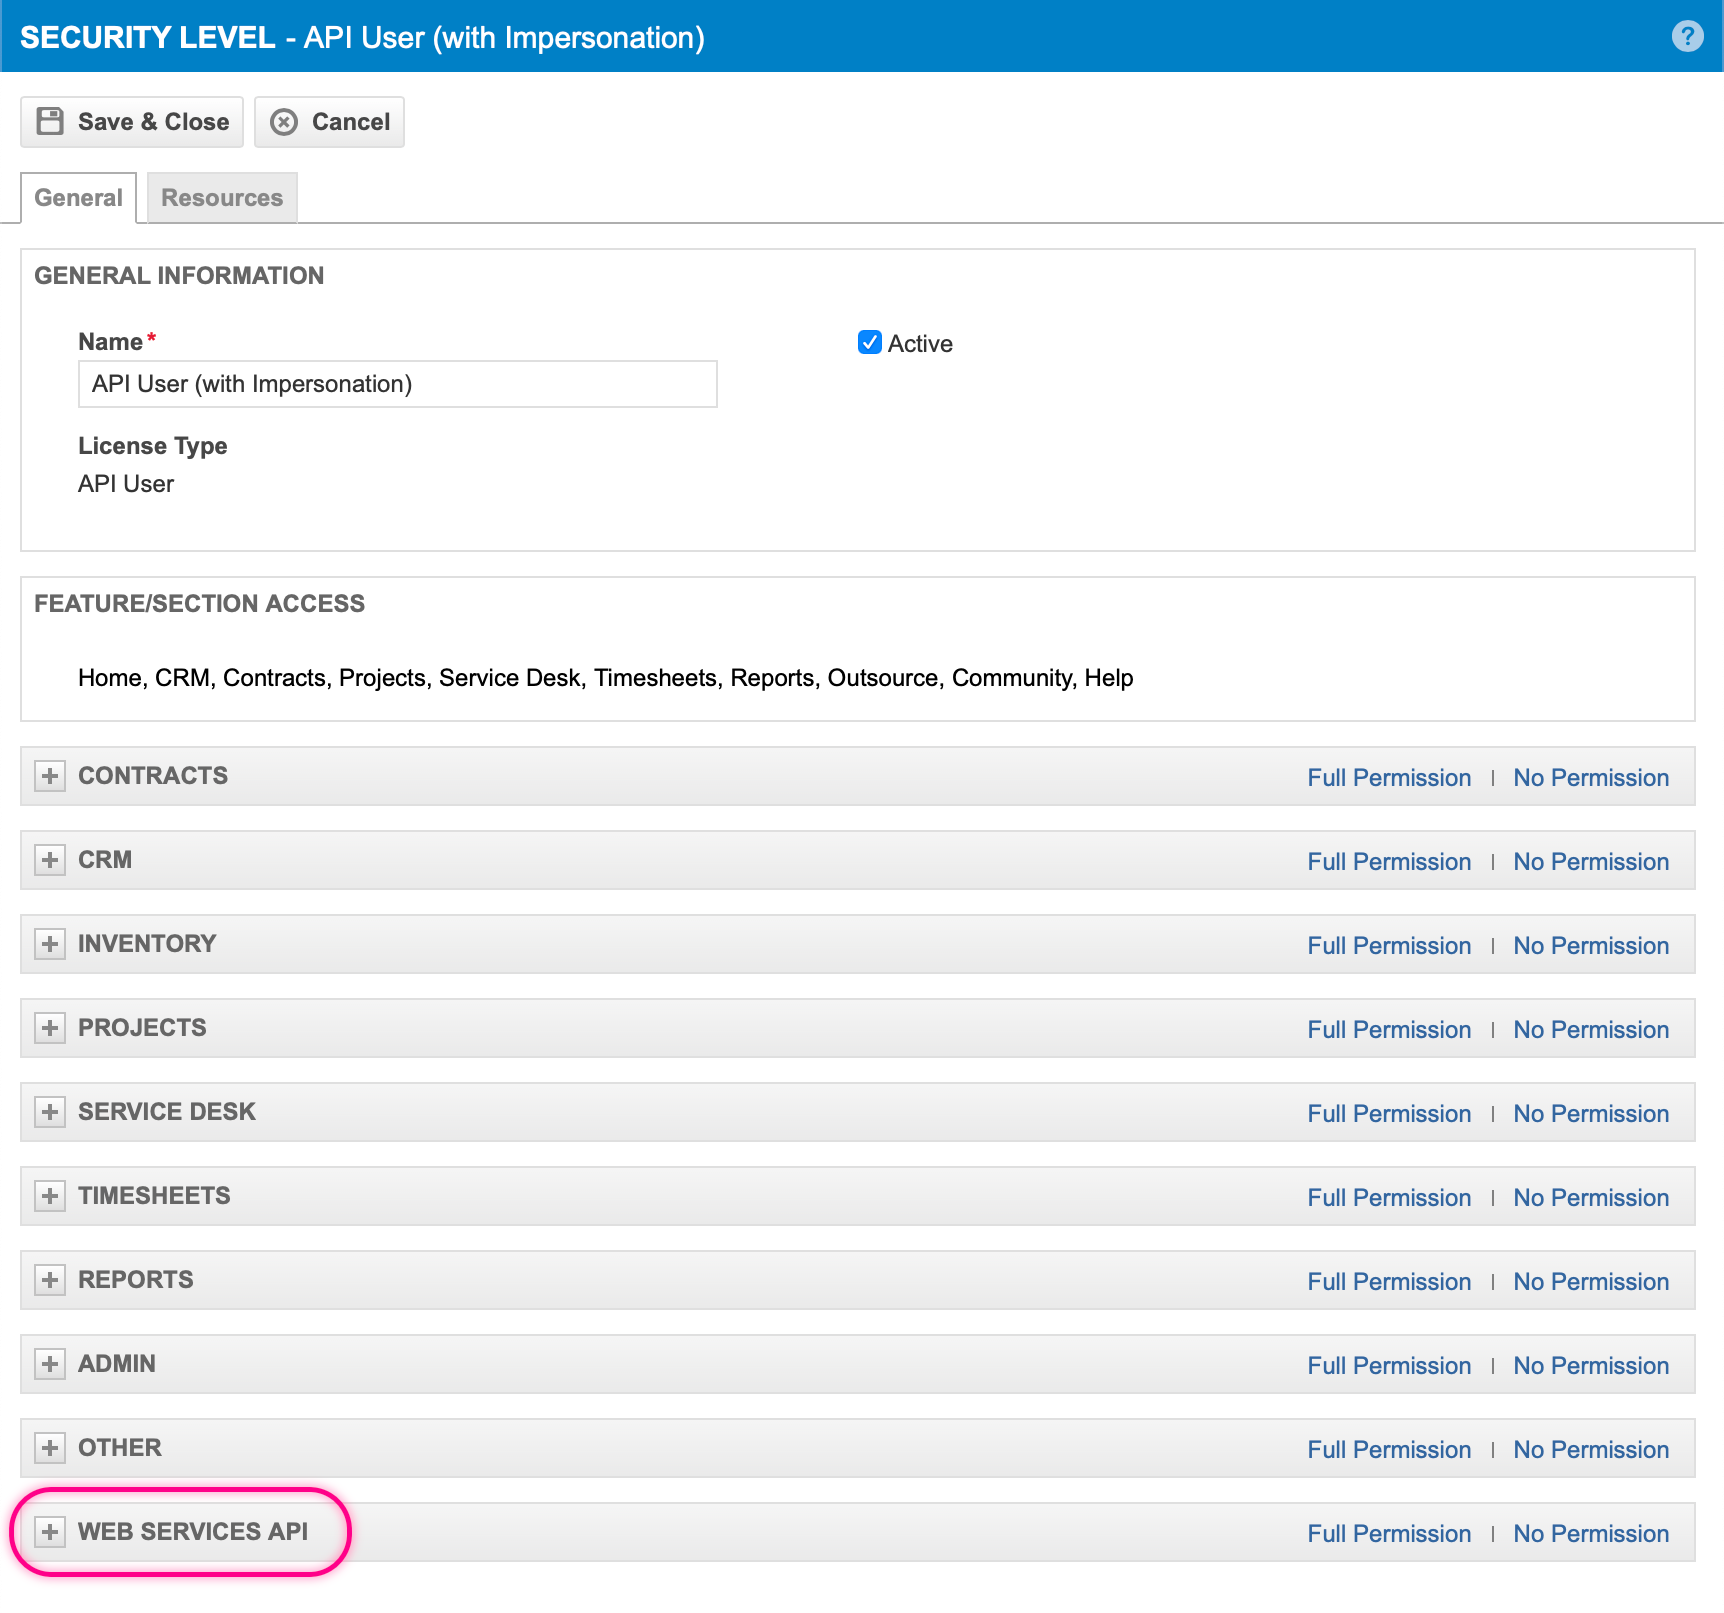
A Security Level editor will open for the copied Security Level
Now the copy of the default system "API User' Security Level needs to be customized to ensure it is correctly configured to allow Resource Impersonation.
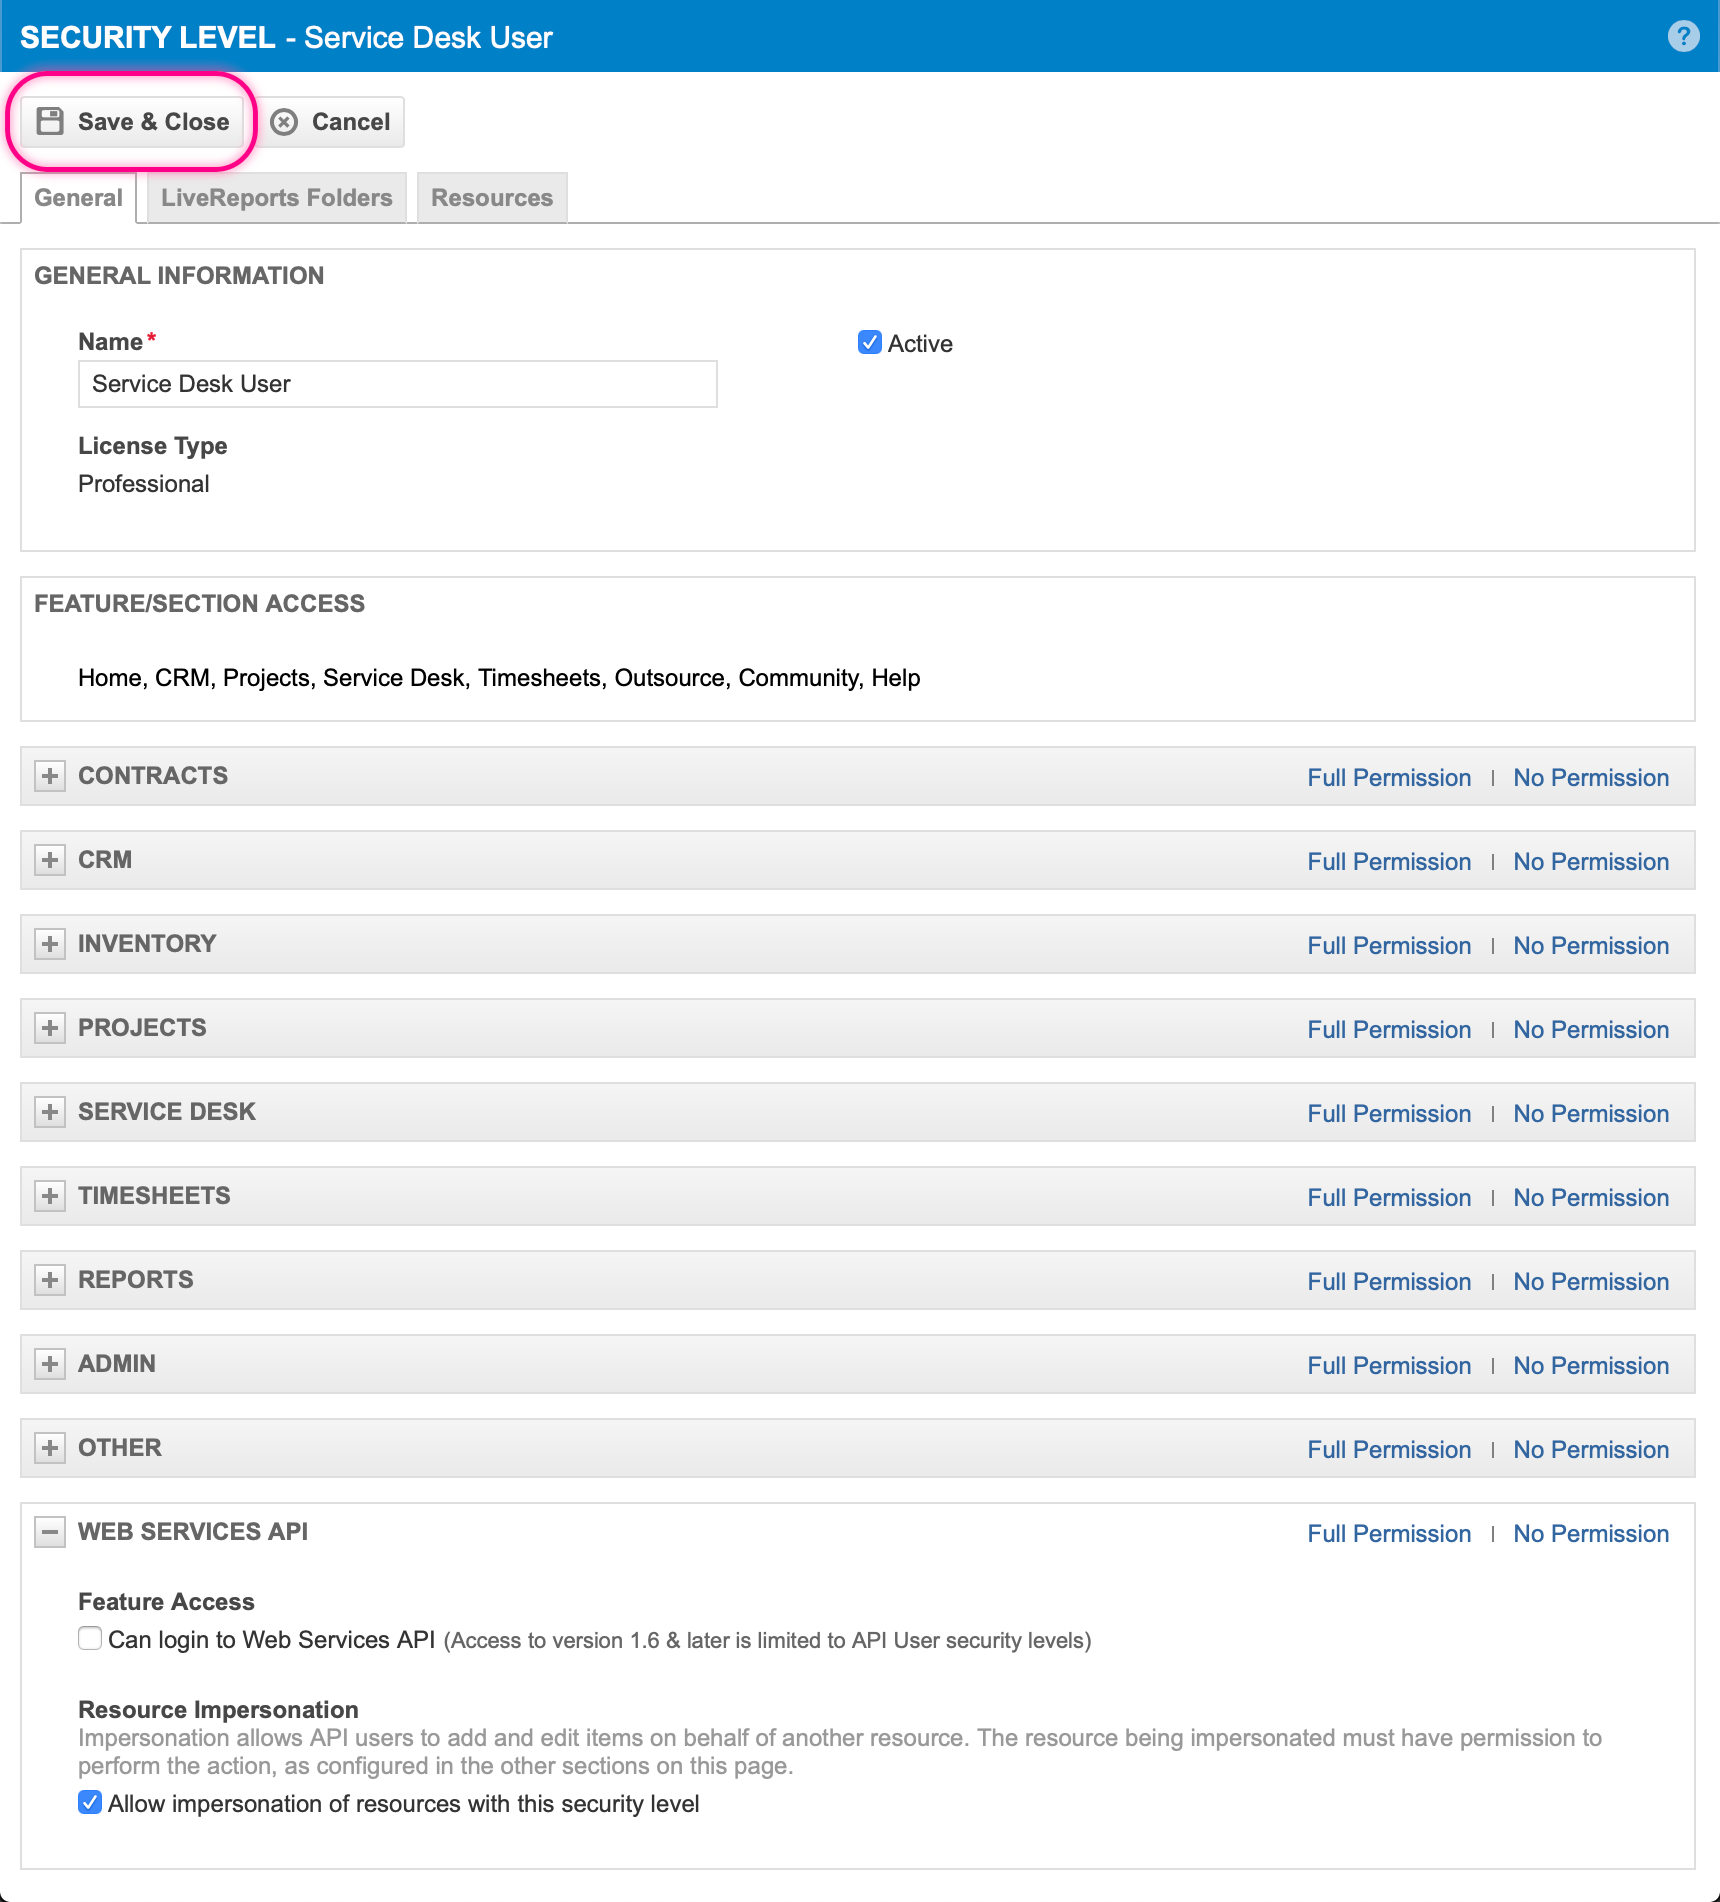
Choose a name for the Security Level, this example is using "API User (with Impersonation)" but it can have any valid name.
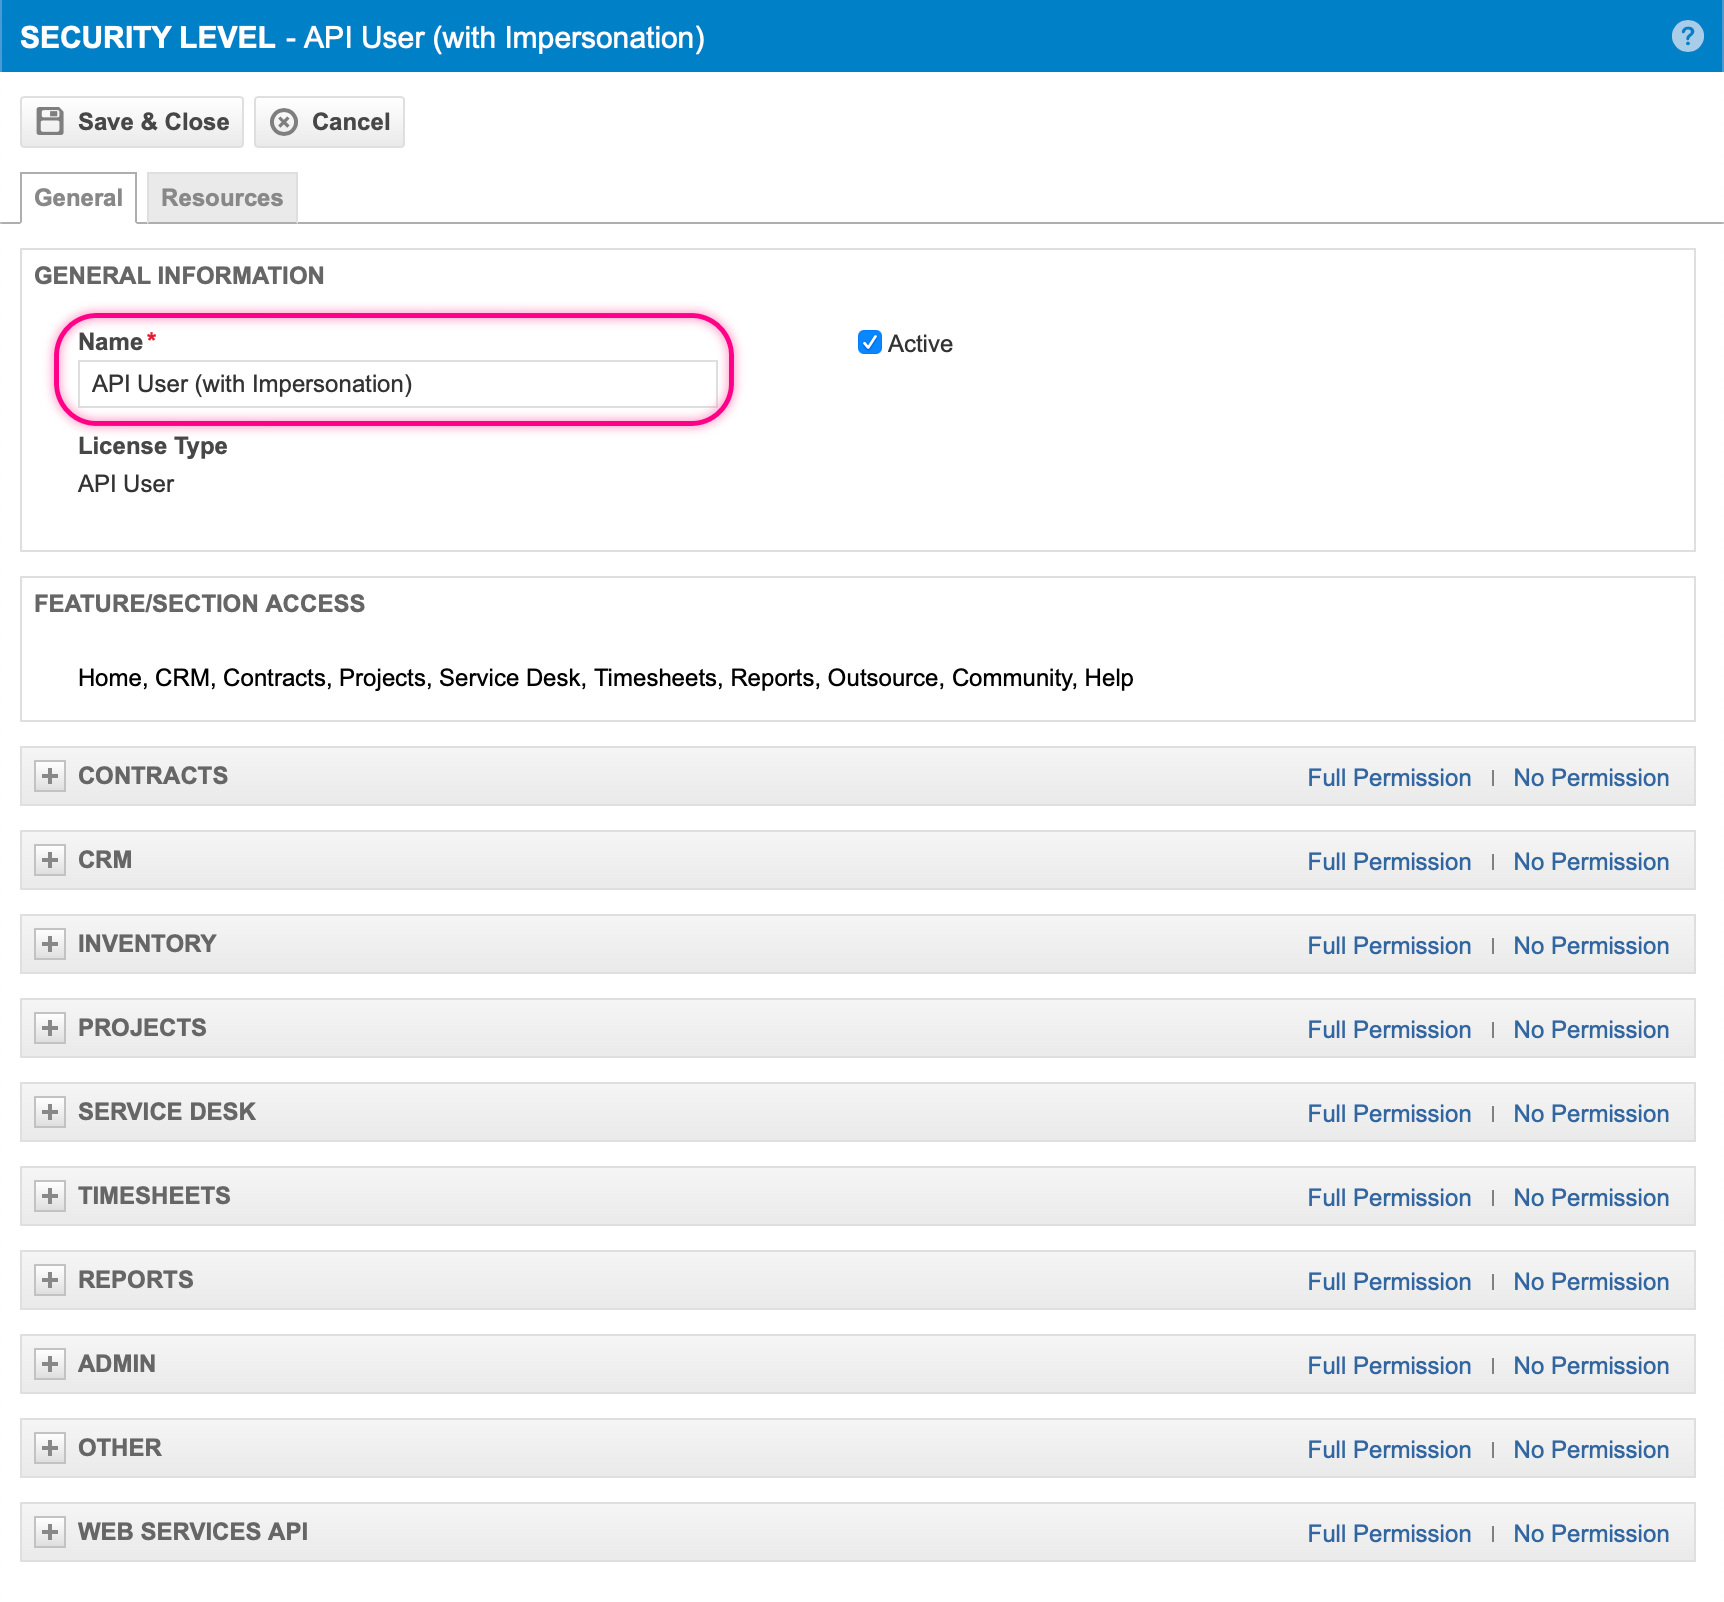
Check the "Active" option

Expand the "Web Services API" group
Check the "Can login to Web Services API" option
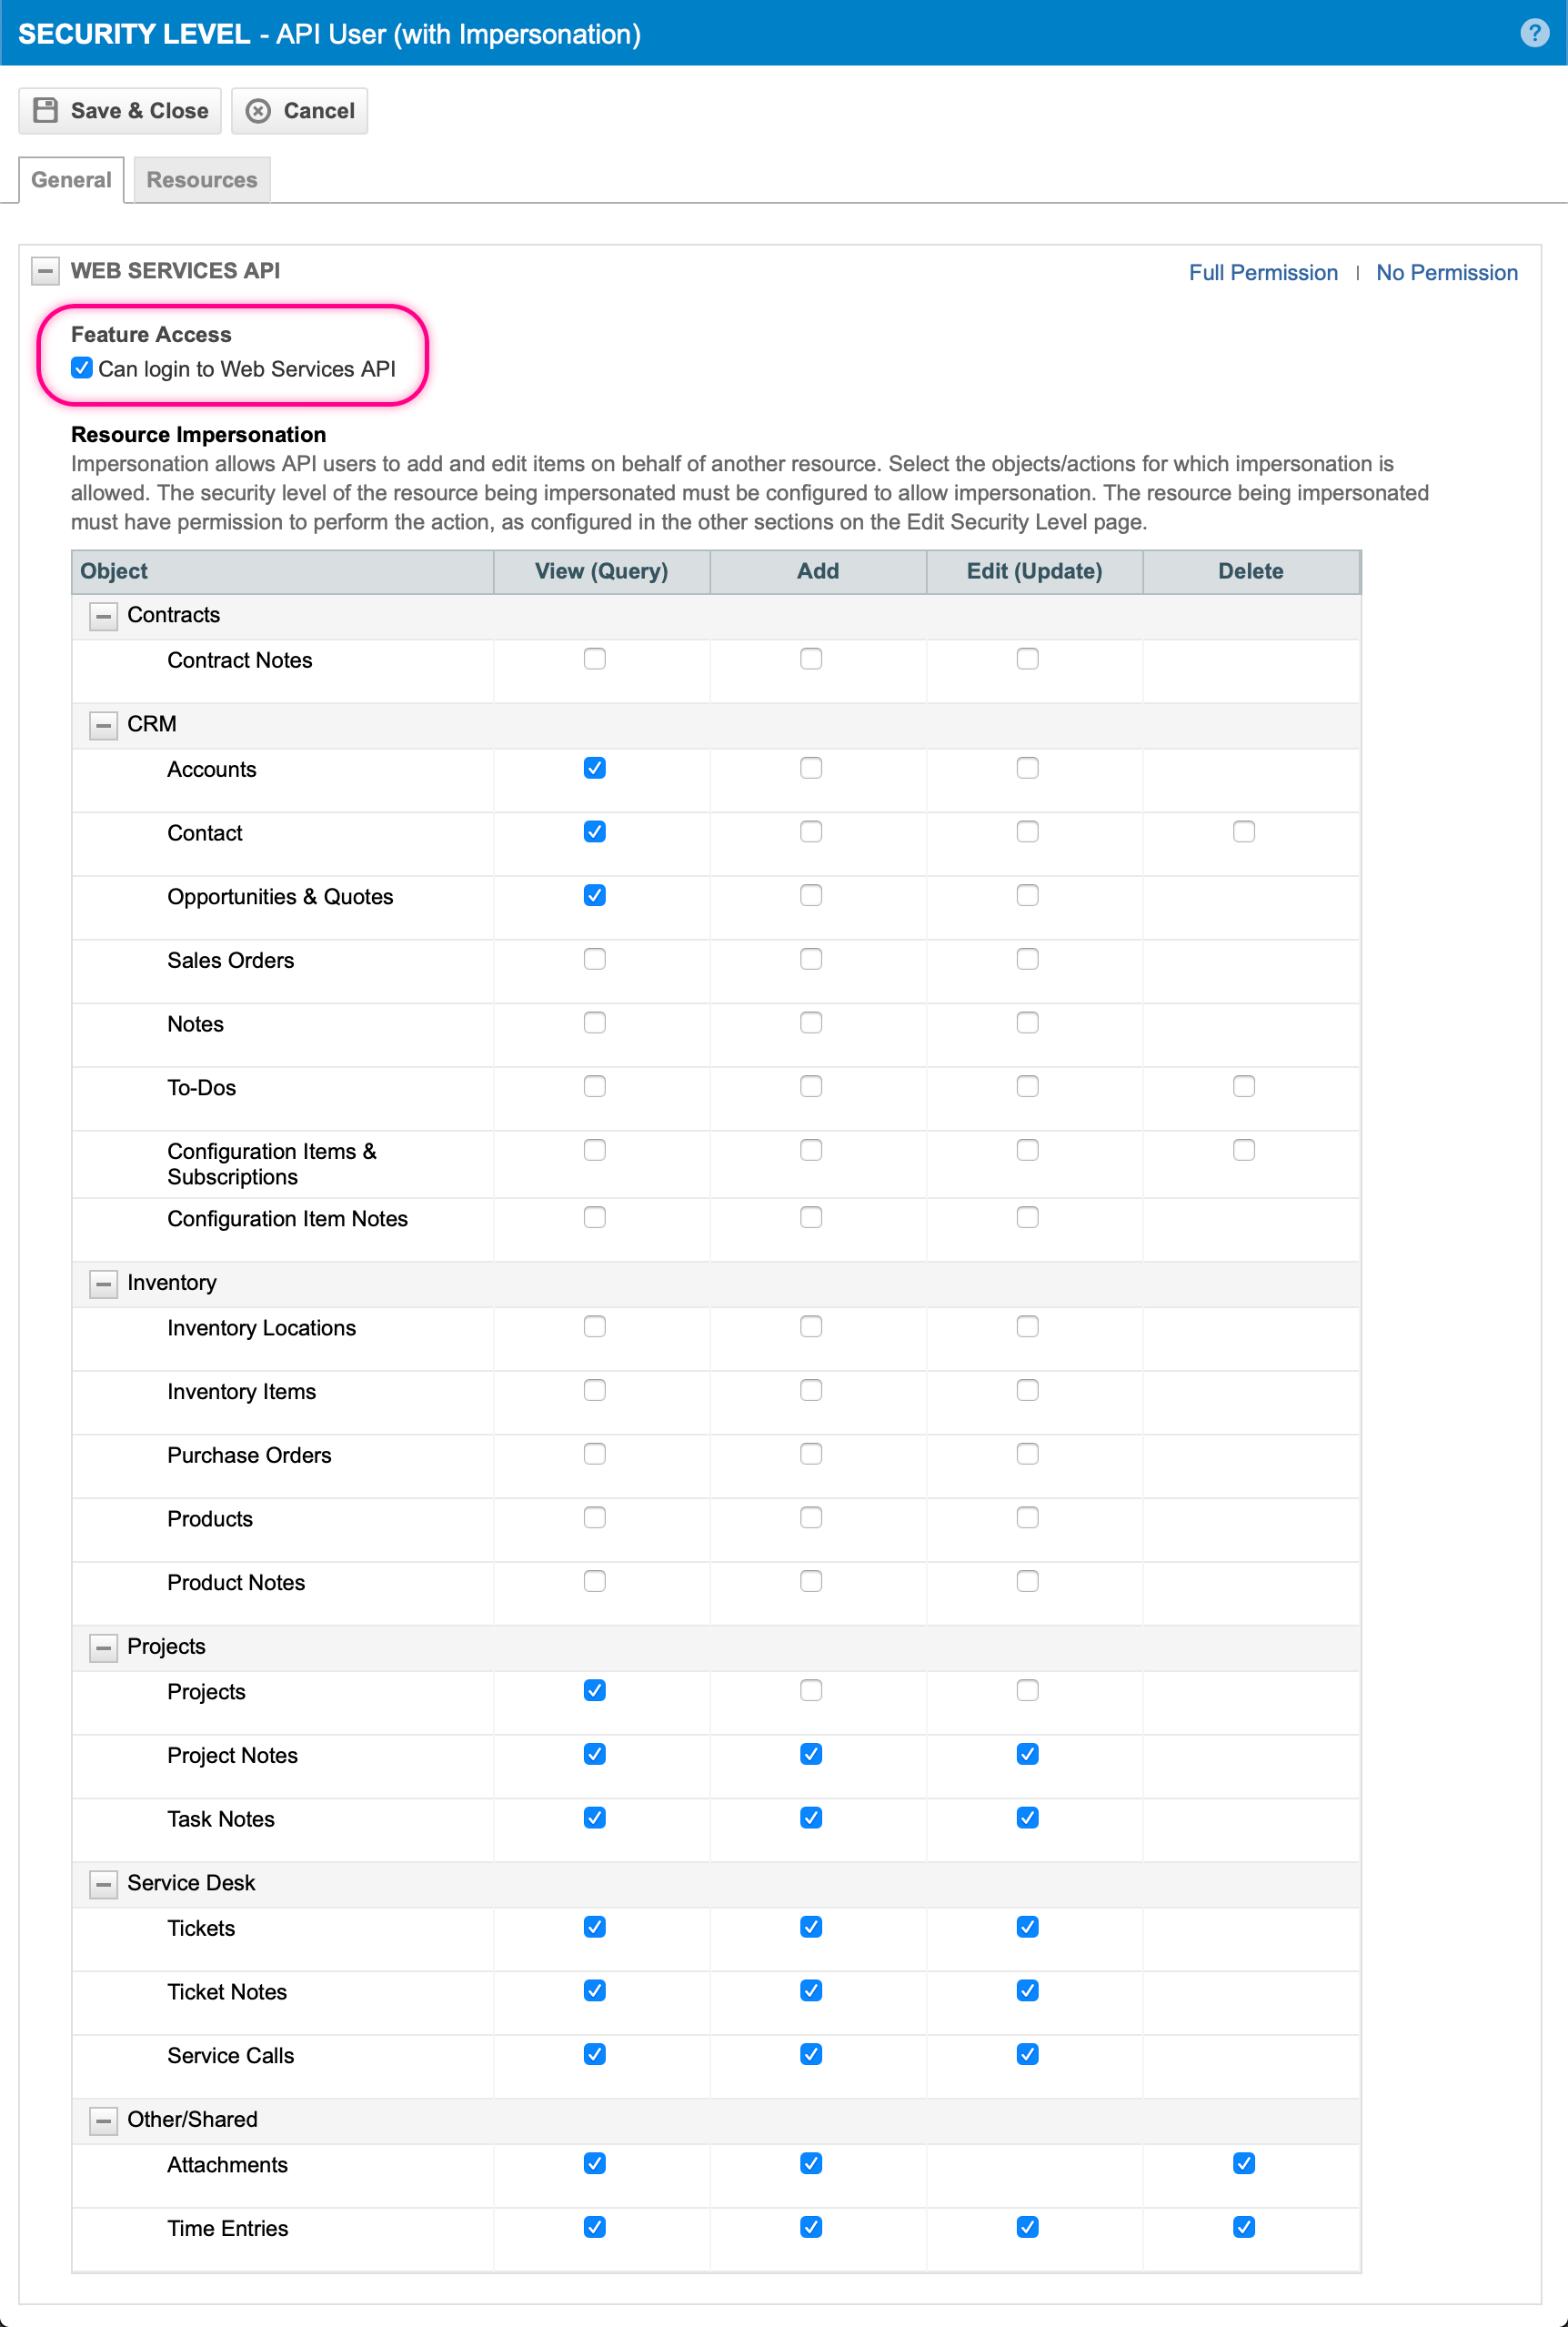
In the CRM section add the View permission to Accounts, Contacts, and Opportunities & Quotes
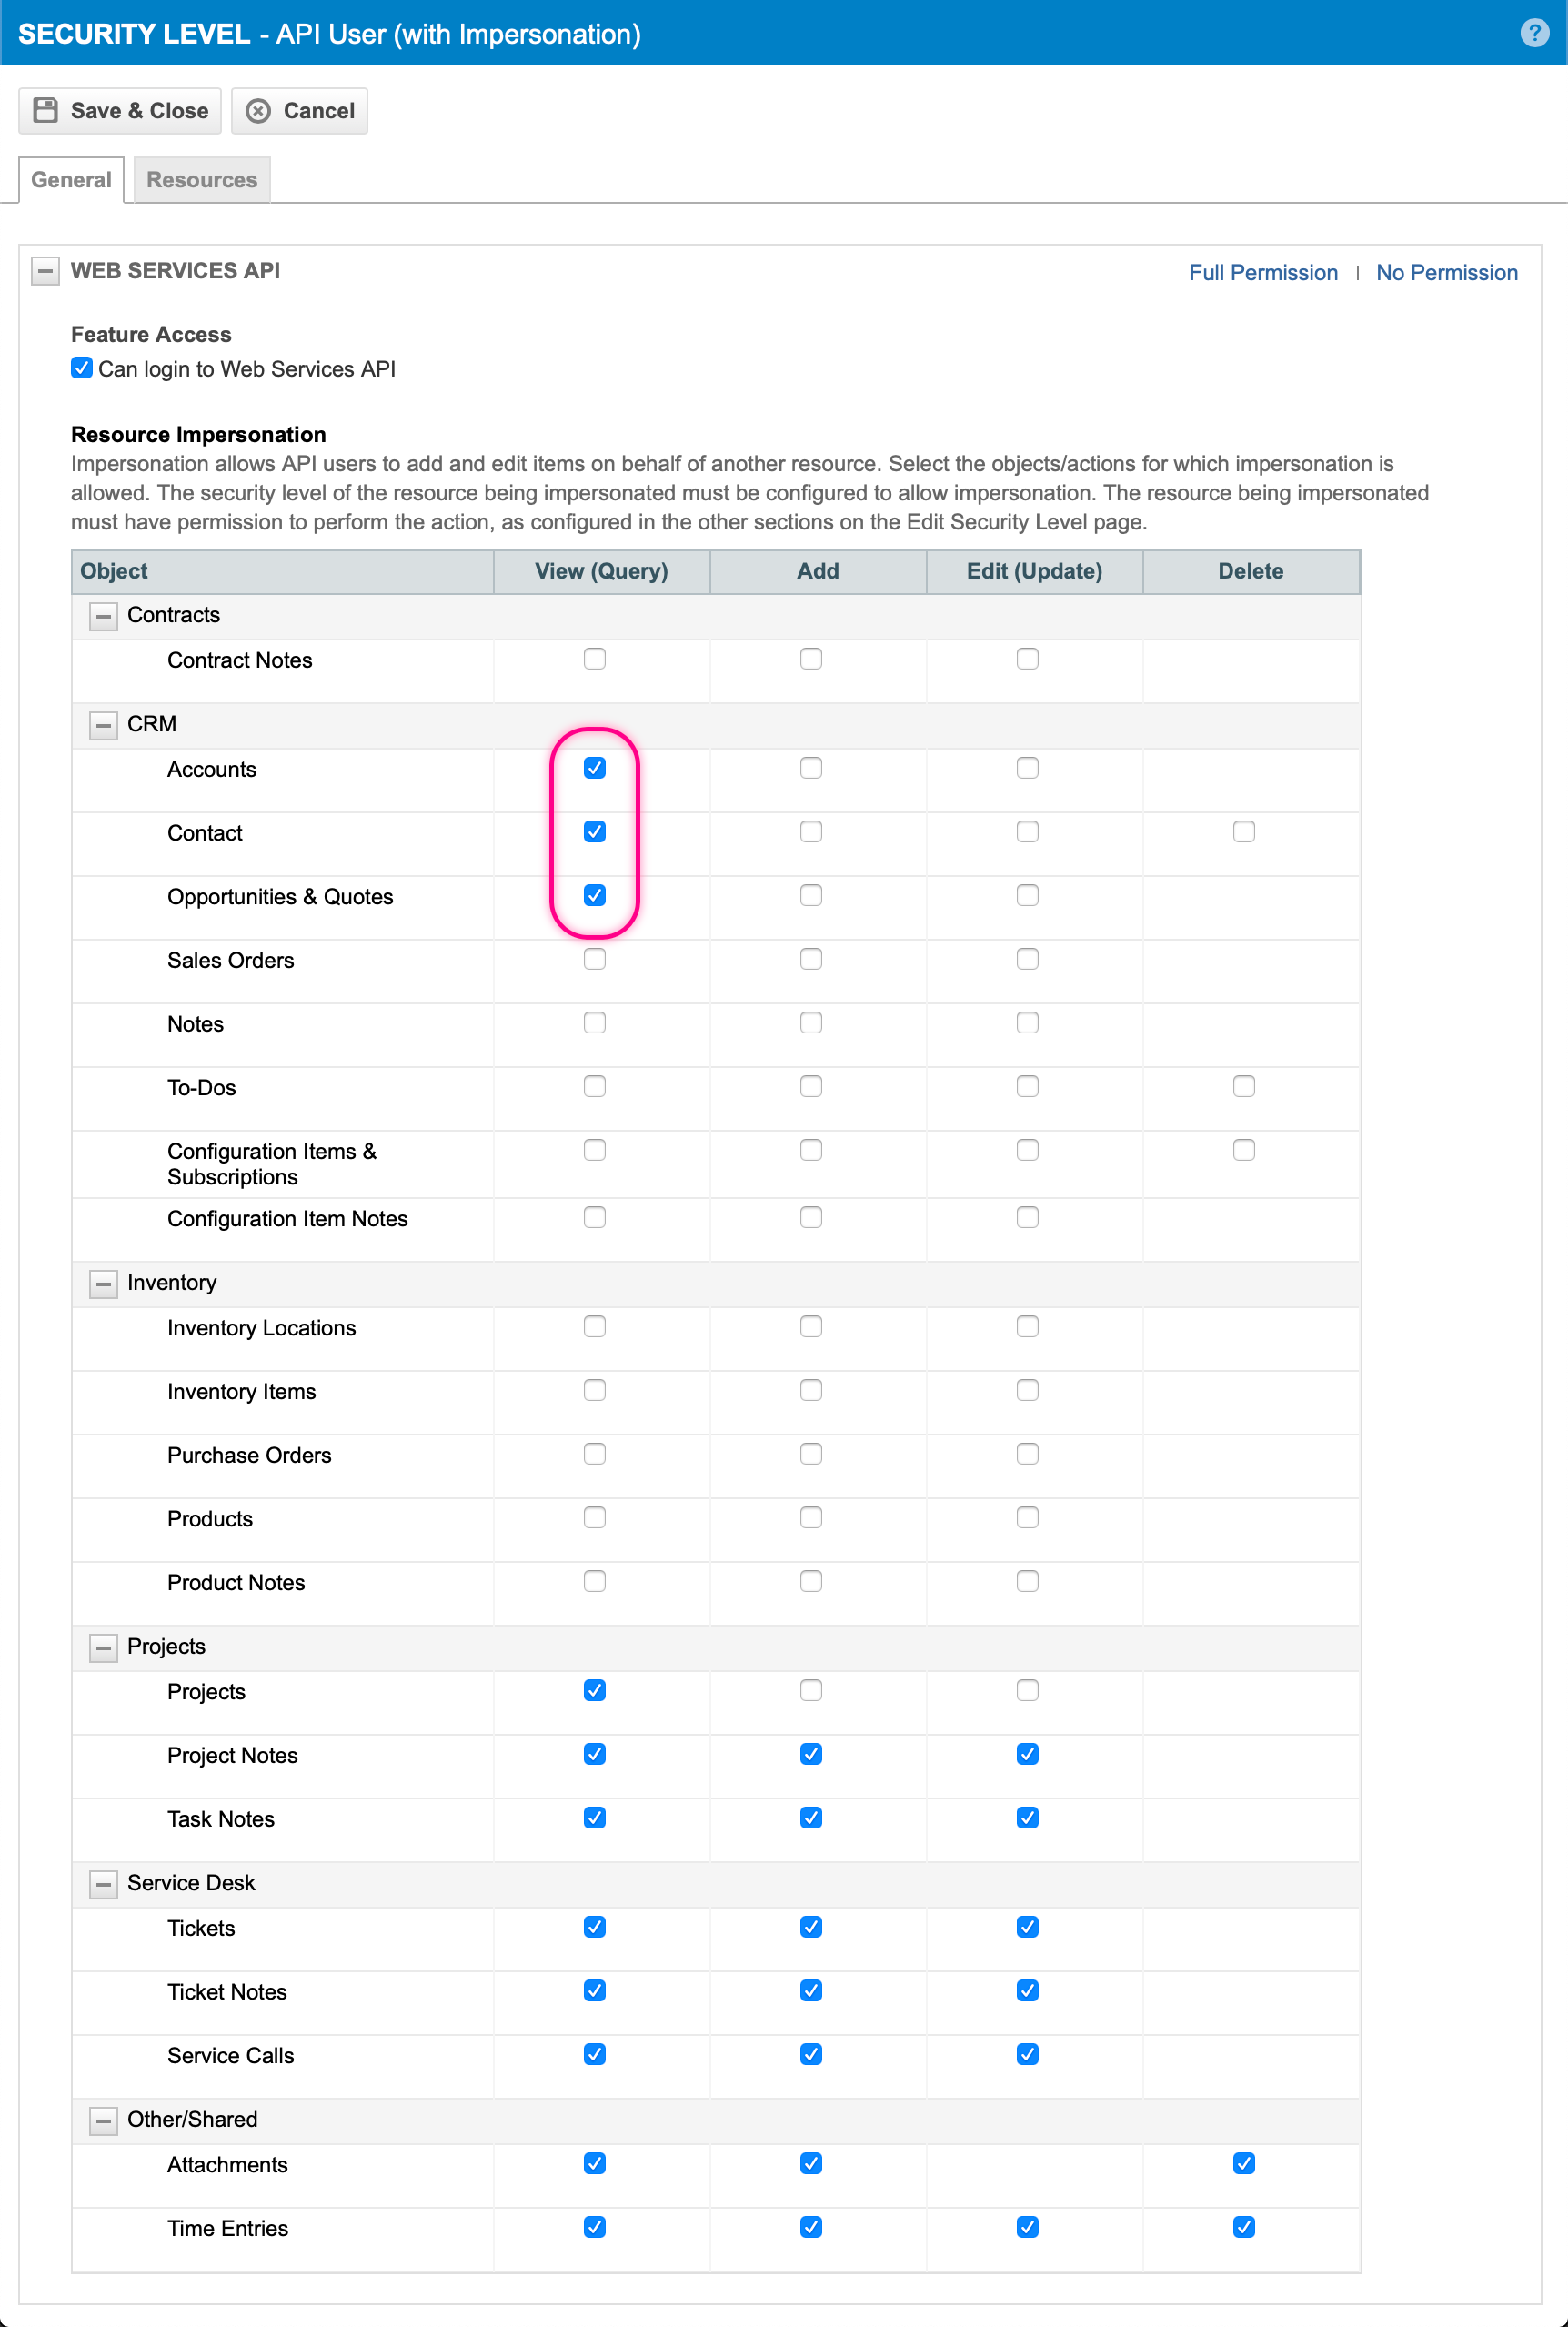
In the Projects section add the View permission to Projects, Project Notes, and Task Notes. Also add the Add and Edit permissions to Project Notes and Task Notes
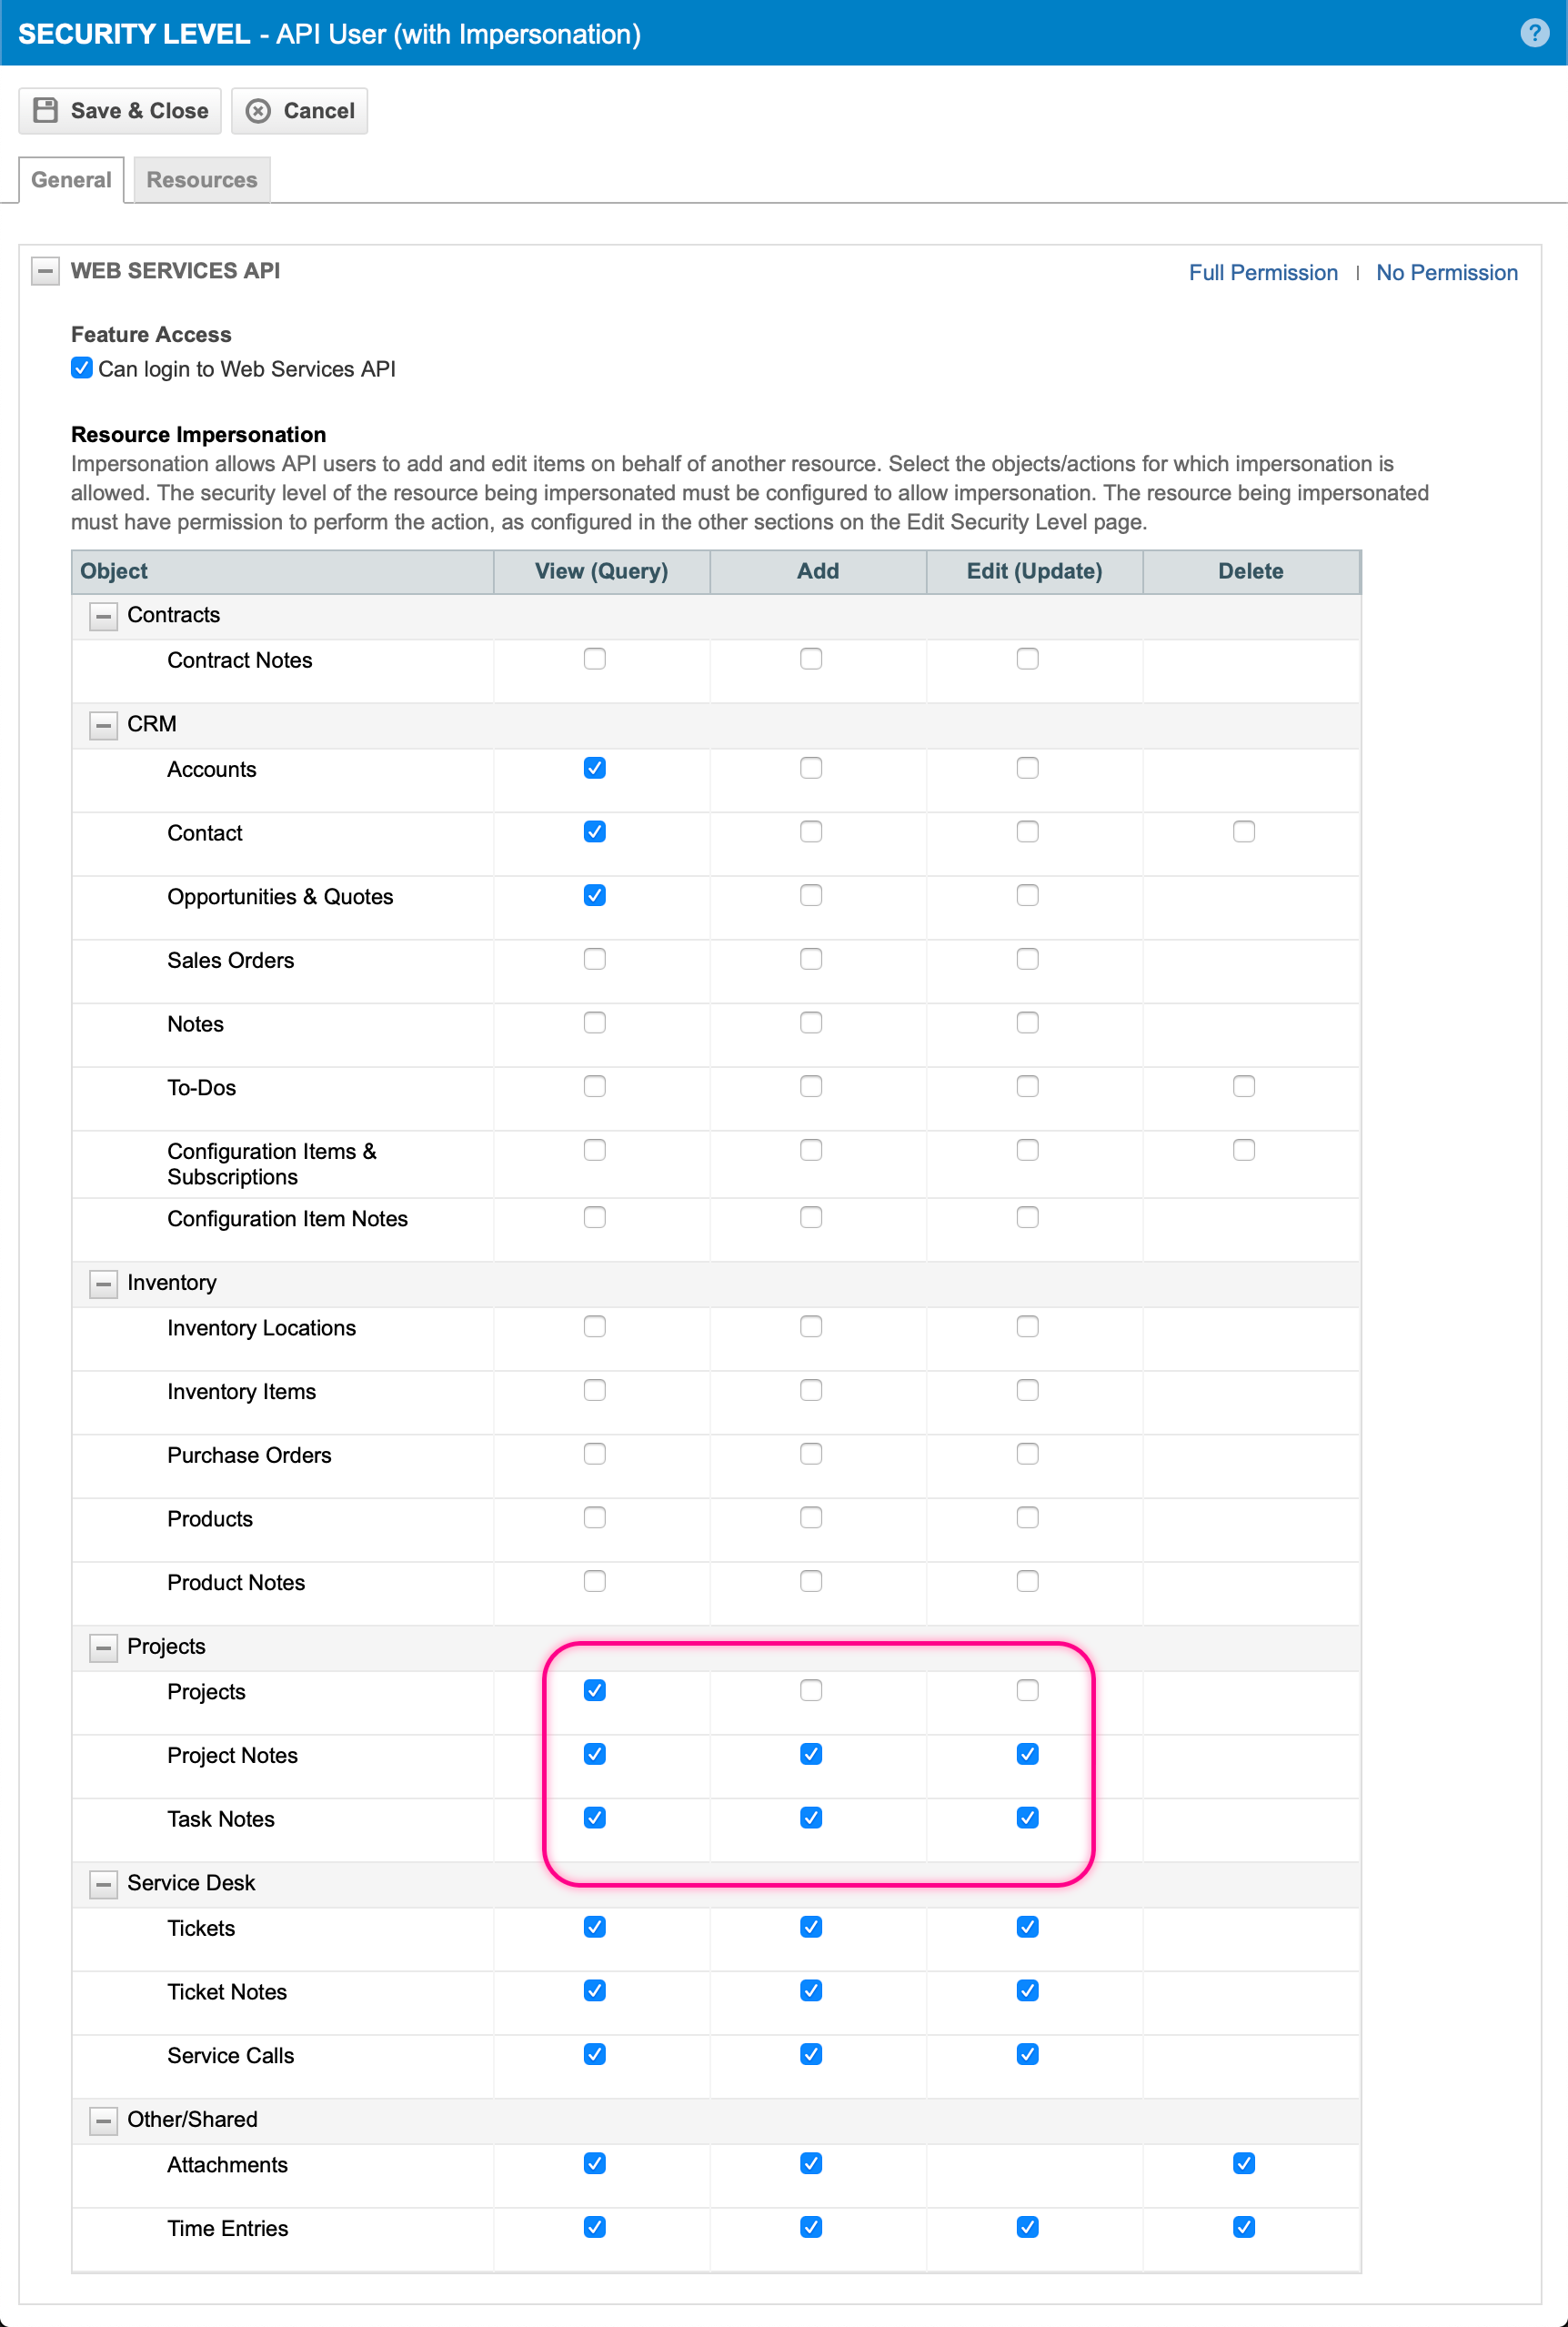
In the Service Desk section add All Available Permissions
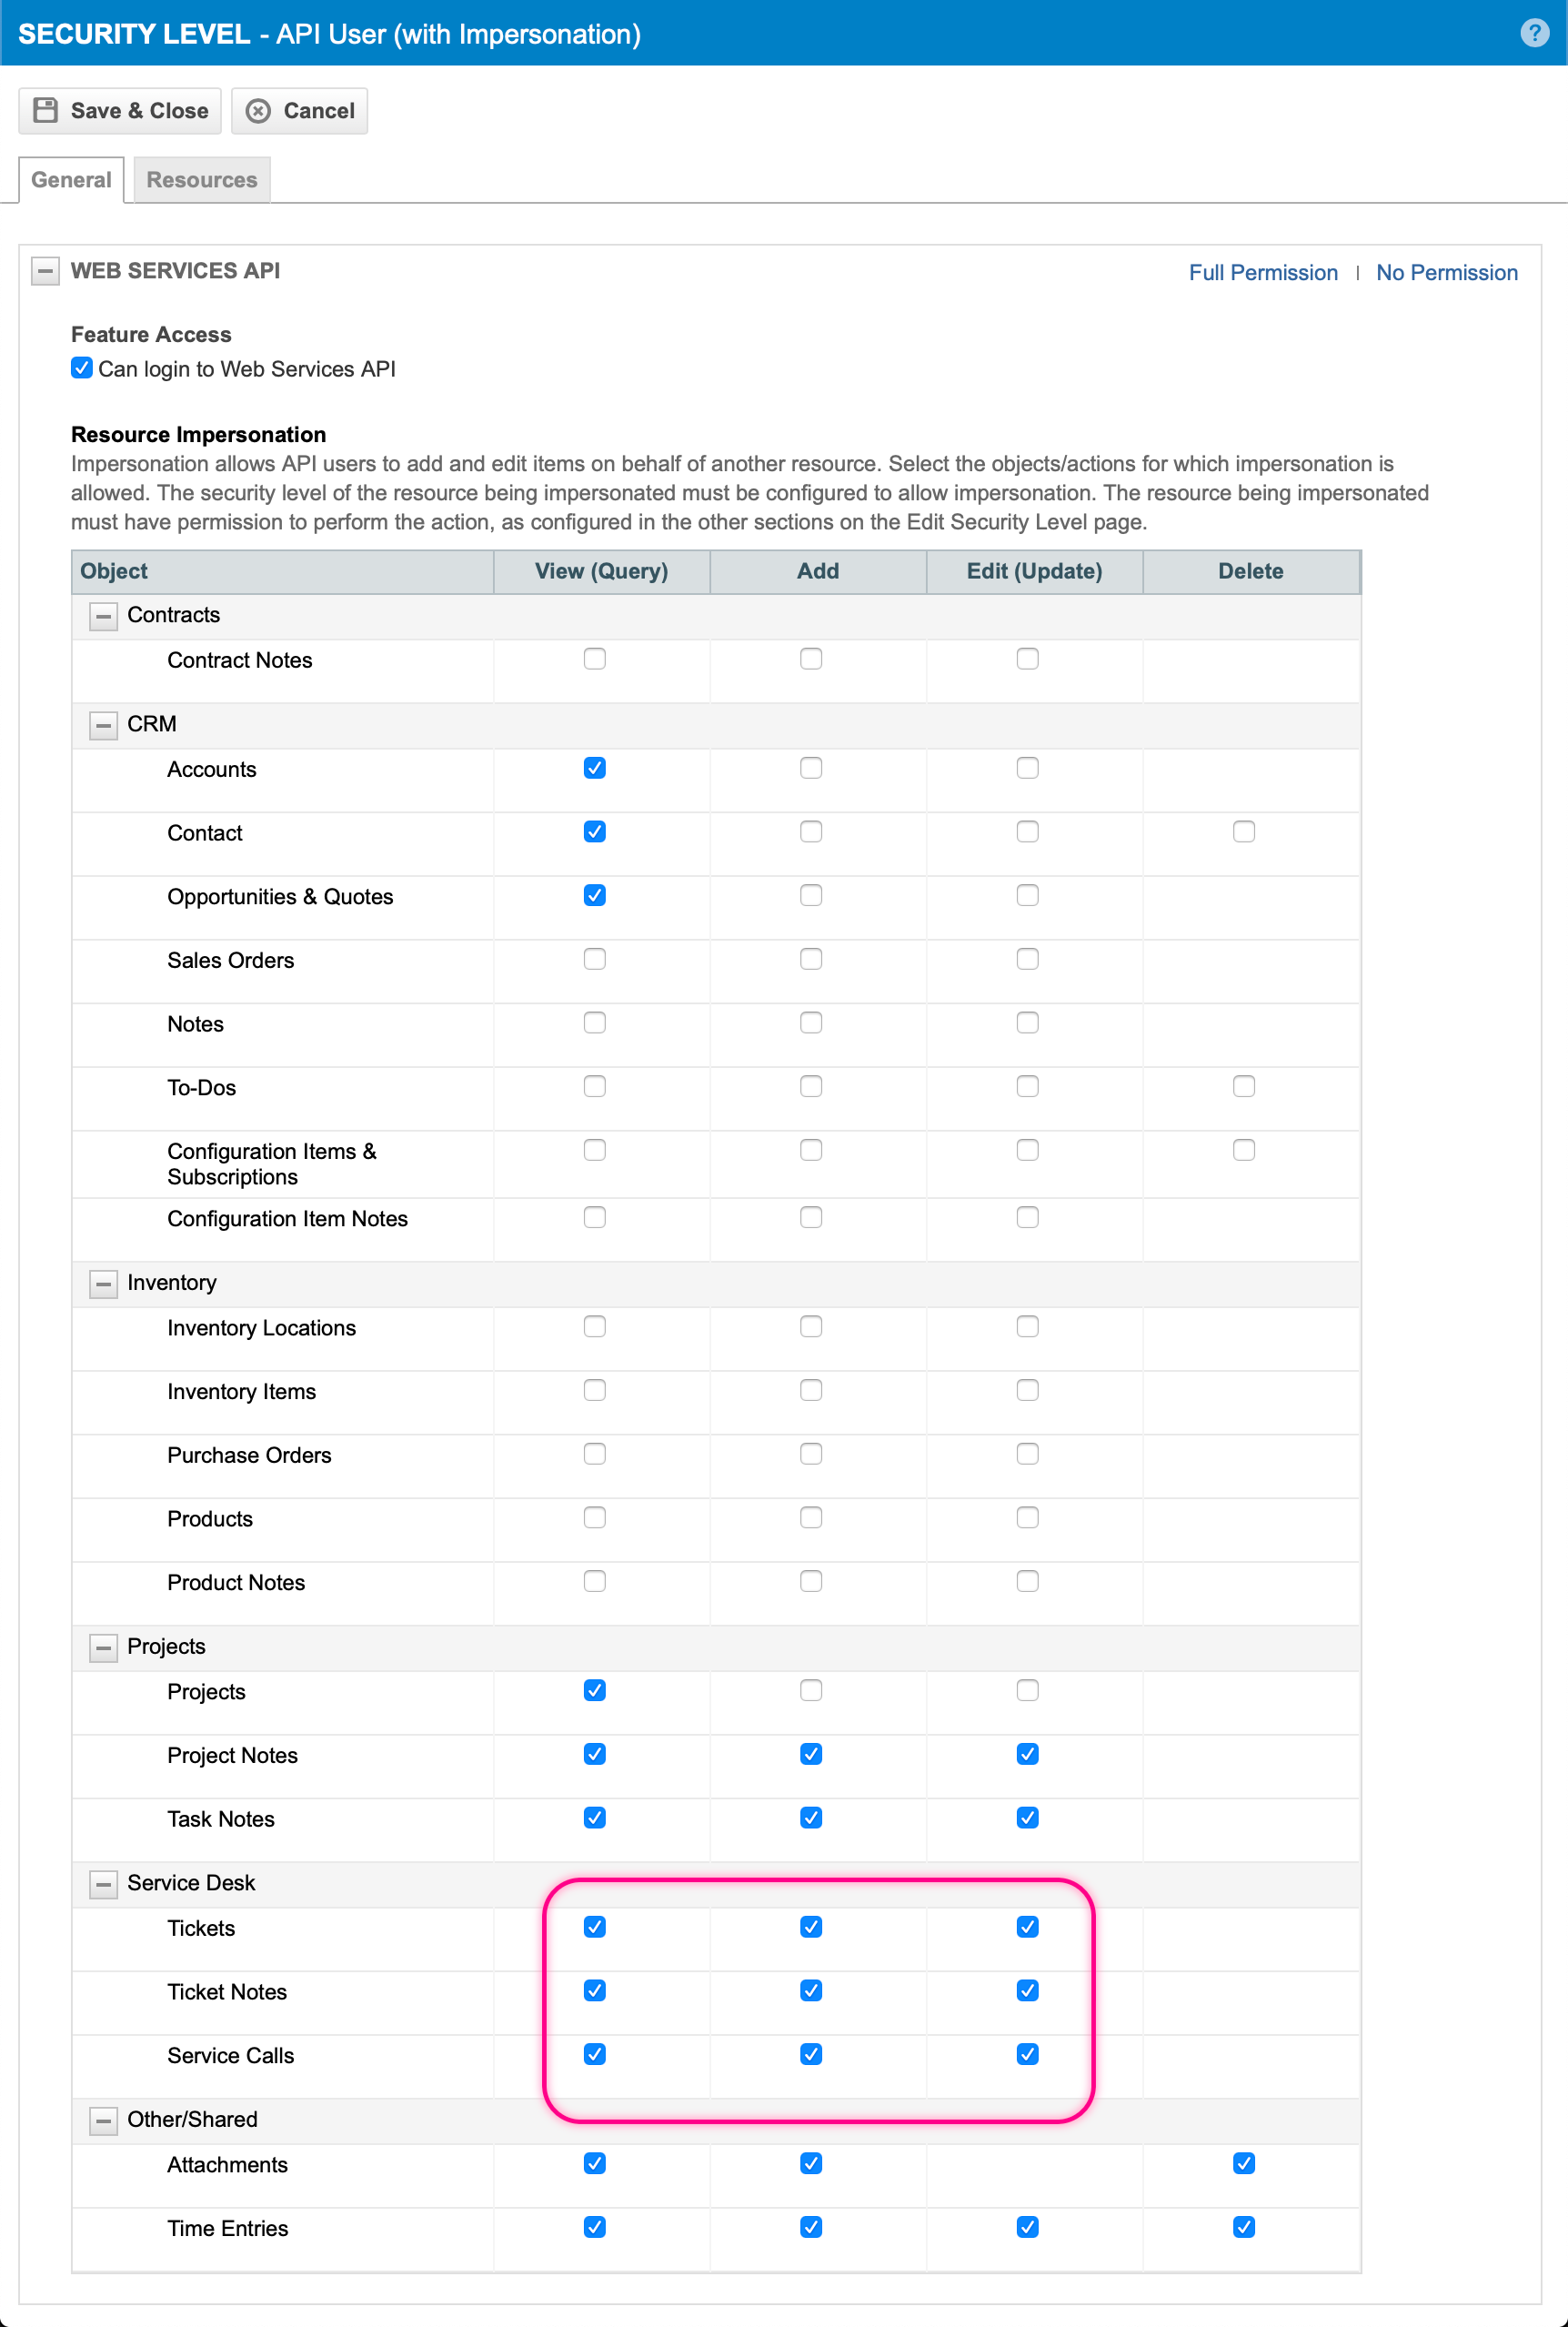
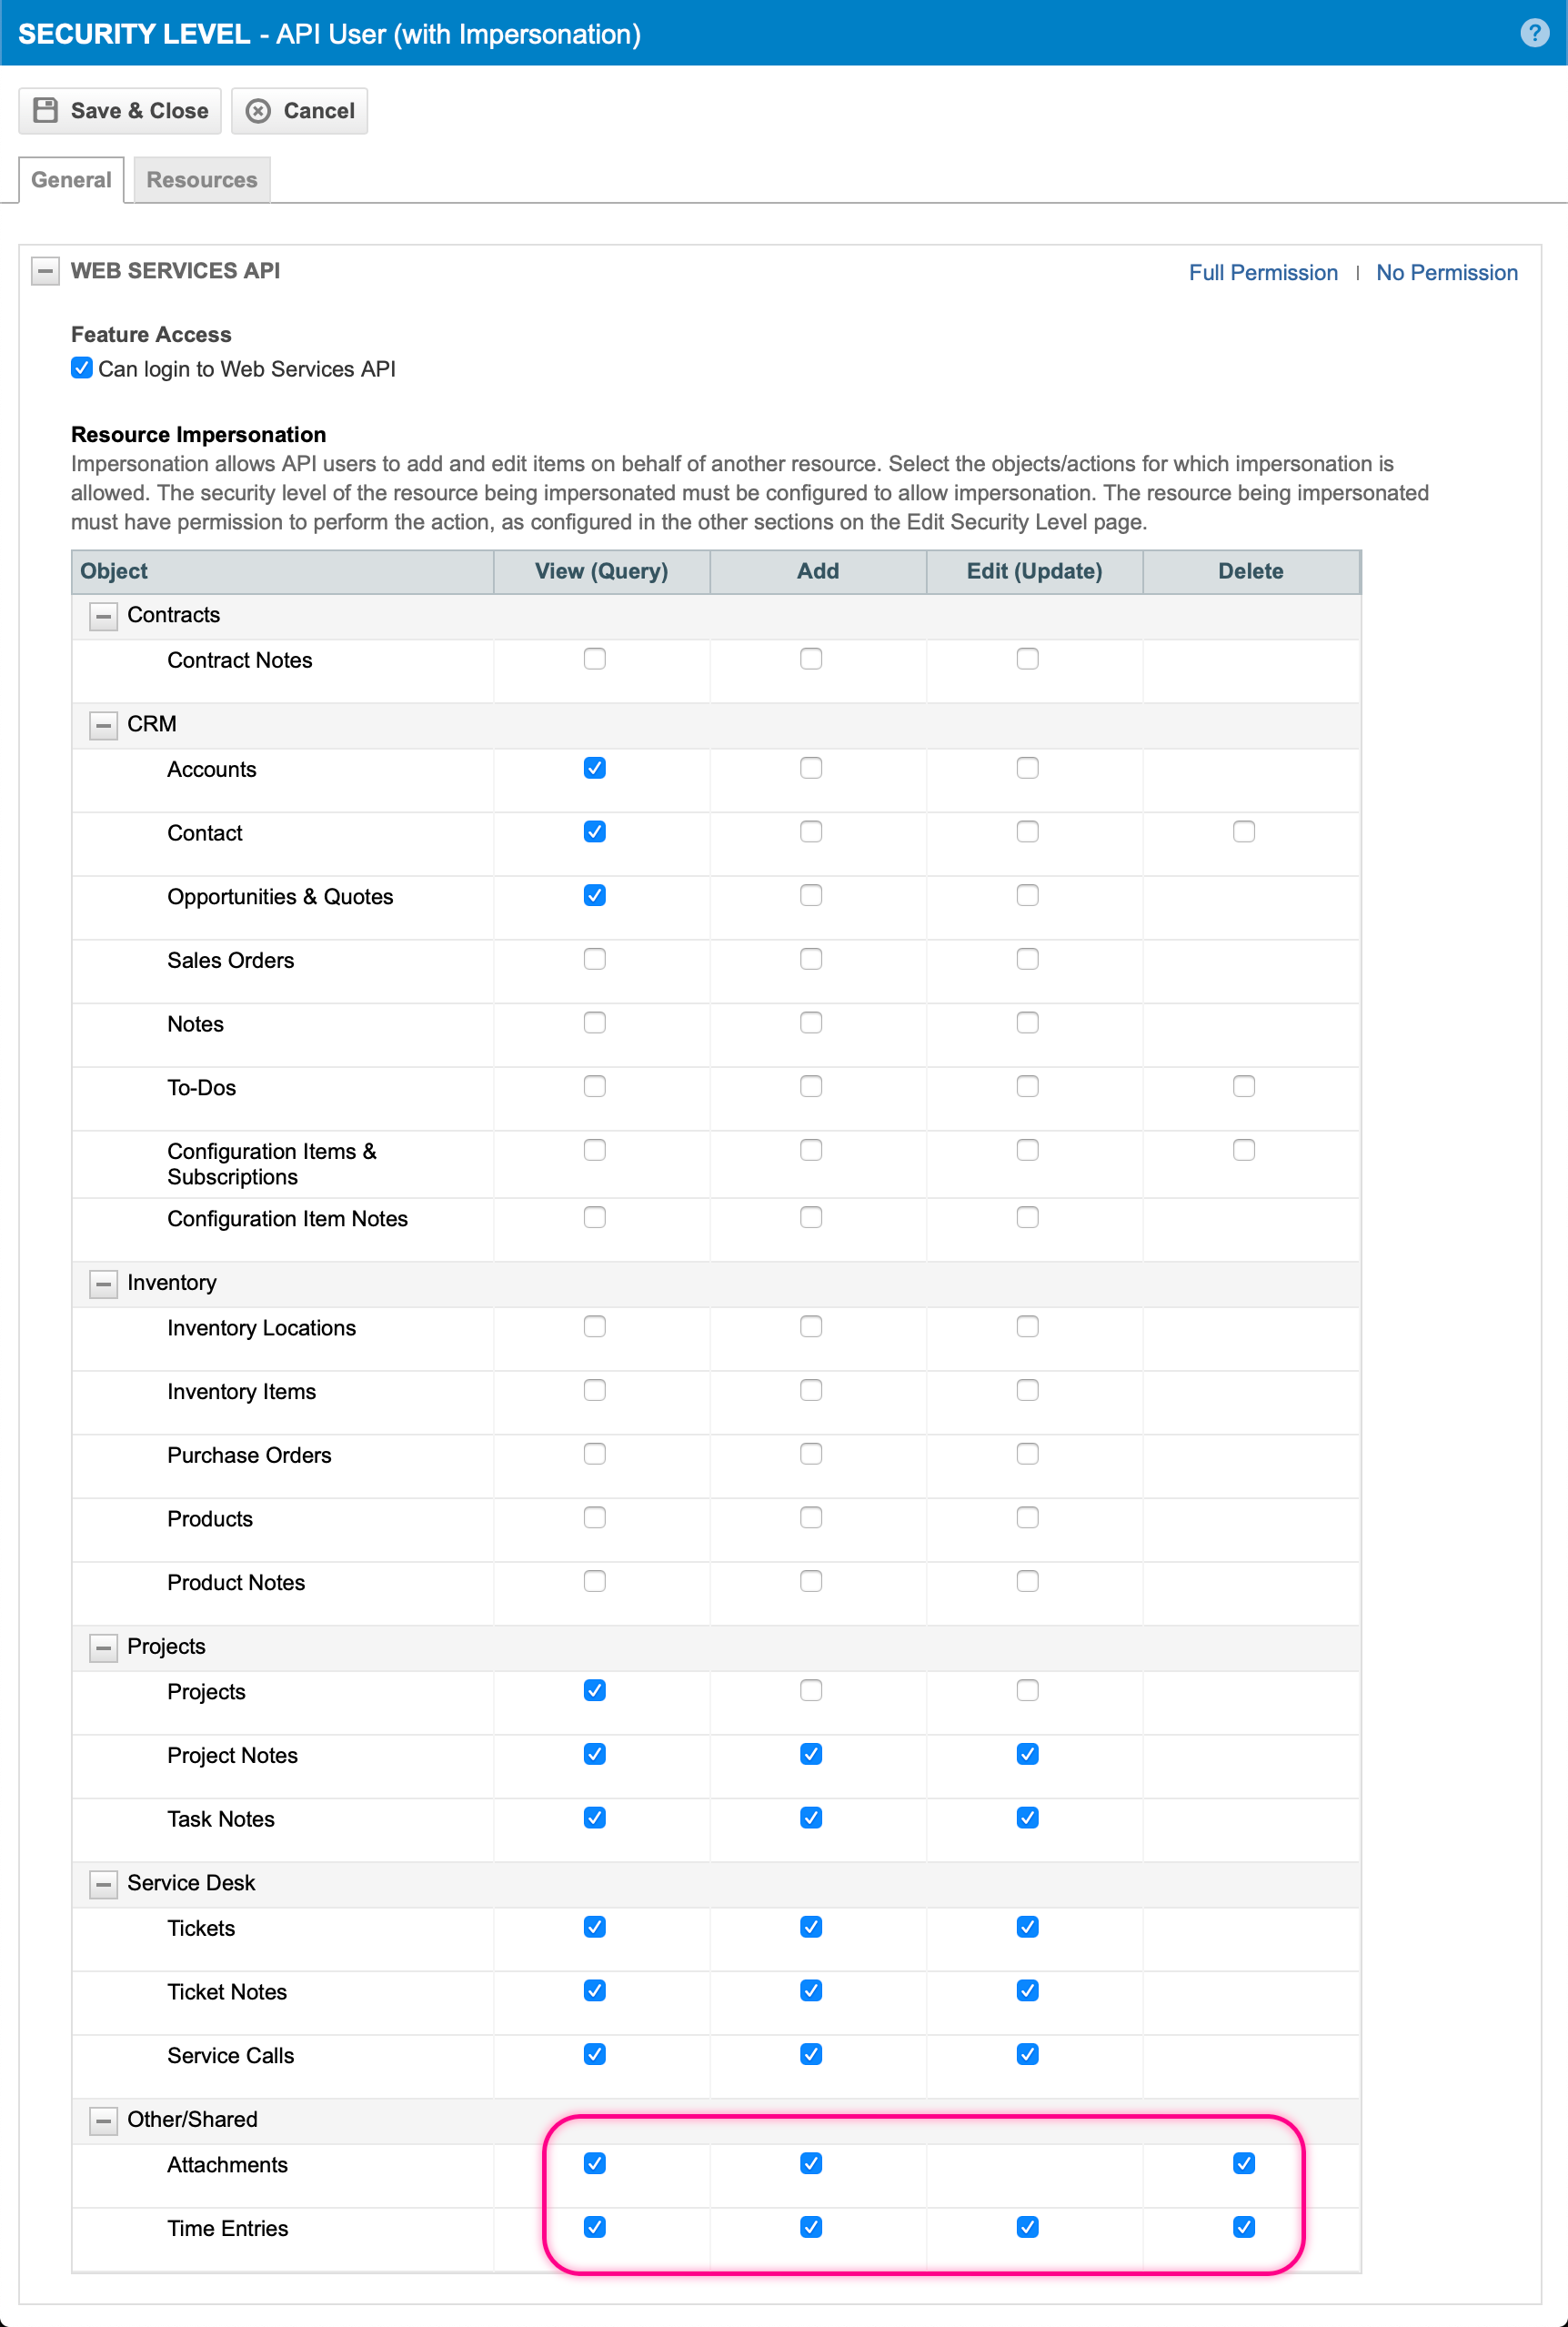
In the Other/Shared section add All Available Permissions
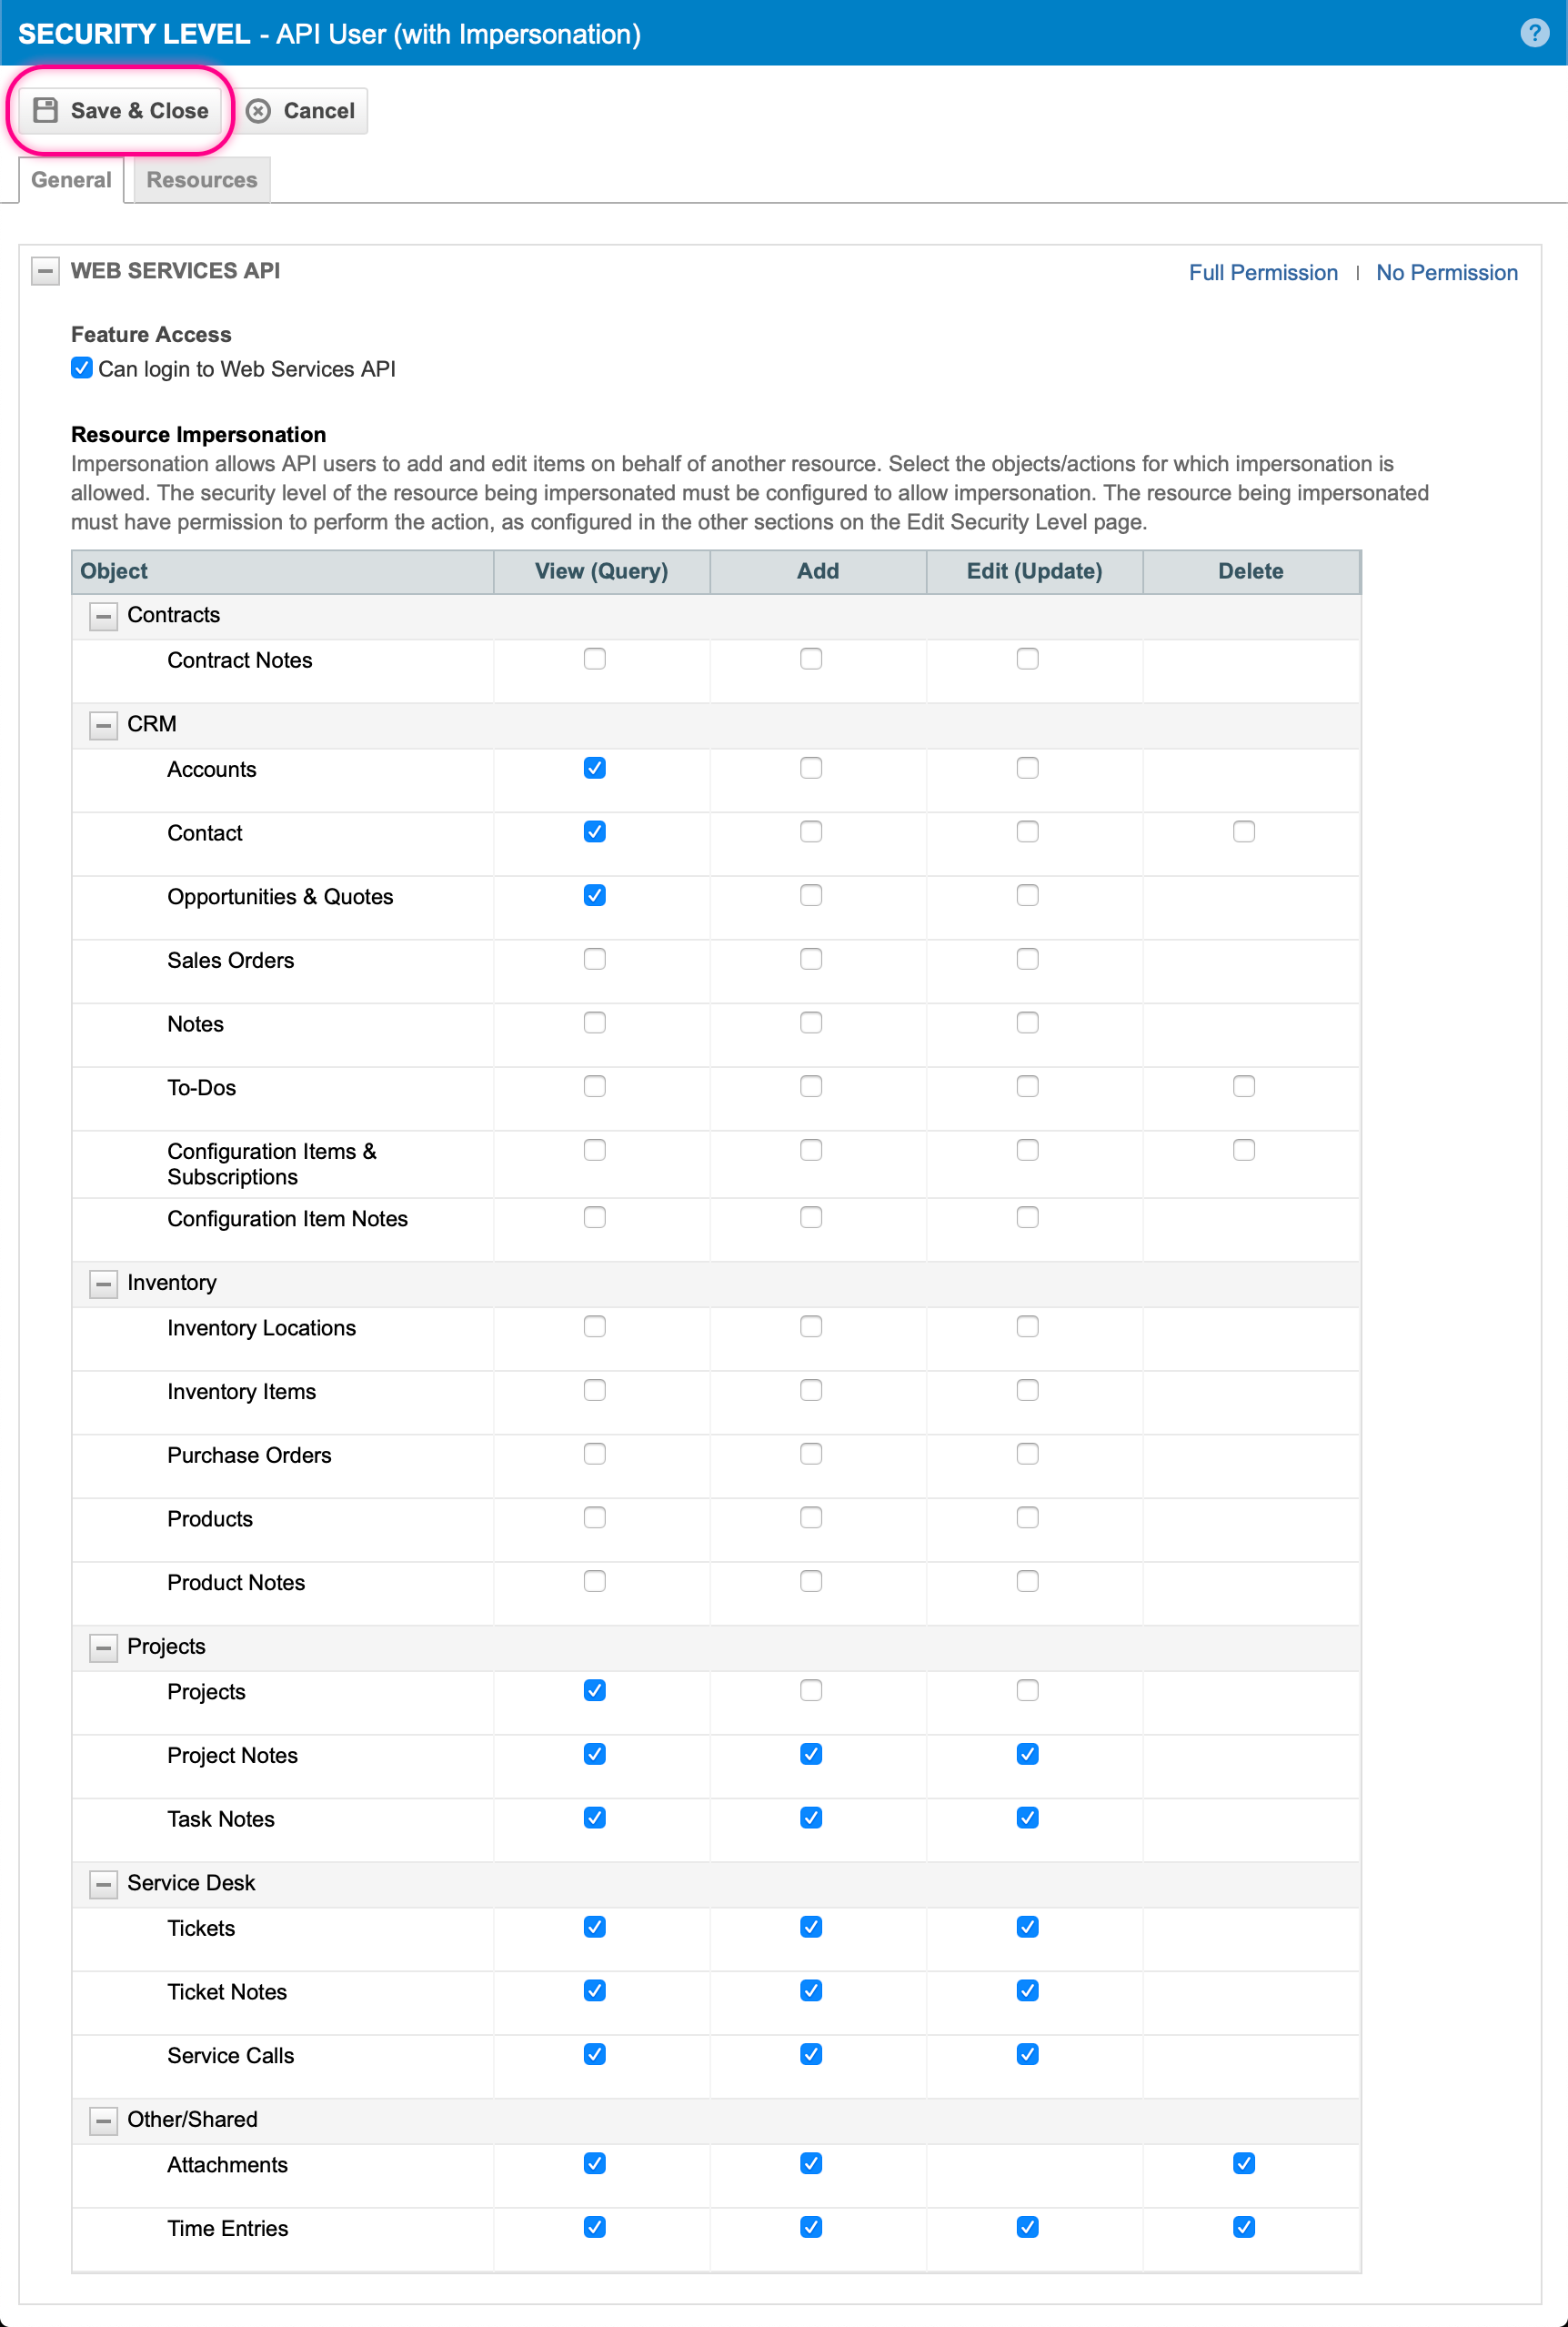
Save the customized Security Level
2. Allow Resource Impersonation for all Security Levels in use by Tasky users
Each Security Level that is used by any Tasky user must also specifically allow Resource Impersonation.
Return to the list of Security Levels (which should still be visible). This walkthrough is editing the standard "Service Desk User" Security Level for demonstration purposes.
Locate the Security Level to be modified
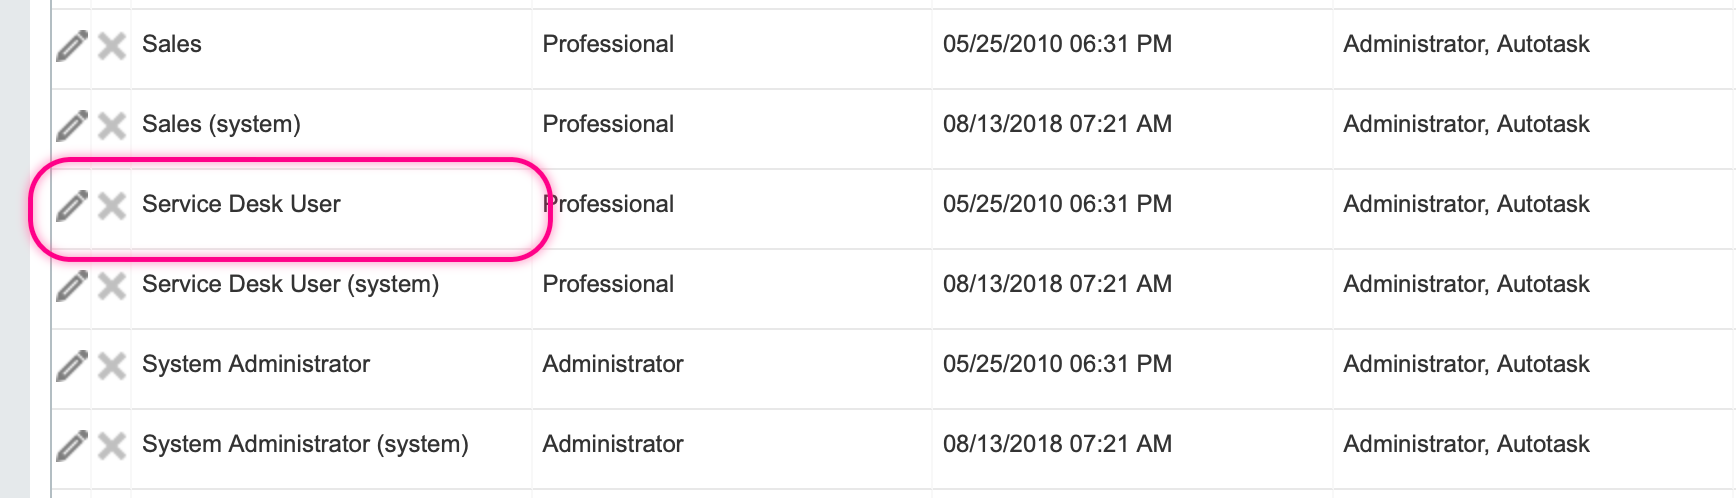
Click edit for the Security Level to be modified
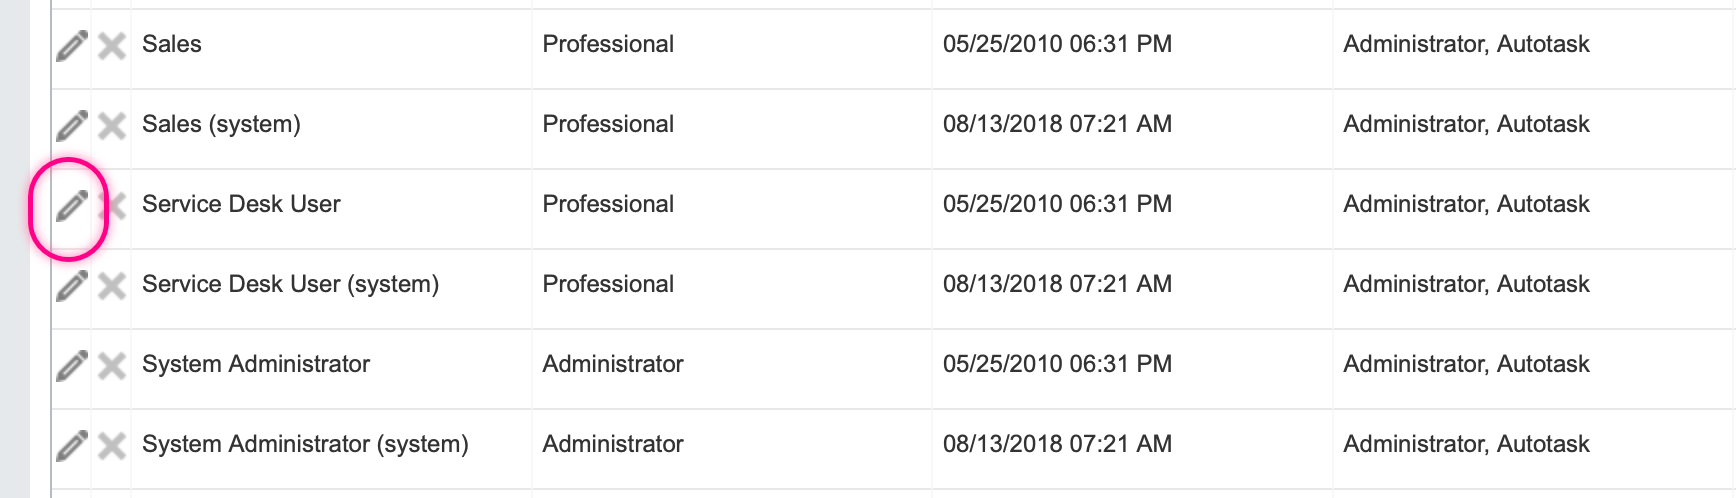
A Security Level editor will open for the selected Security Level
Expand the "Web Services API" group
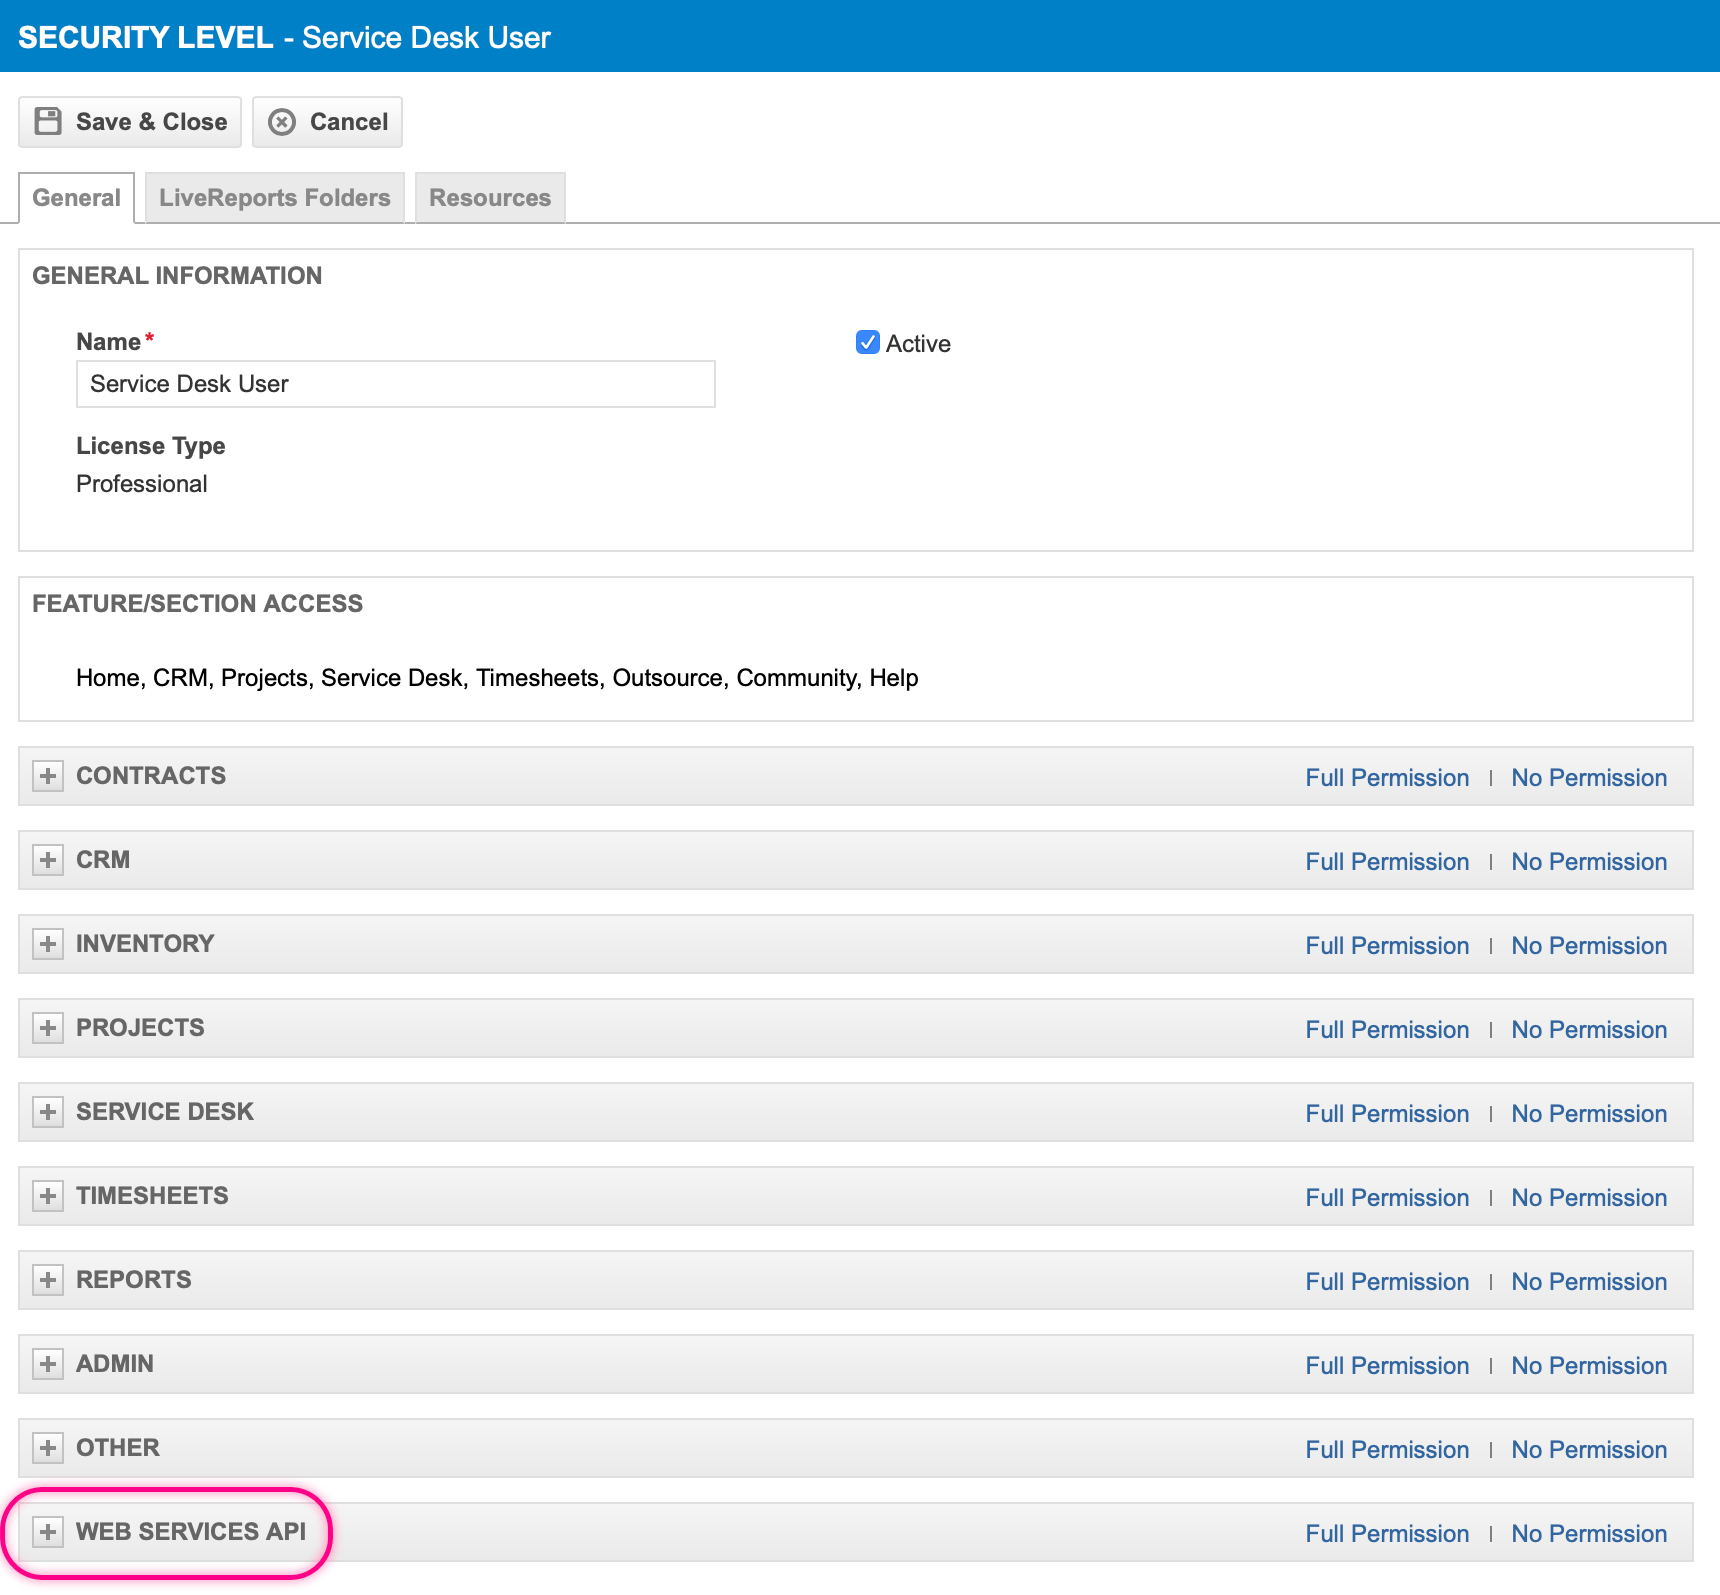
Uncheck the "Can login to Web Services API" option
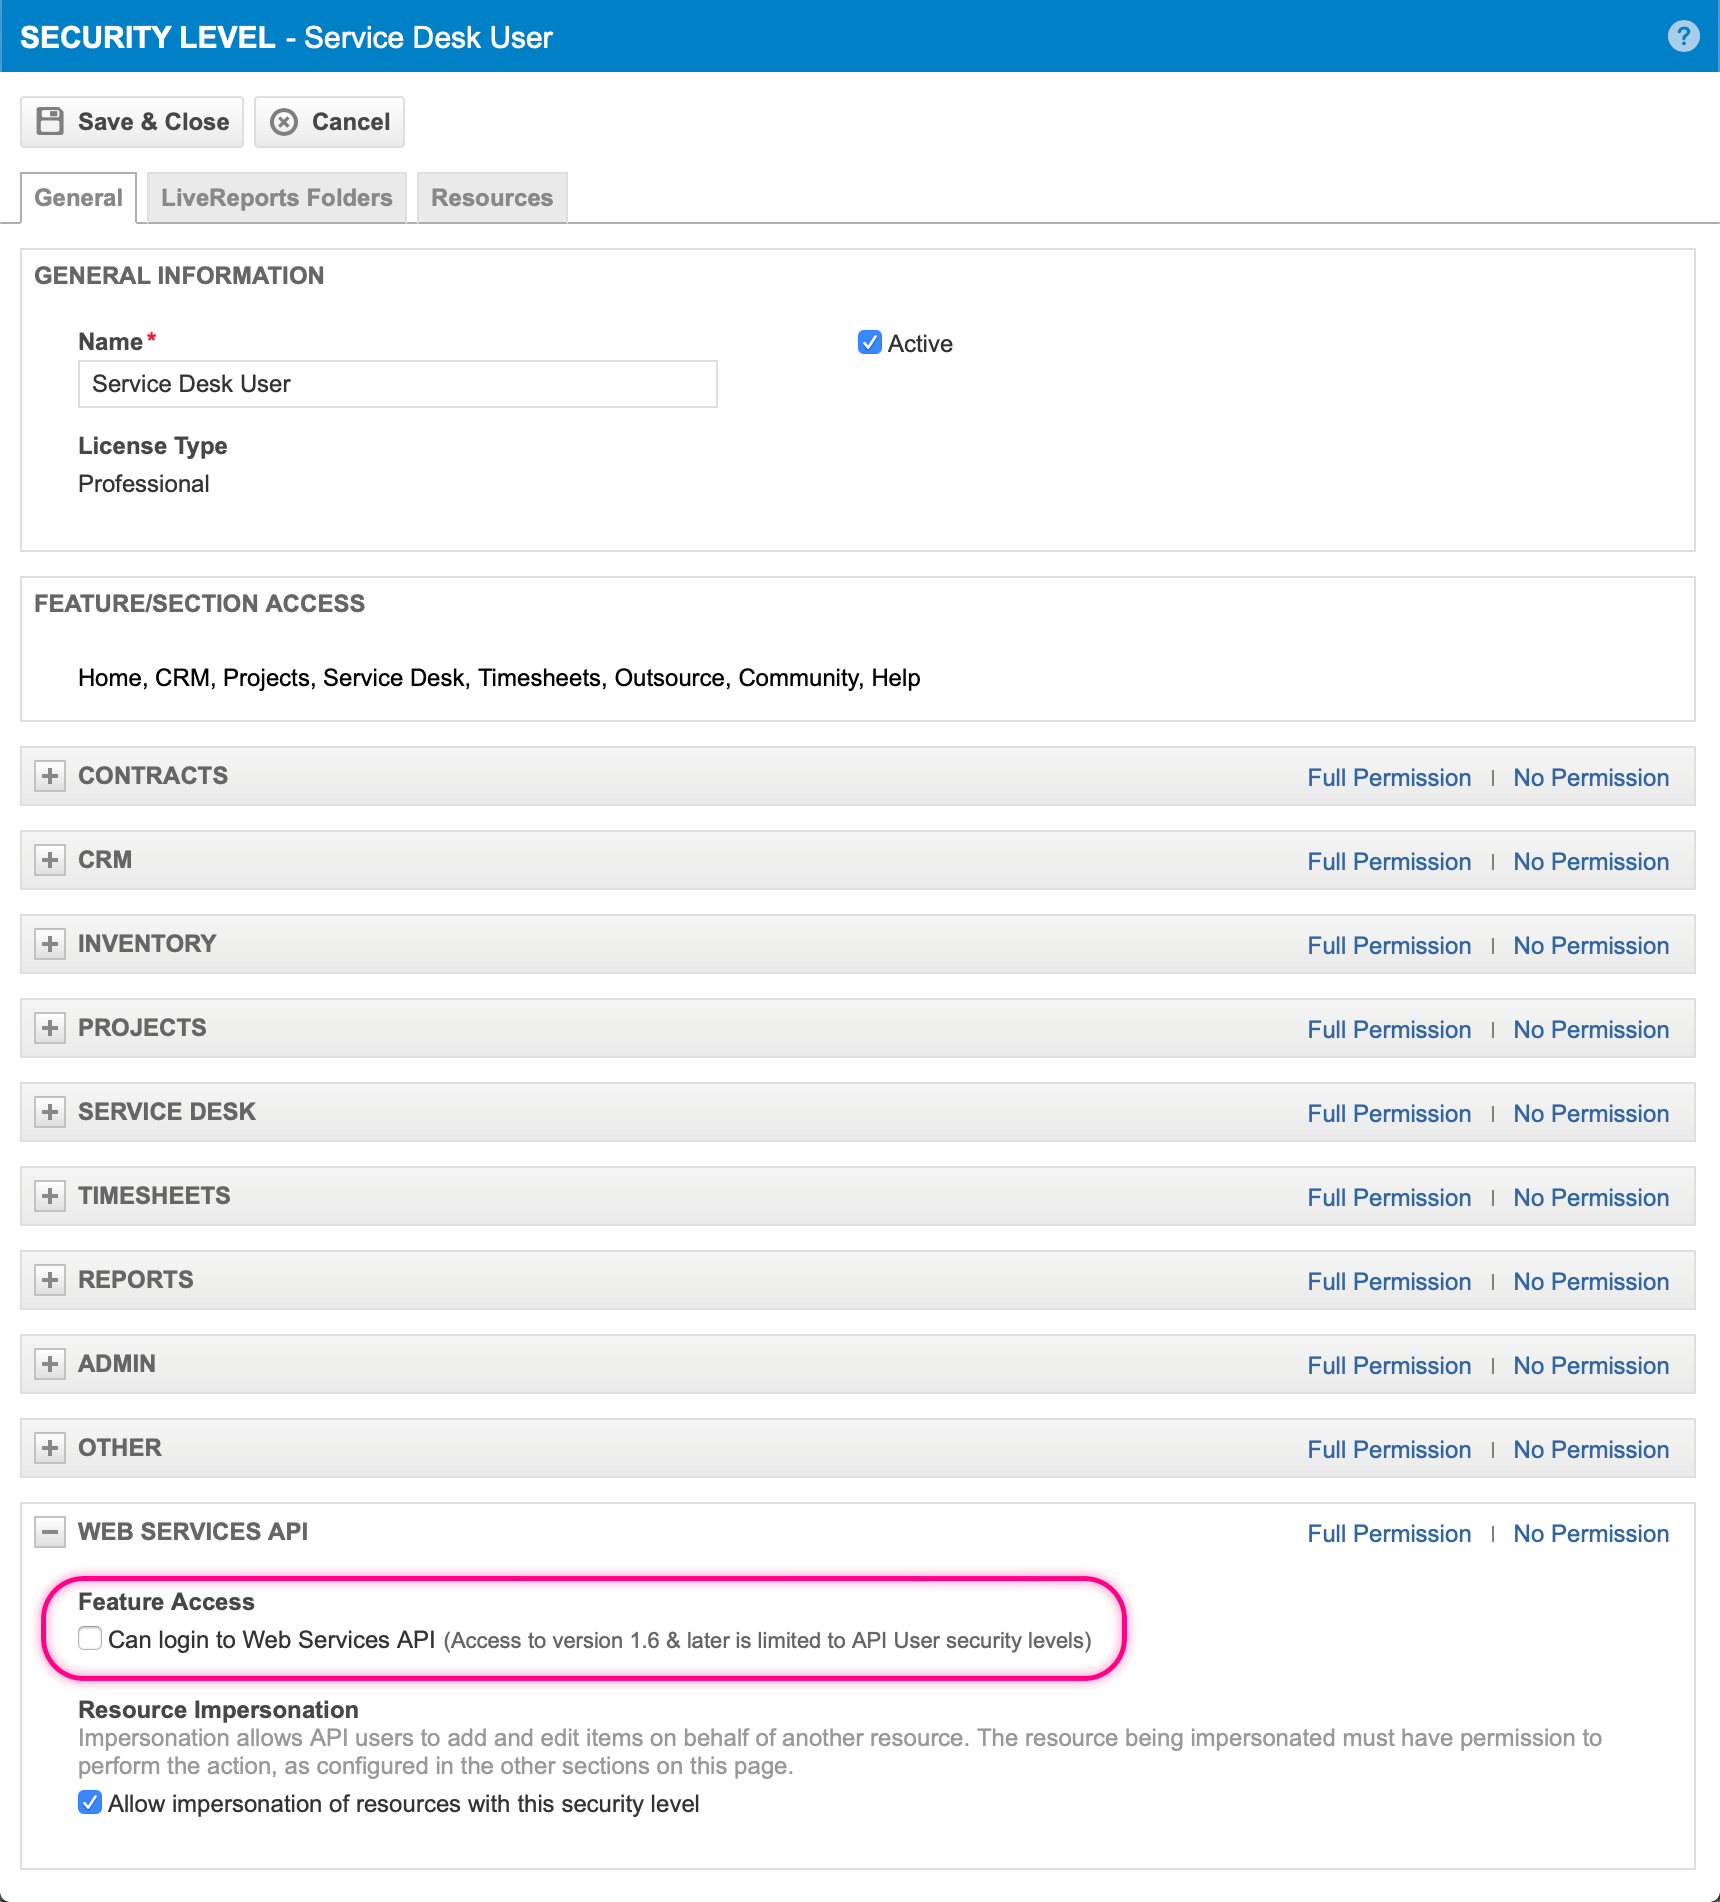
Check the "Resource Impersonation" option
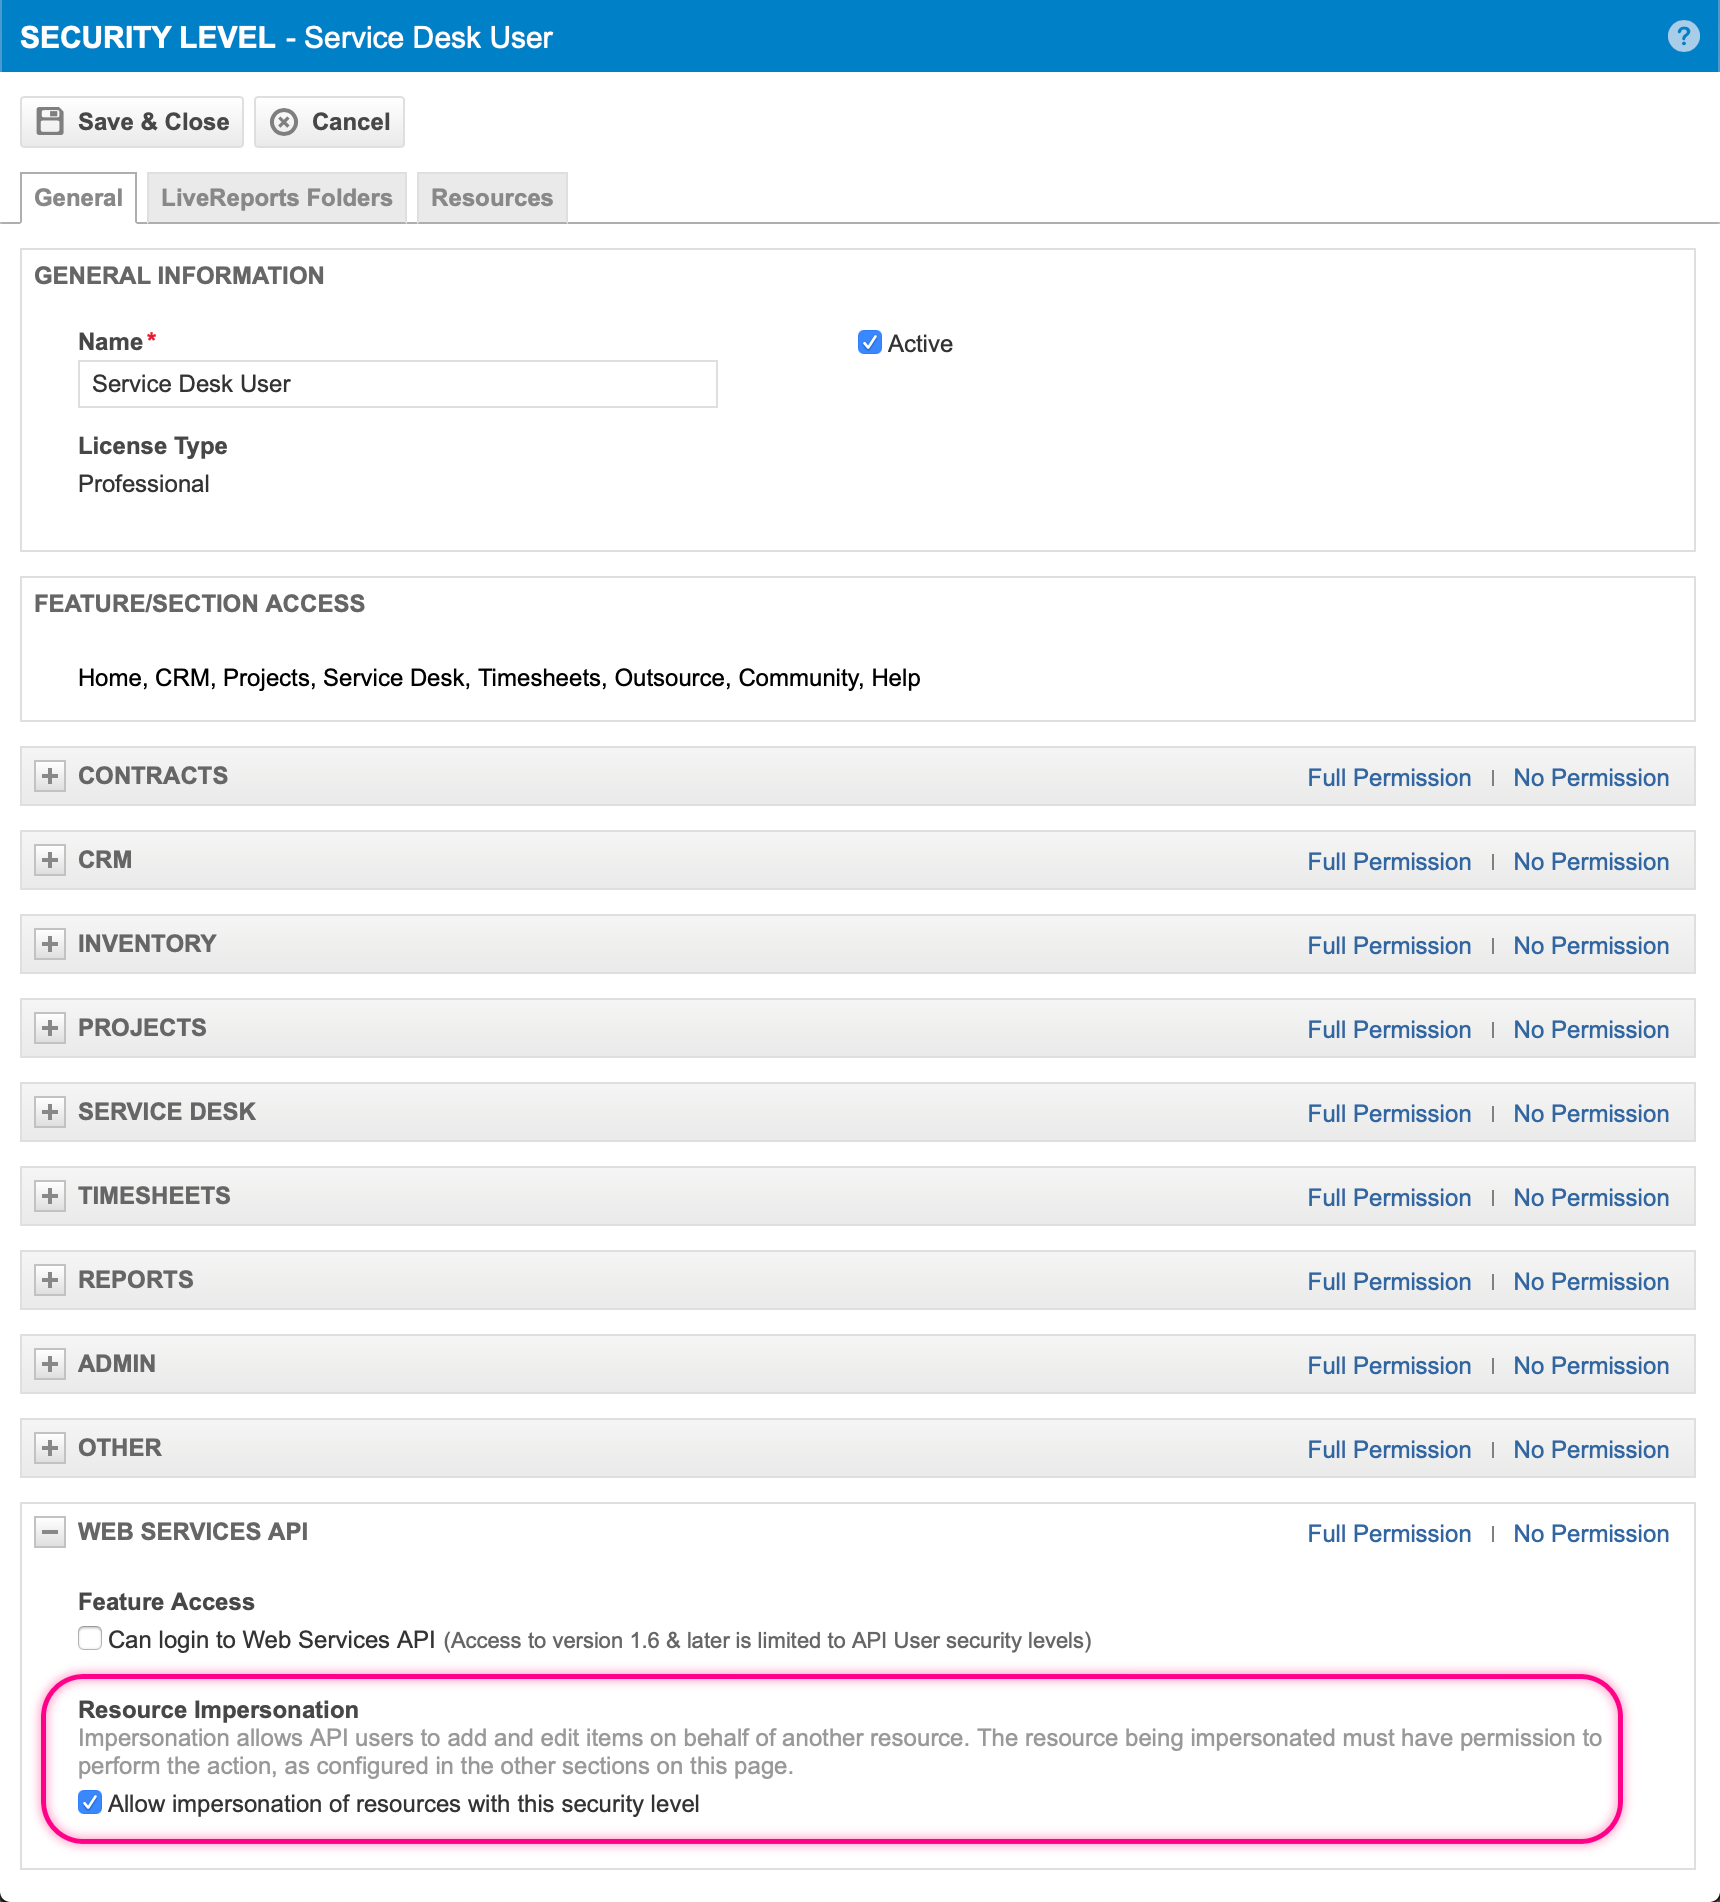
Save the modified Security Level
Note: This walkthrough only modifies the available "Service Desk User" Security Level but this step must be repeated for all Security Levels in use by Tasky users.
3. Add, or update, an "API User" assigned to the Tasky integration
To utilize the Security Level created in Step 1 an "API User" must be assigned to it. This can be done by creating a new "API User" or updating an existing "API User" if one is already created and assigned to the Tasky integration.
This walkthrough shows the process of creating a new "API User".
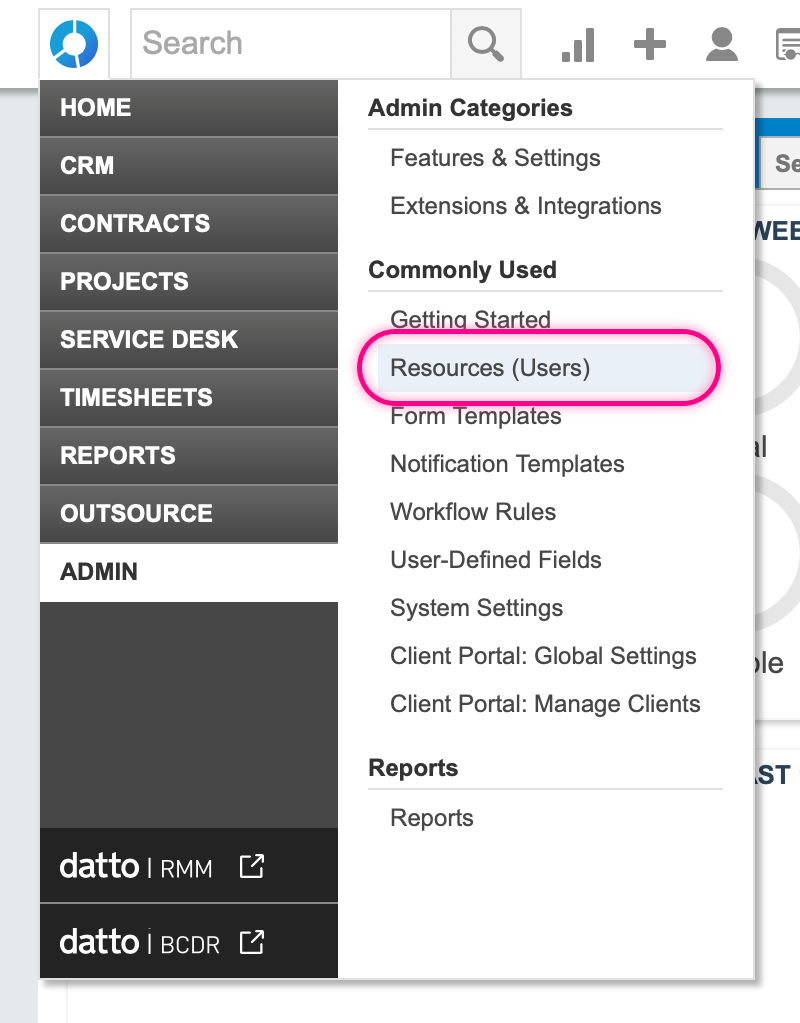
Open, by hovering over, Autotask menu in the top left corner
Select, by hovering over, "ADMIN" menu option
Select, by clicking, "Resources" menu option
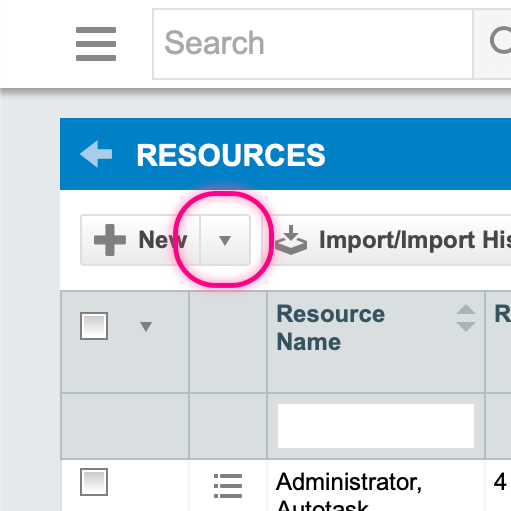
Drop-down the "New" multi-button
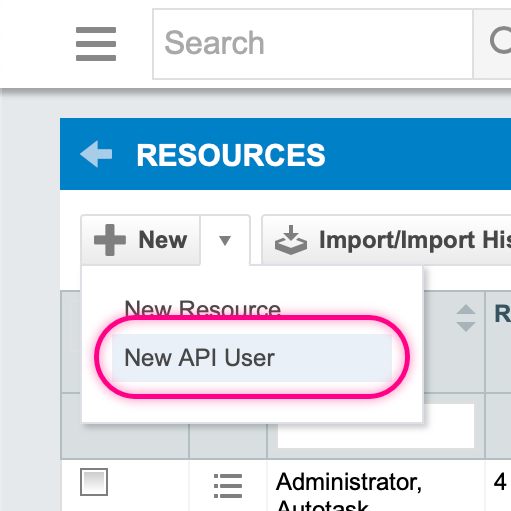
Select the "New API User" option
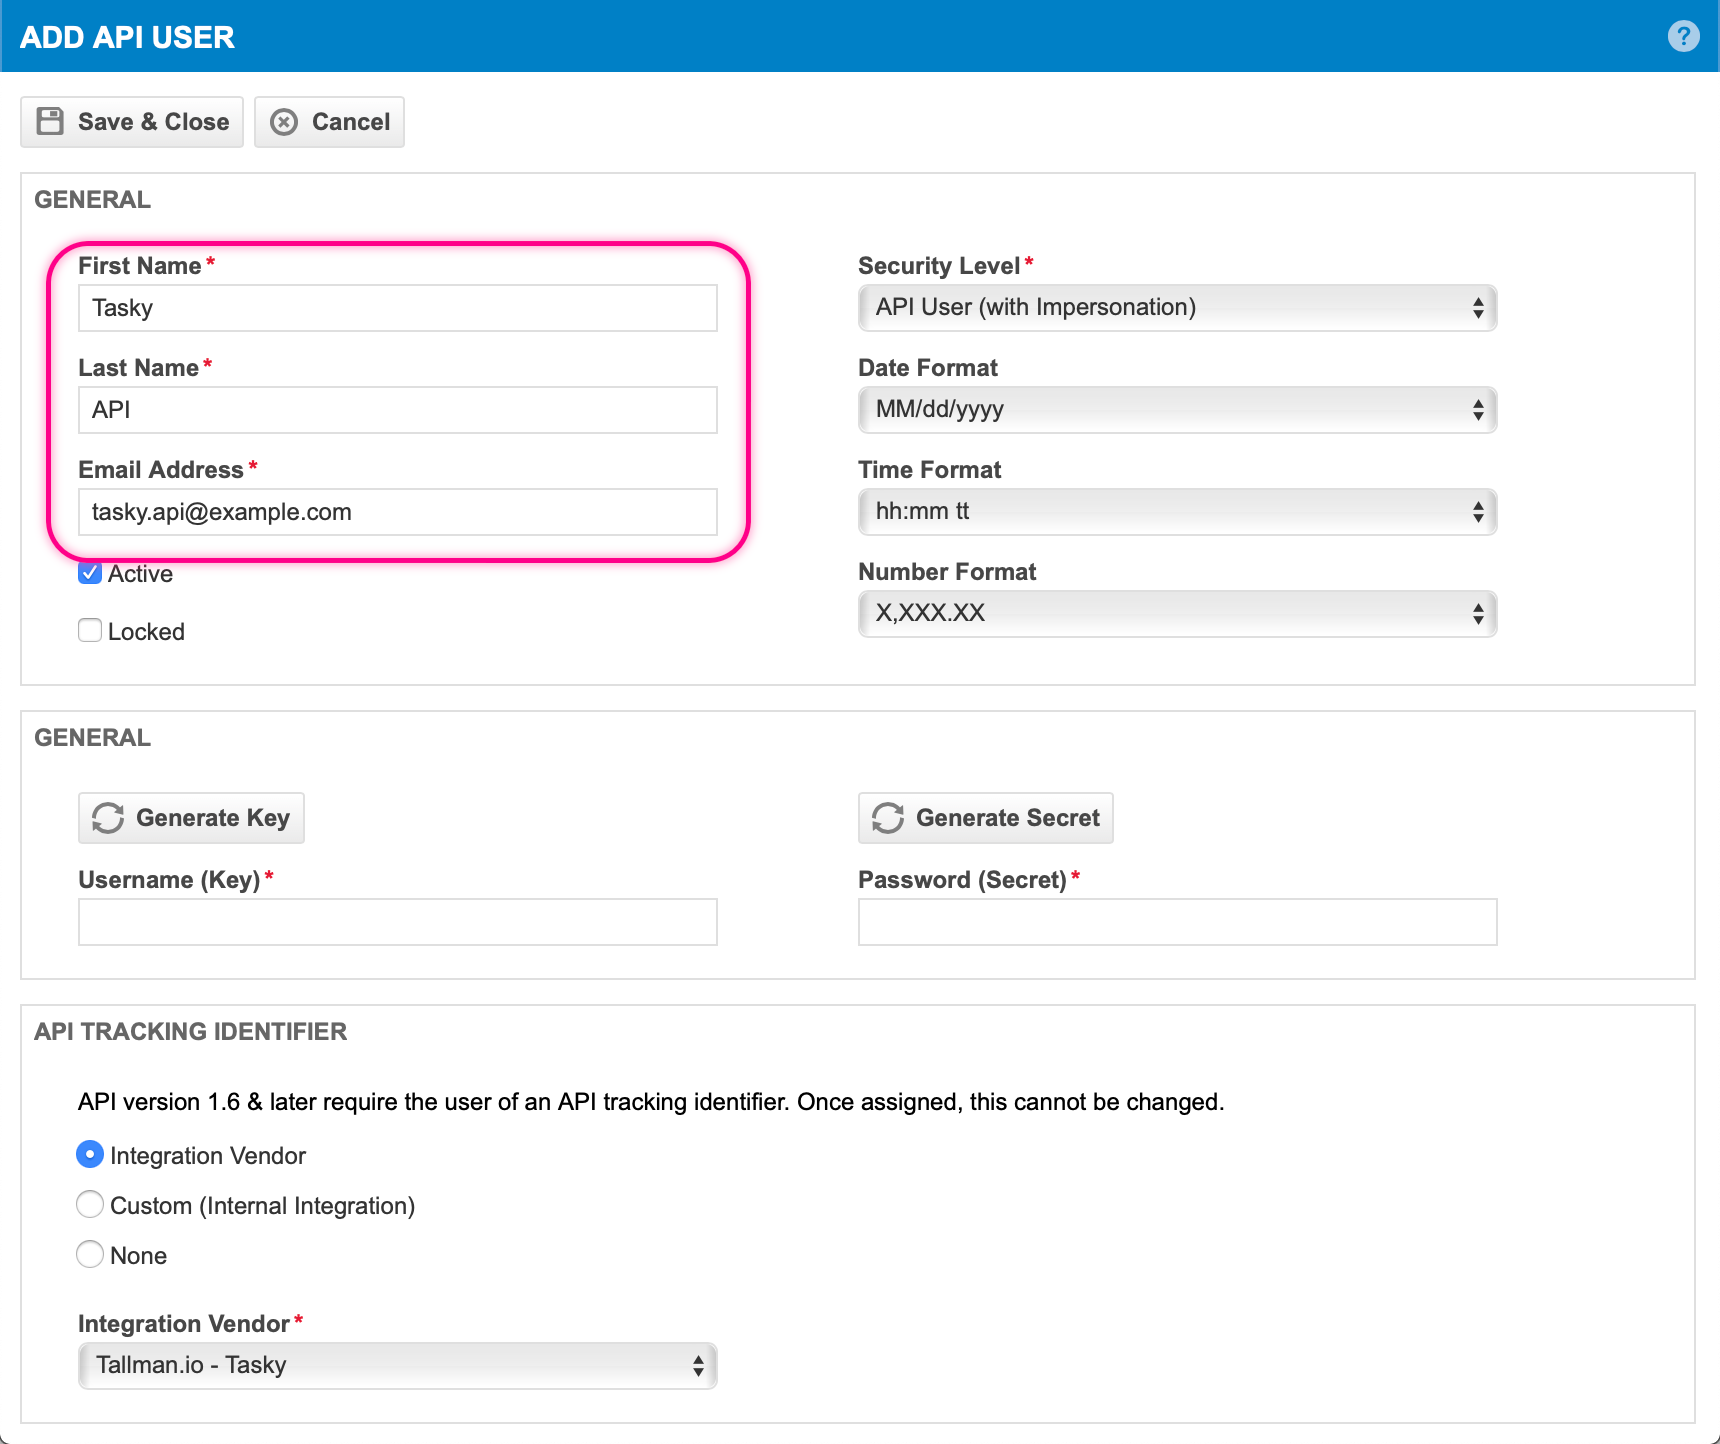
Fill in the required values for First Name, Last Name & E-mail
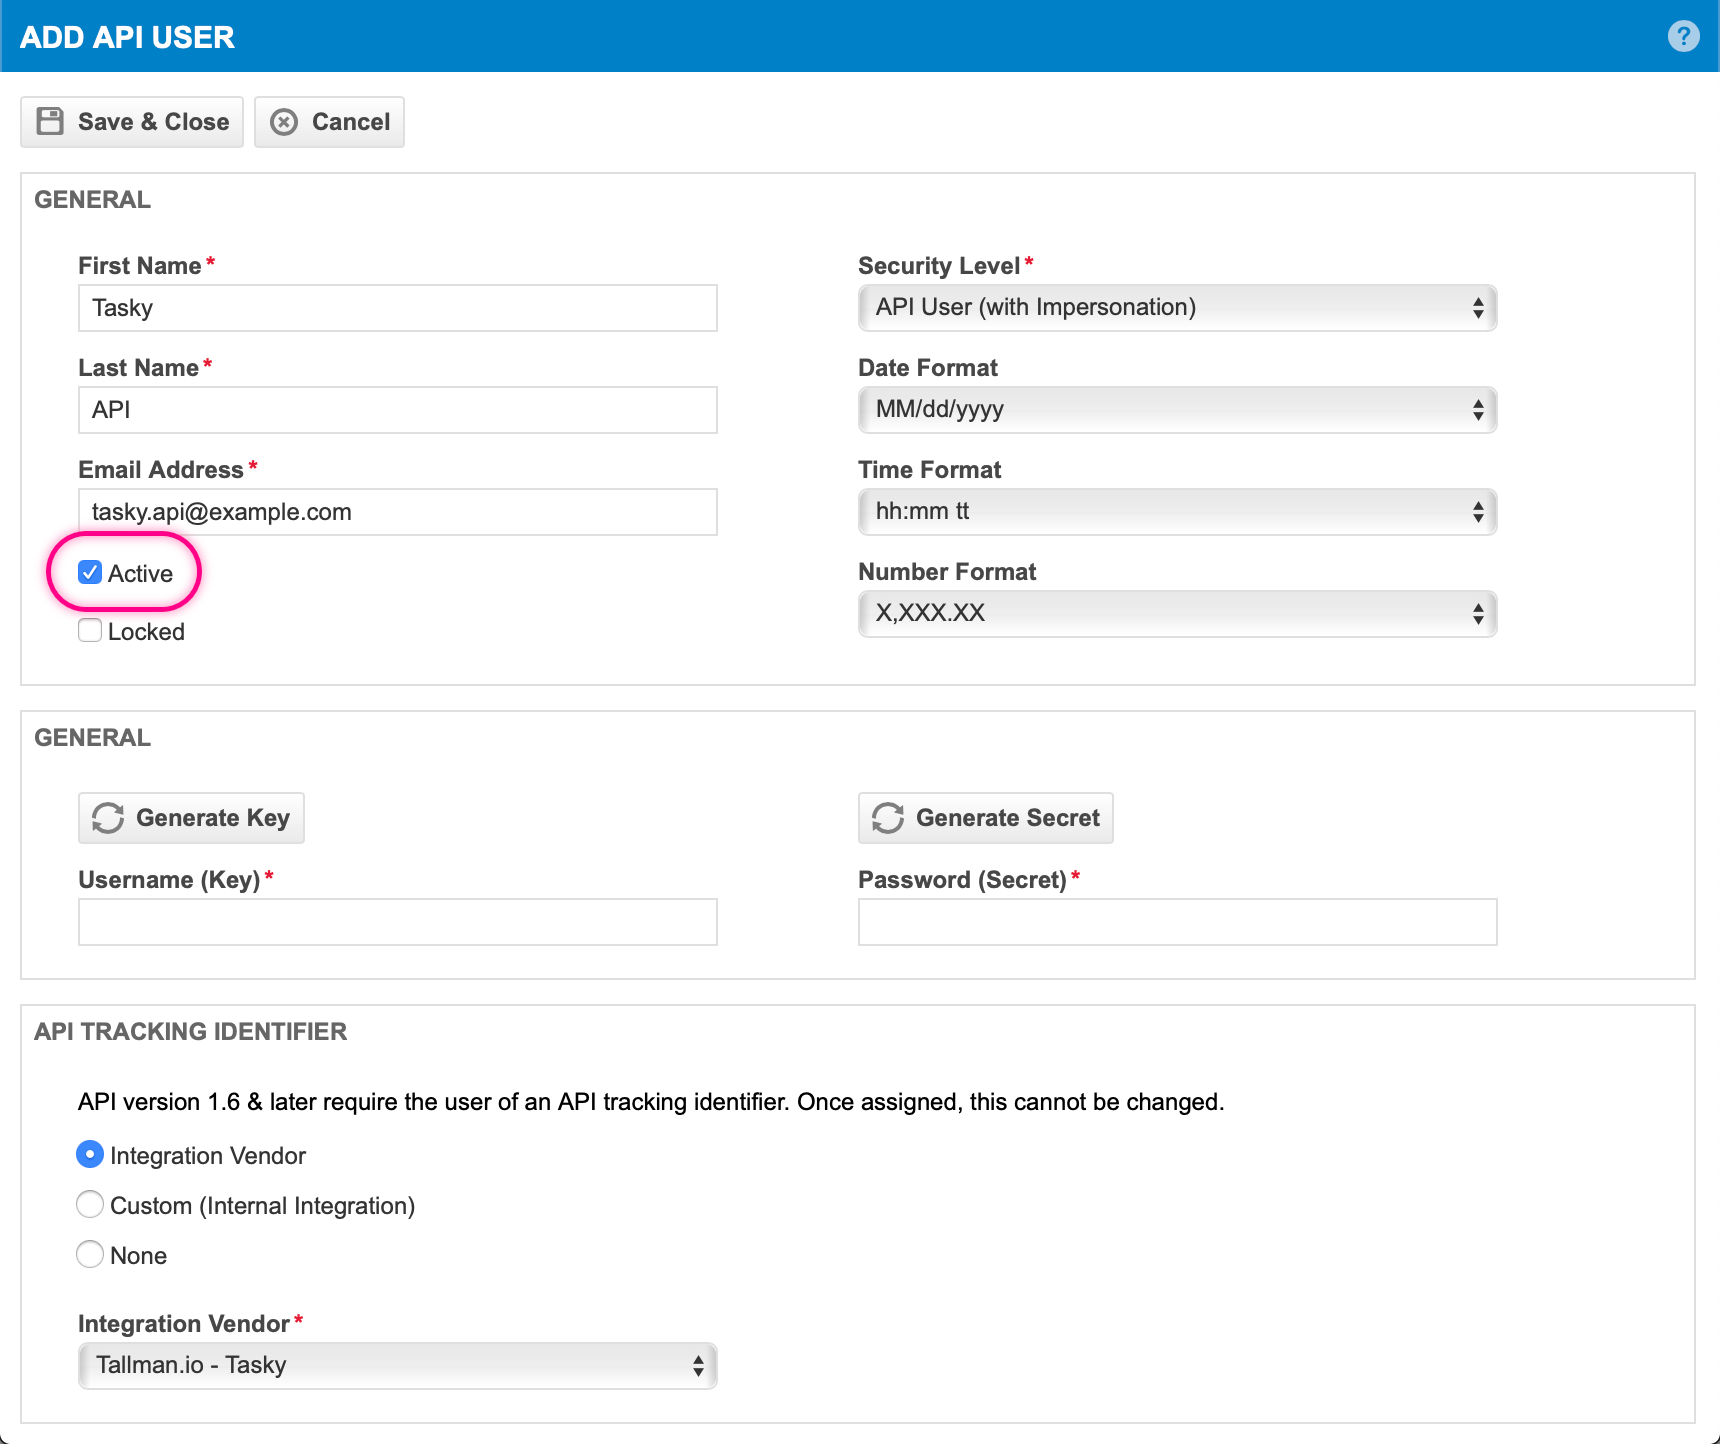
Check the "Active" option
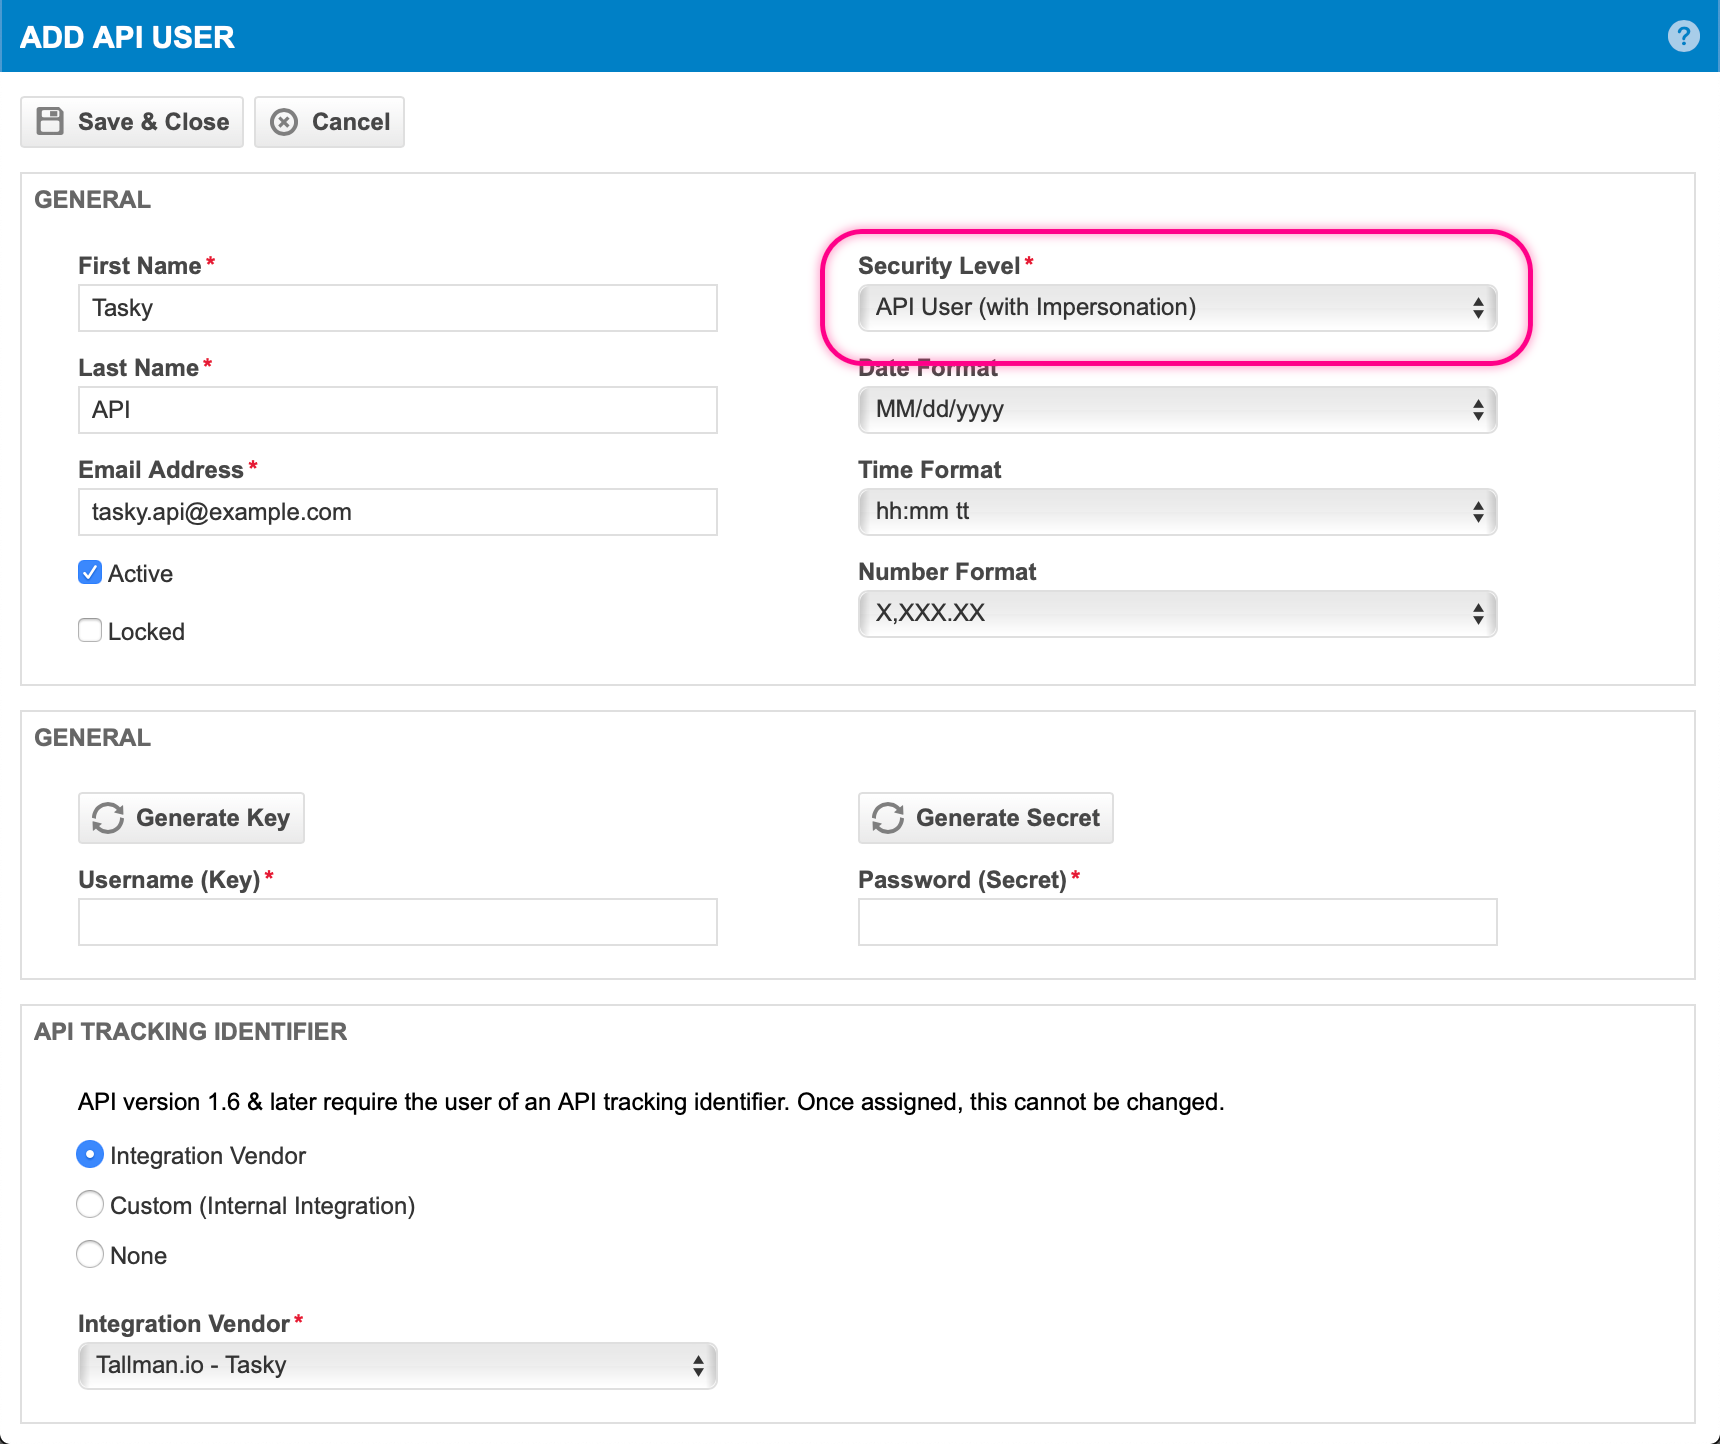
Select the Security Level created in Step 1
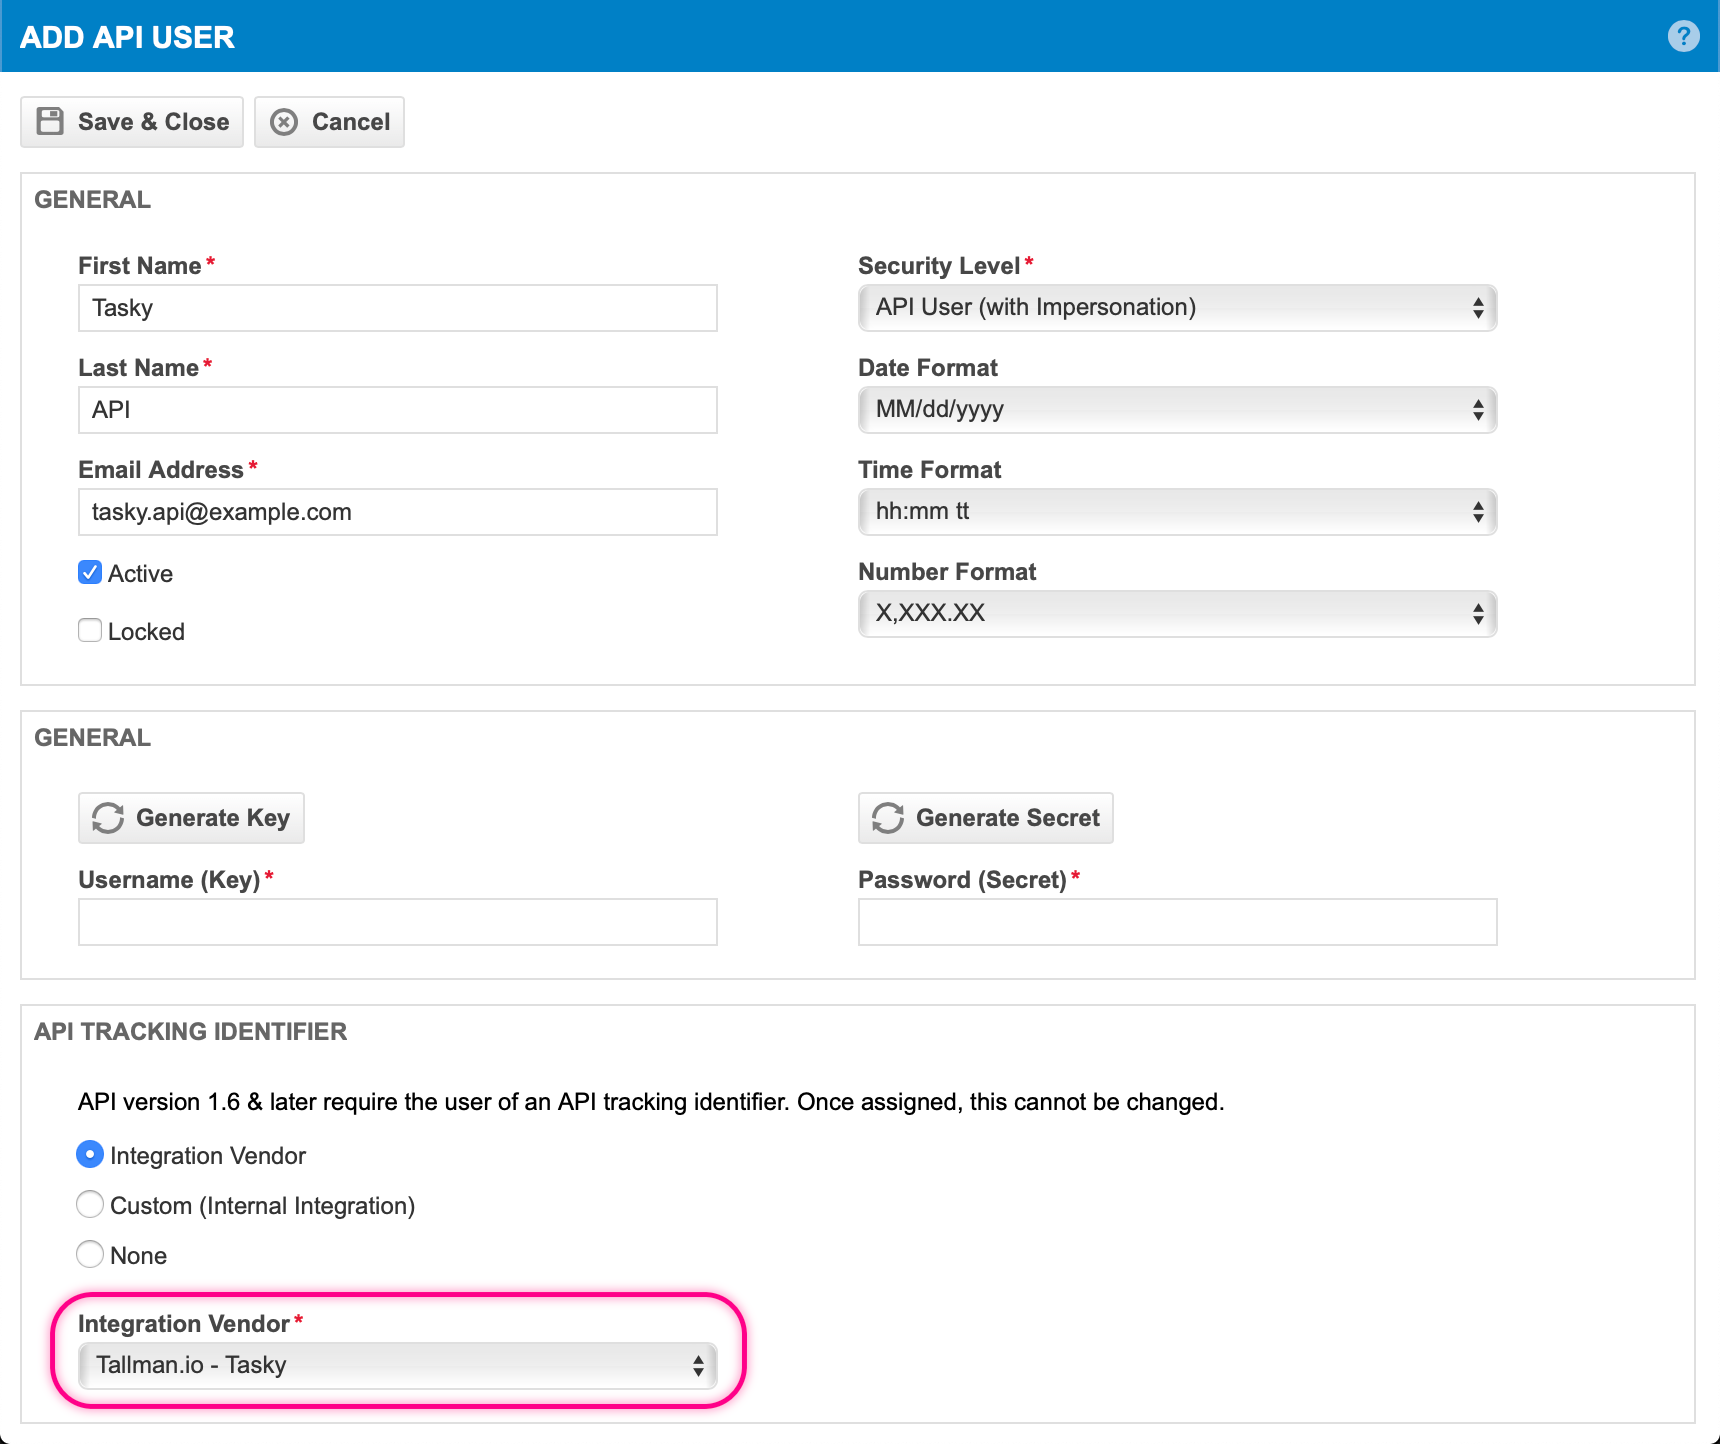
Select the "Integration Vendor" radio option to enable the "Integration Vendor" selection
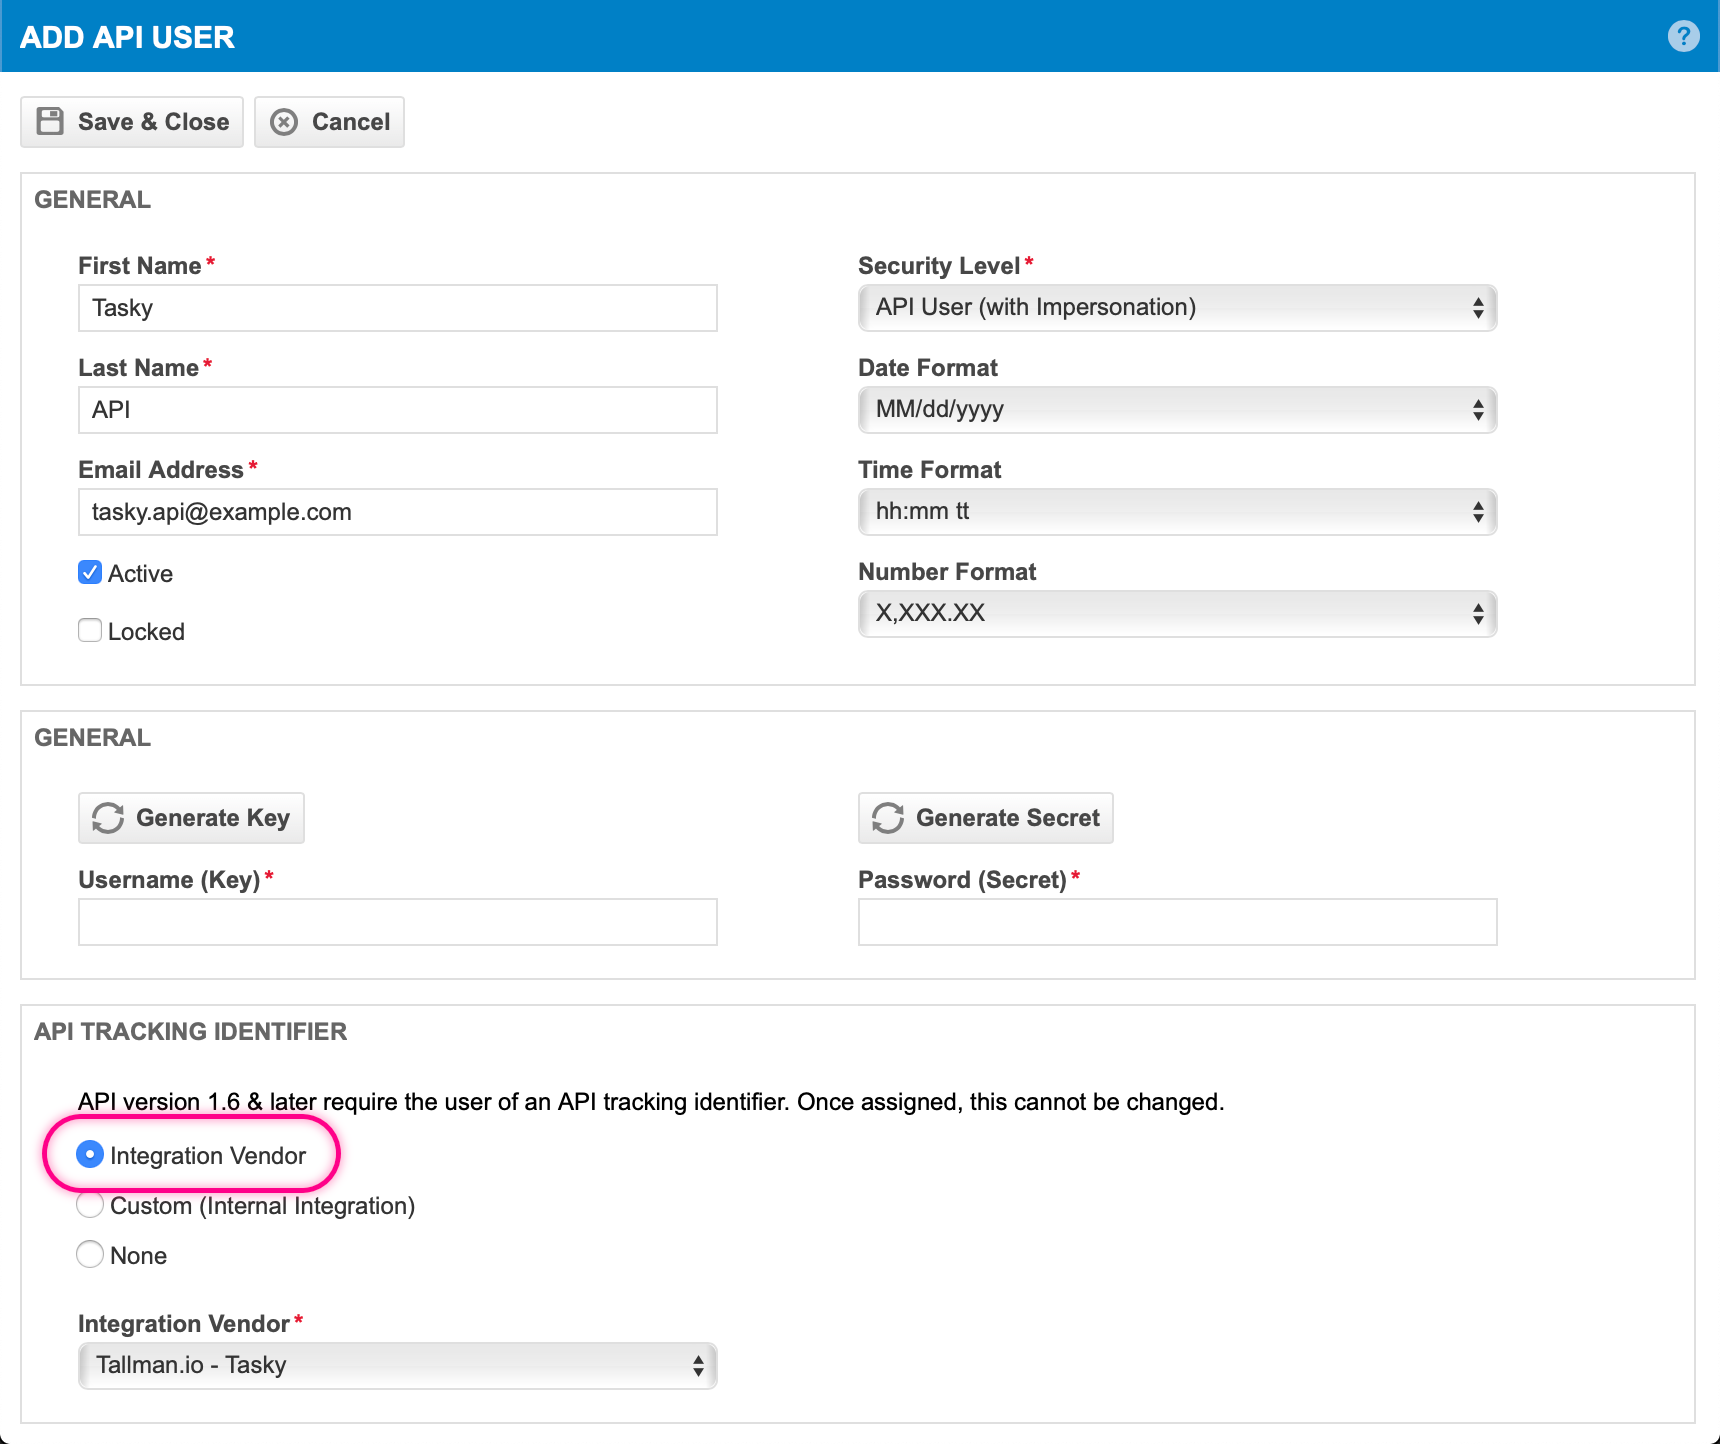
Select the option "Tallman.io - Tasky" in the "Integration Vendor" selection
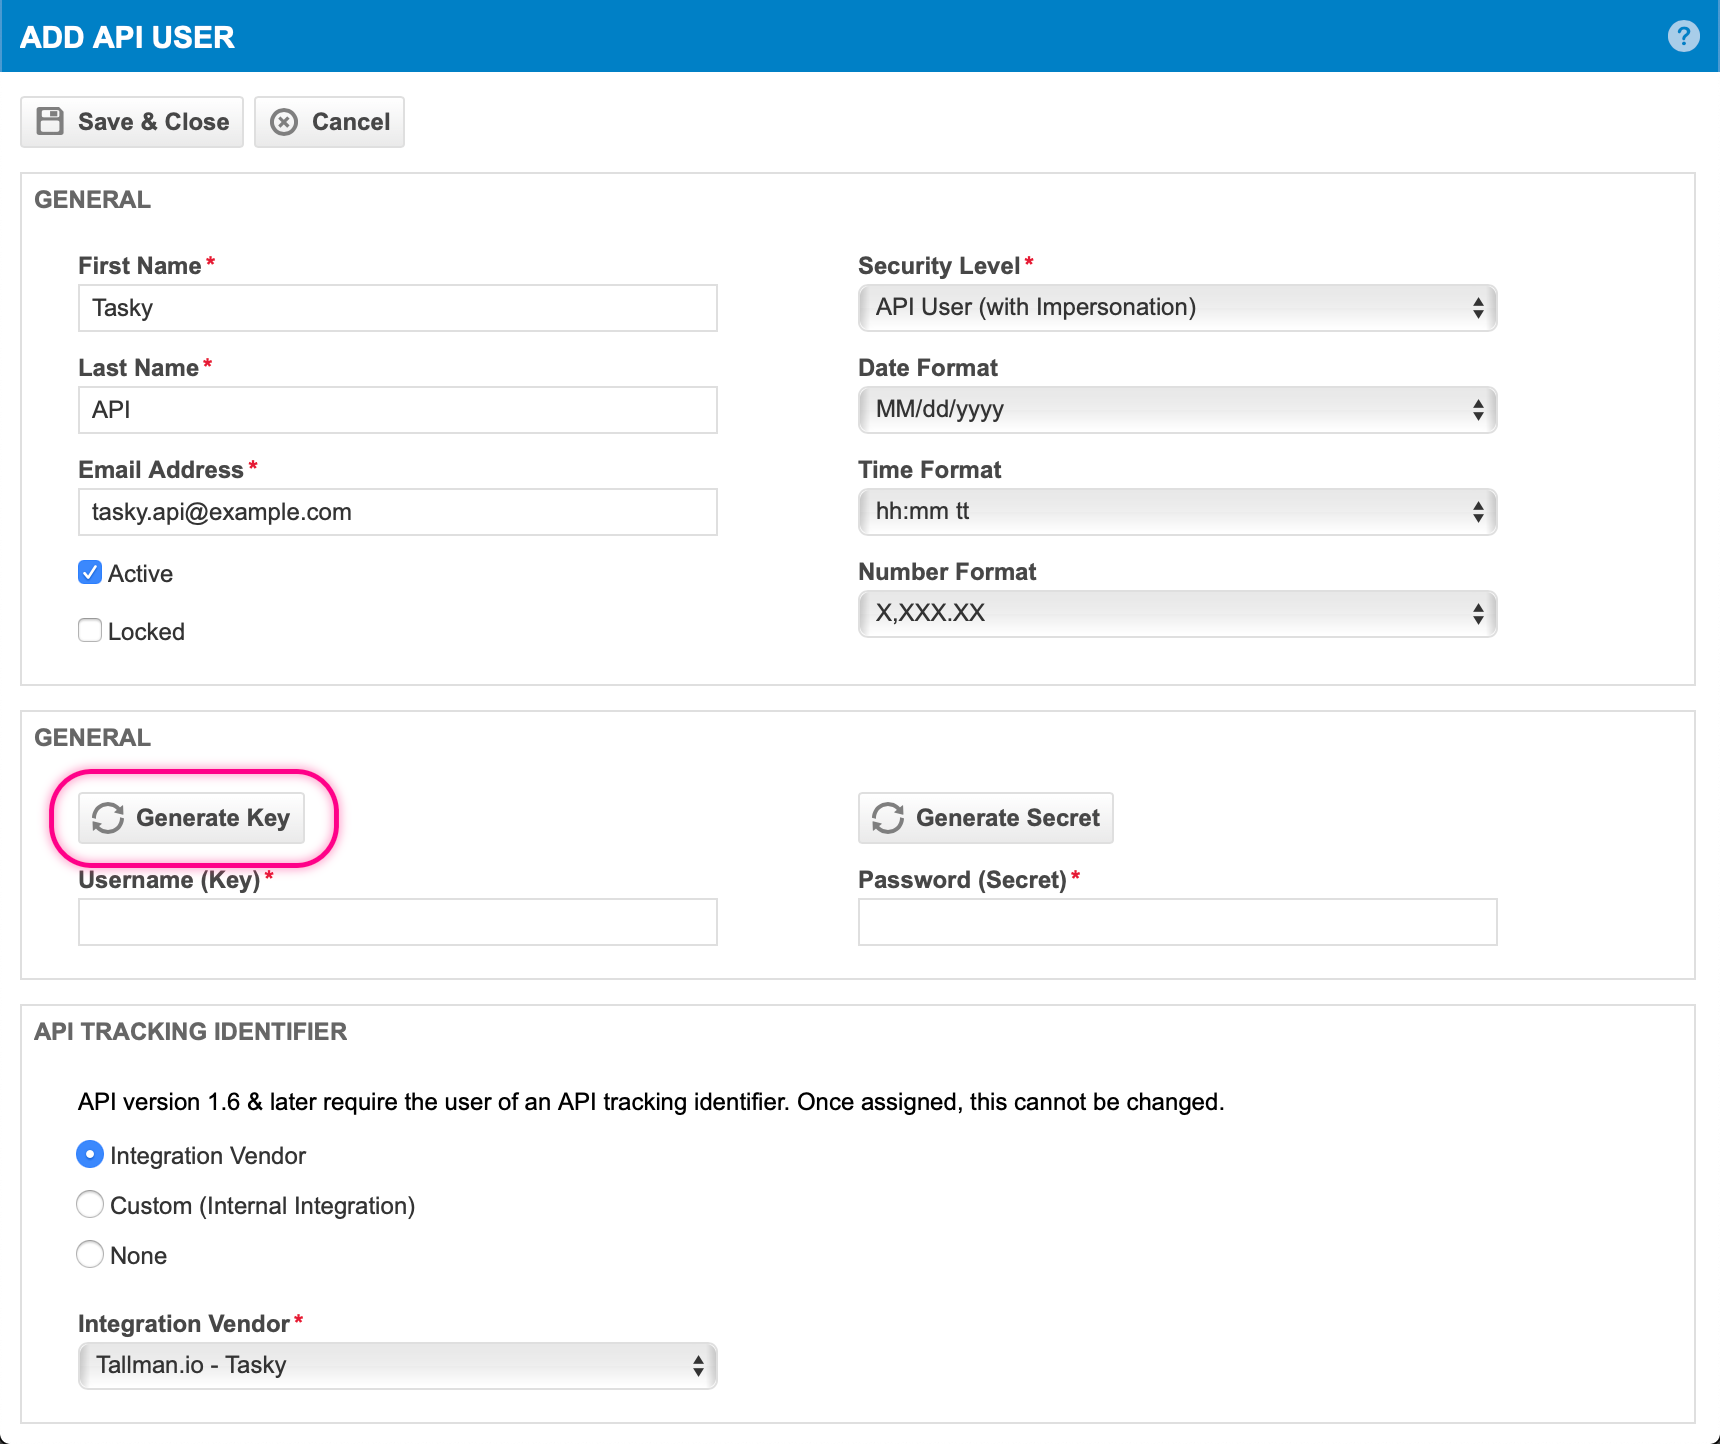
Click the Generate Key button to generate a key/username
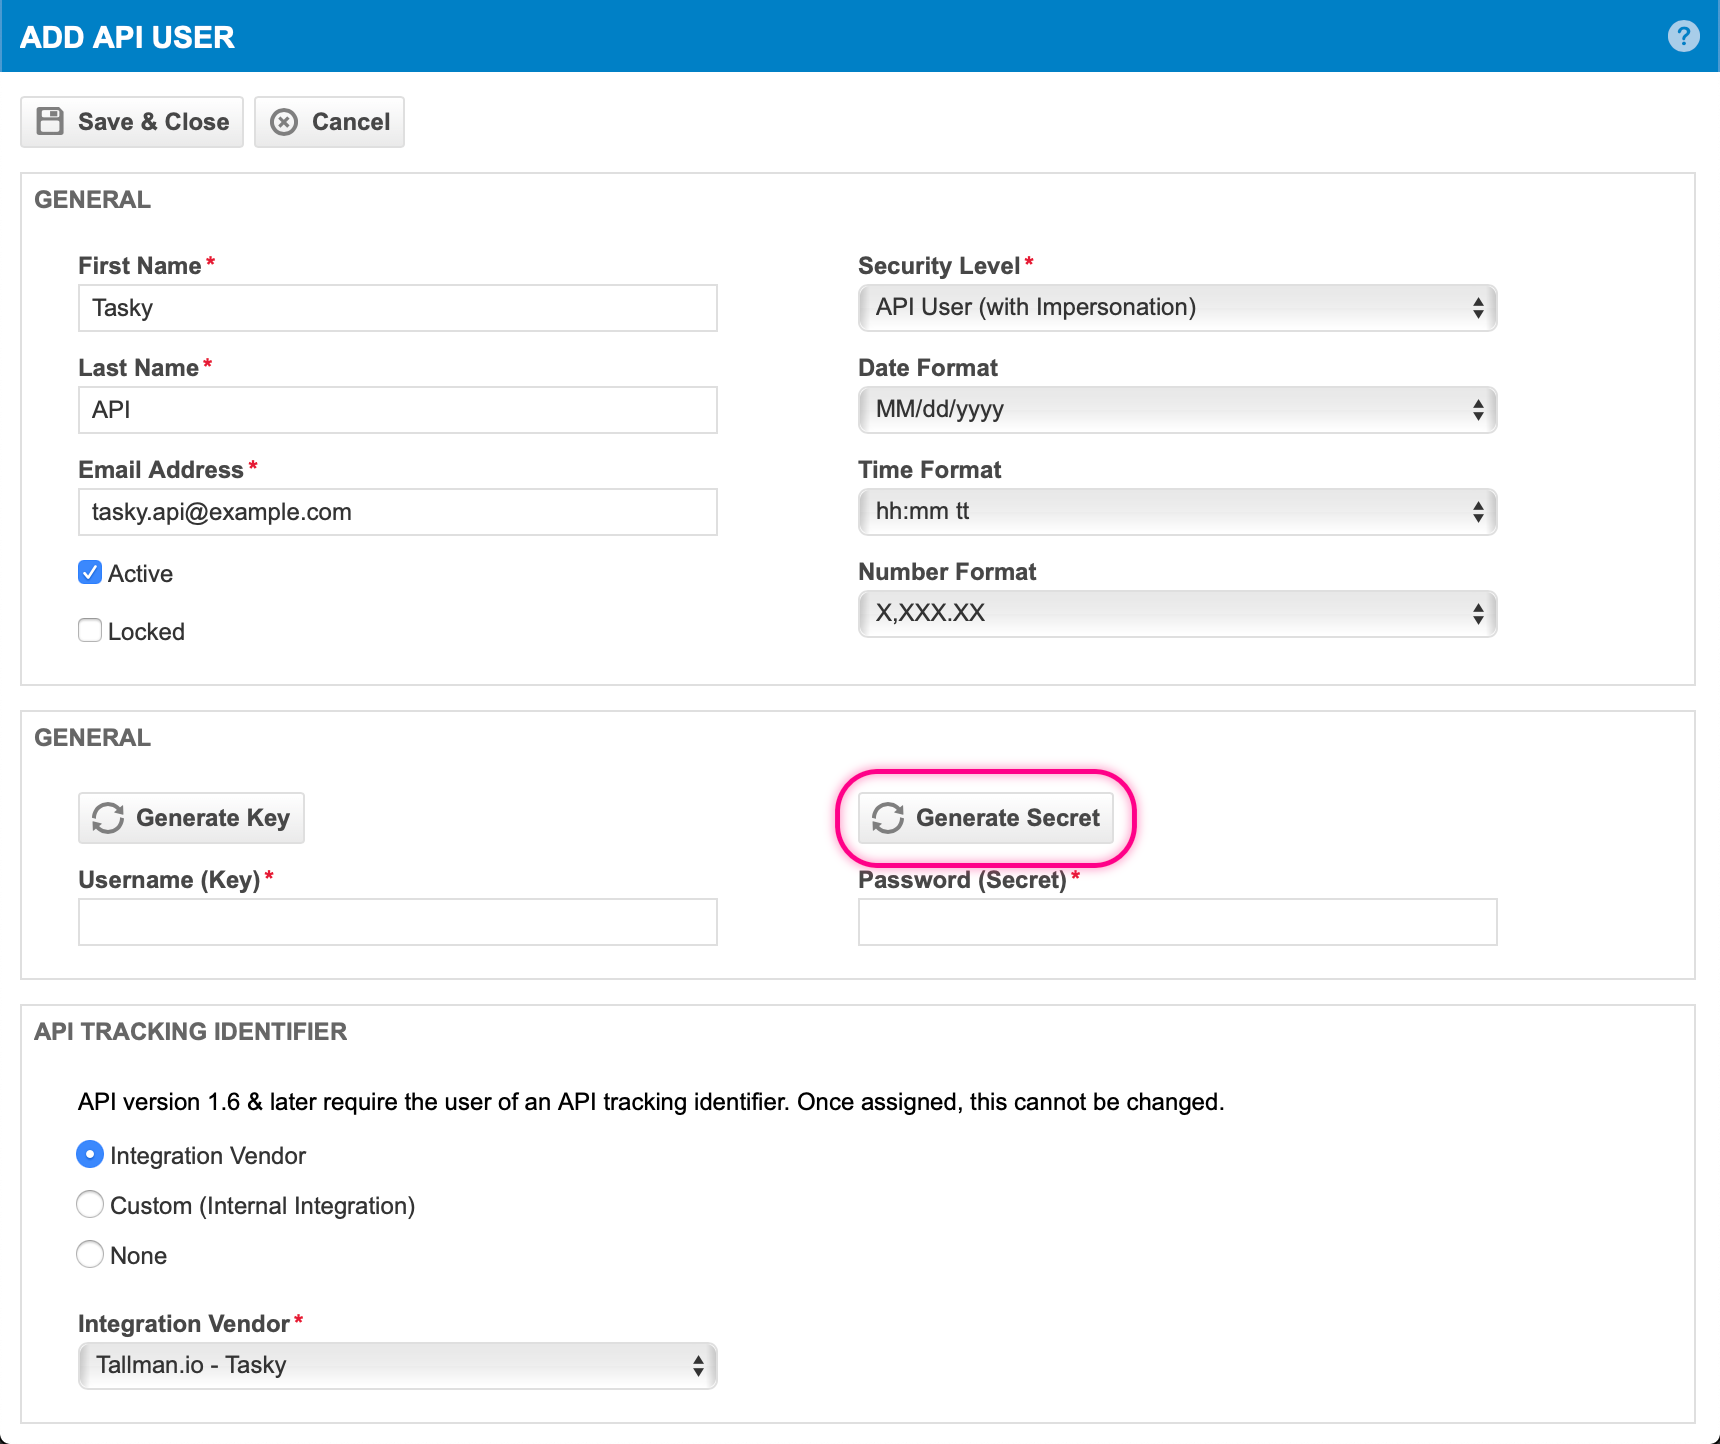
Click the Generate Secret button to generate a secret/password
Save the newly created resource.
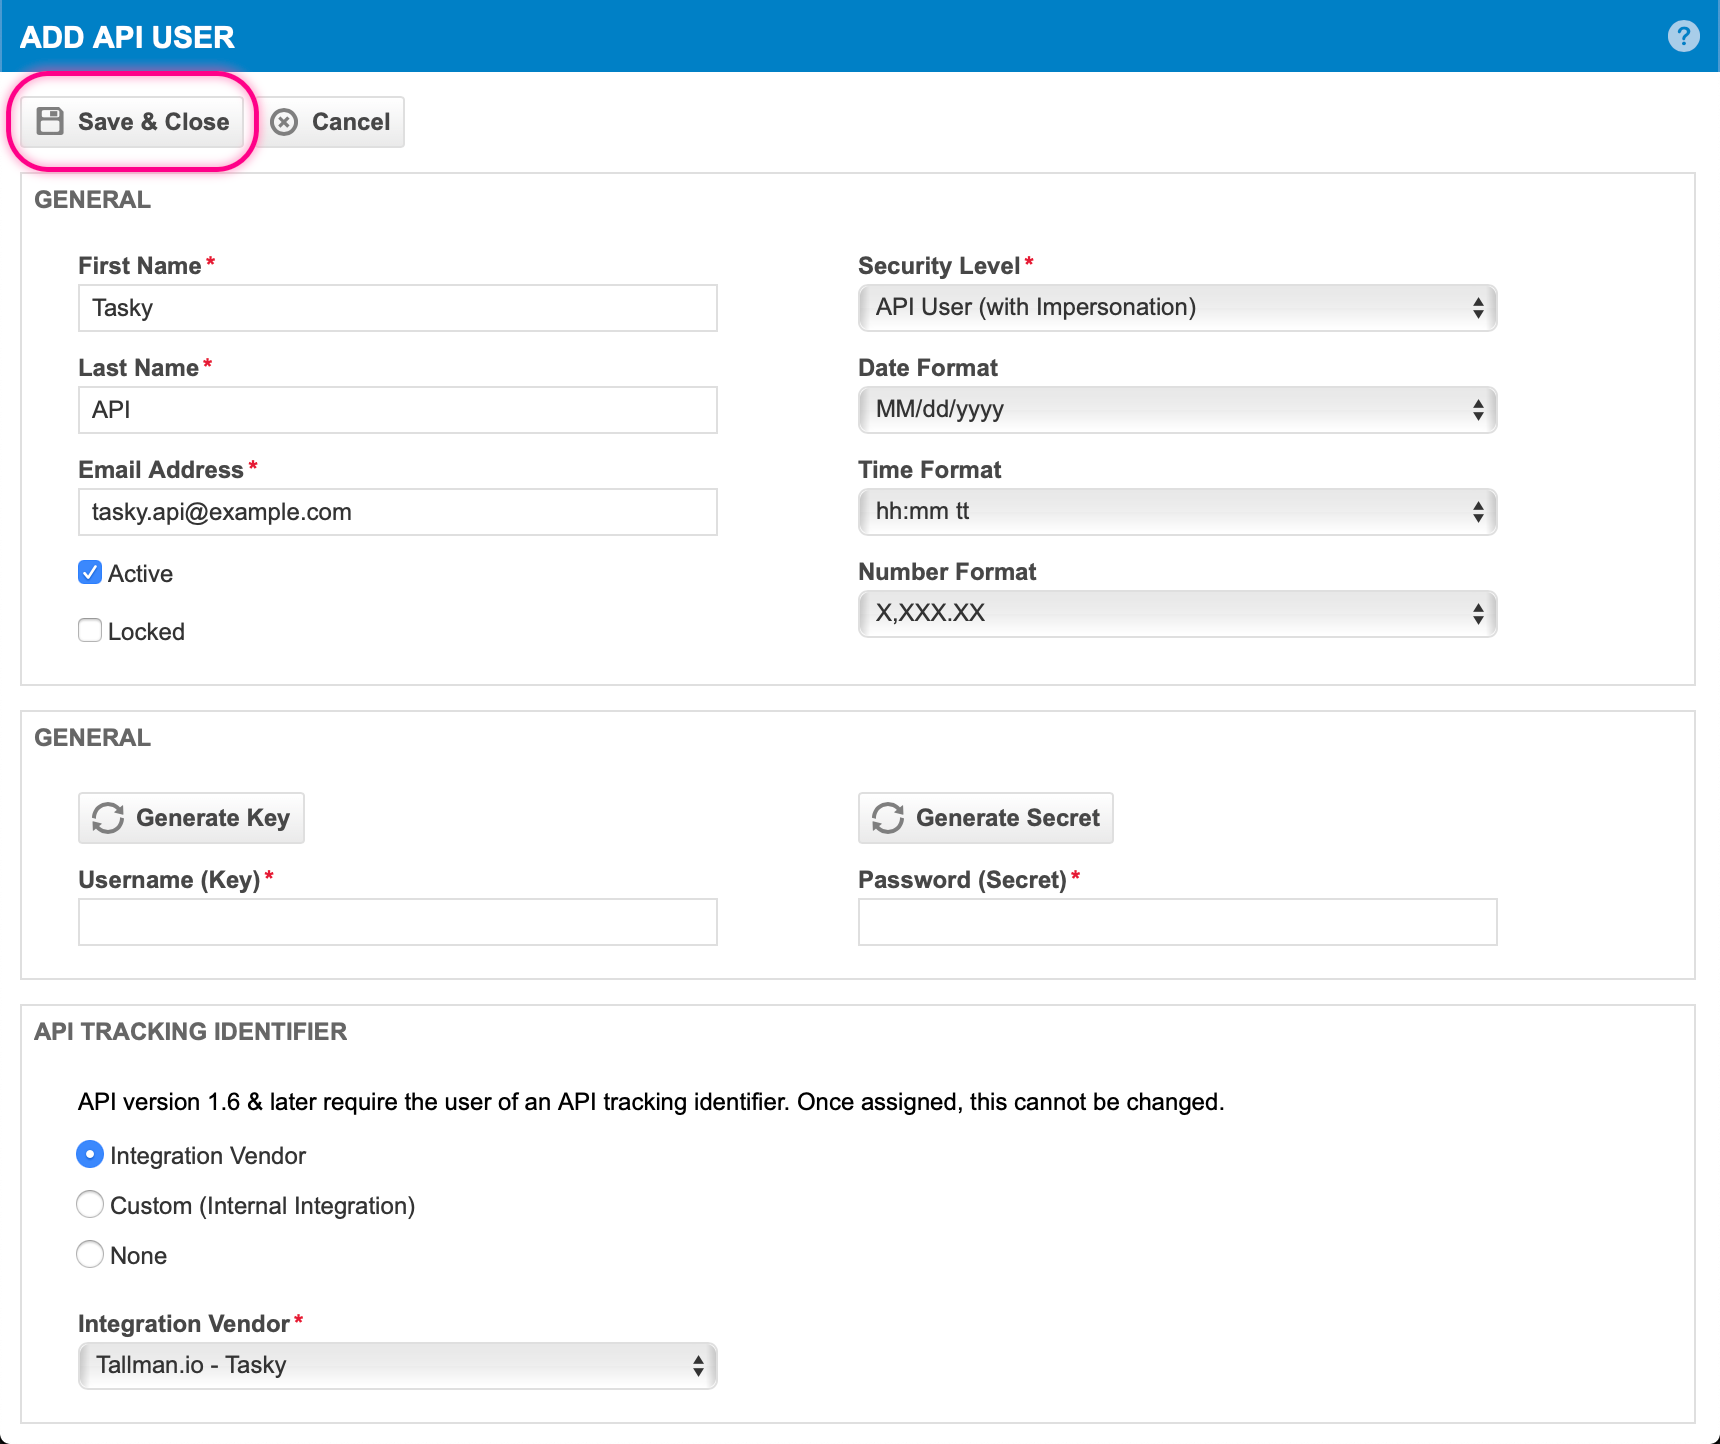
Note: If, like this walkthrough, a new "API User" was created the newly generated Key/Username and Secret/Password will need to transferred to the Autotask Settings in the Tasky console.
4. Apply the Security Level(s) added or updated in Step 2
Each of the Tasky users must be assigned a Security Level that allows impersonation. The required Security Level(s) should have already been created in Step 2.
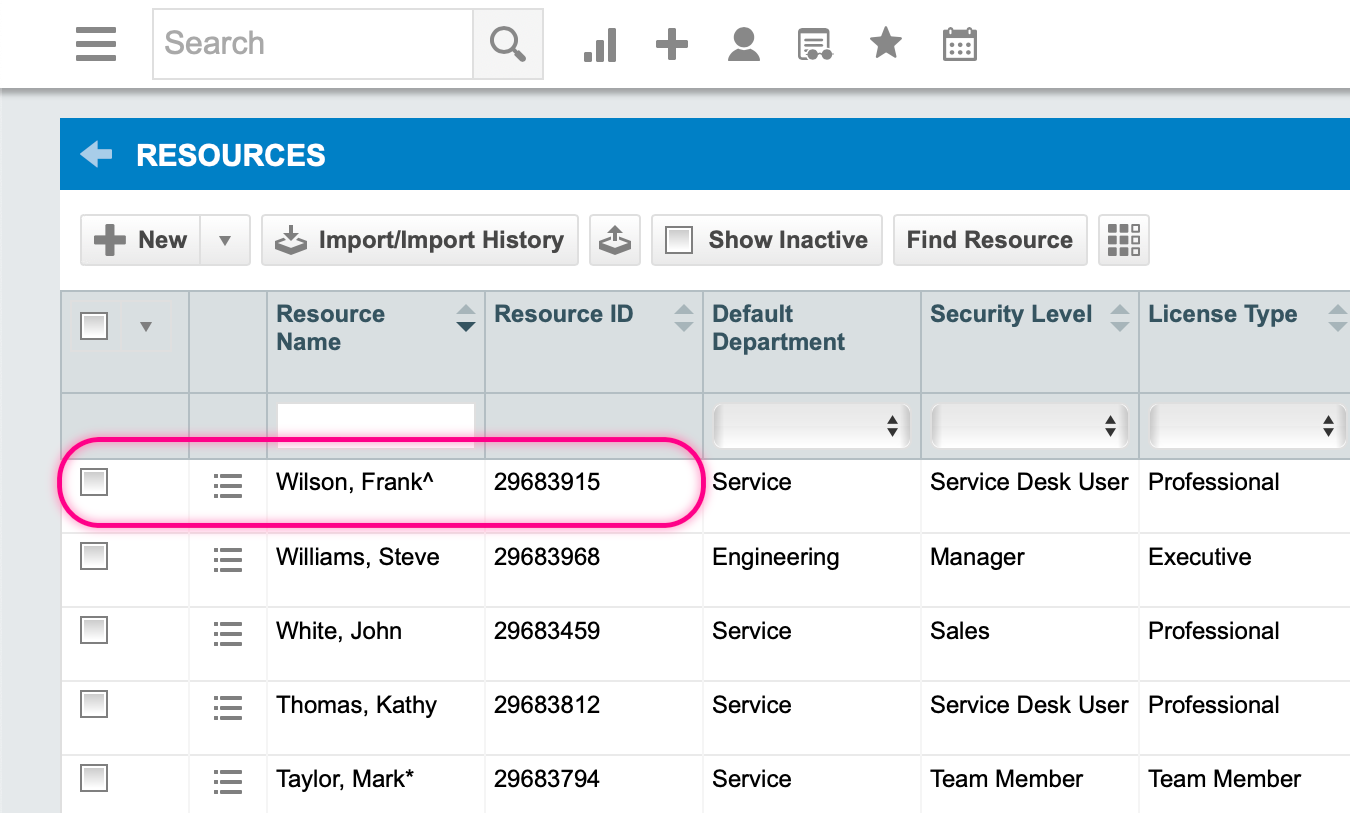
Return to the list of Resources (which should still be visible).
Locate the resource to be updated
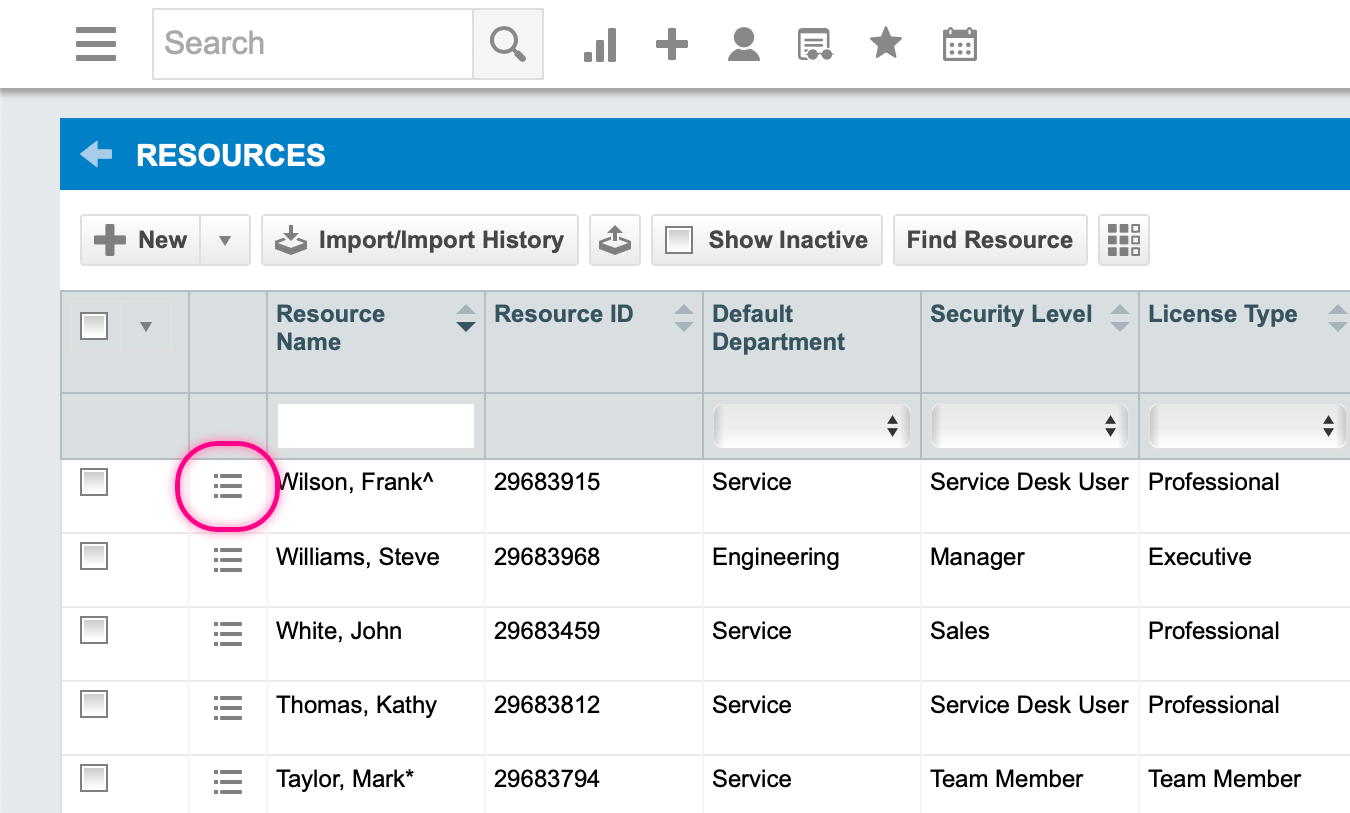
Open, by hovering over, the resource's overflow menu
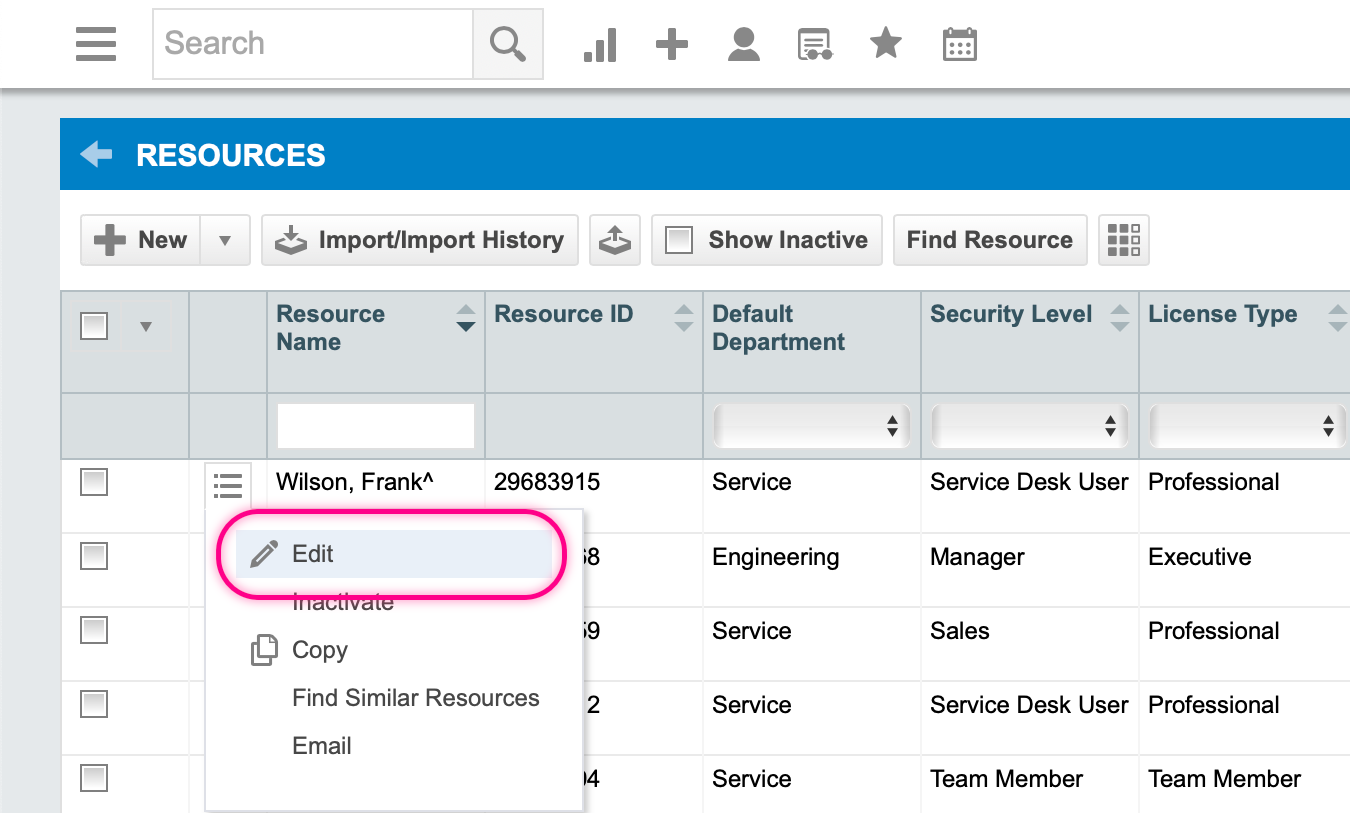
Select the "Edit" menu option
Select the "Security" tab
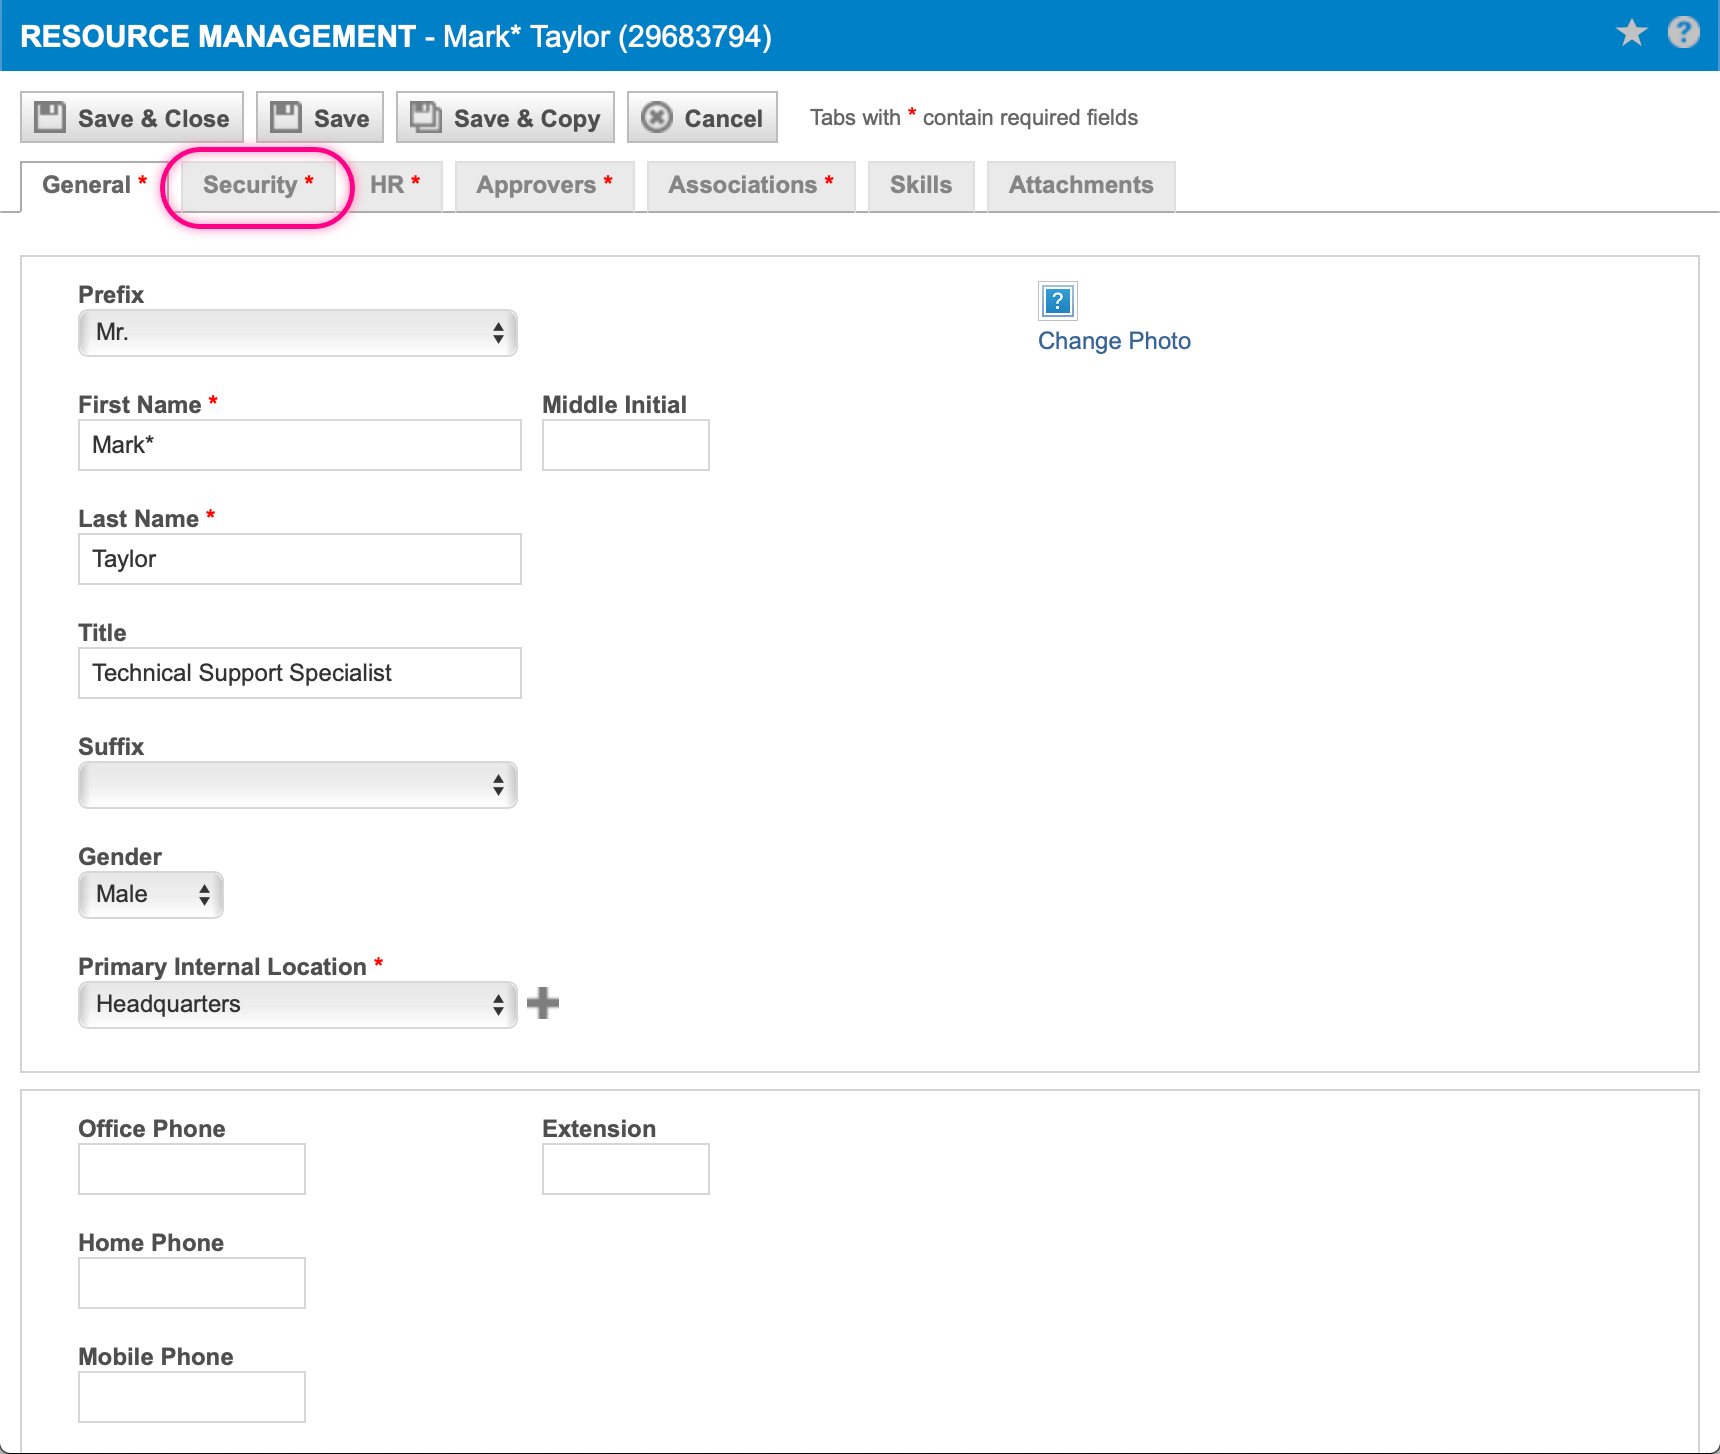
Select the applicable Security Level from Step 2
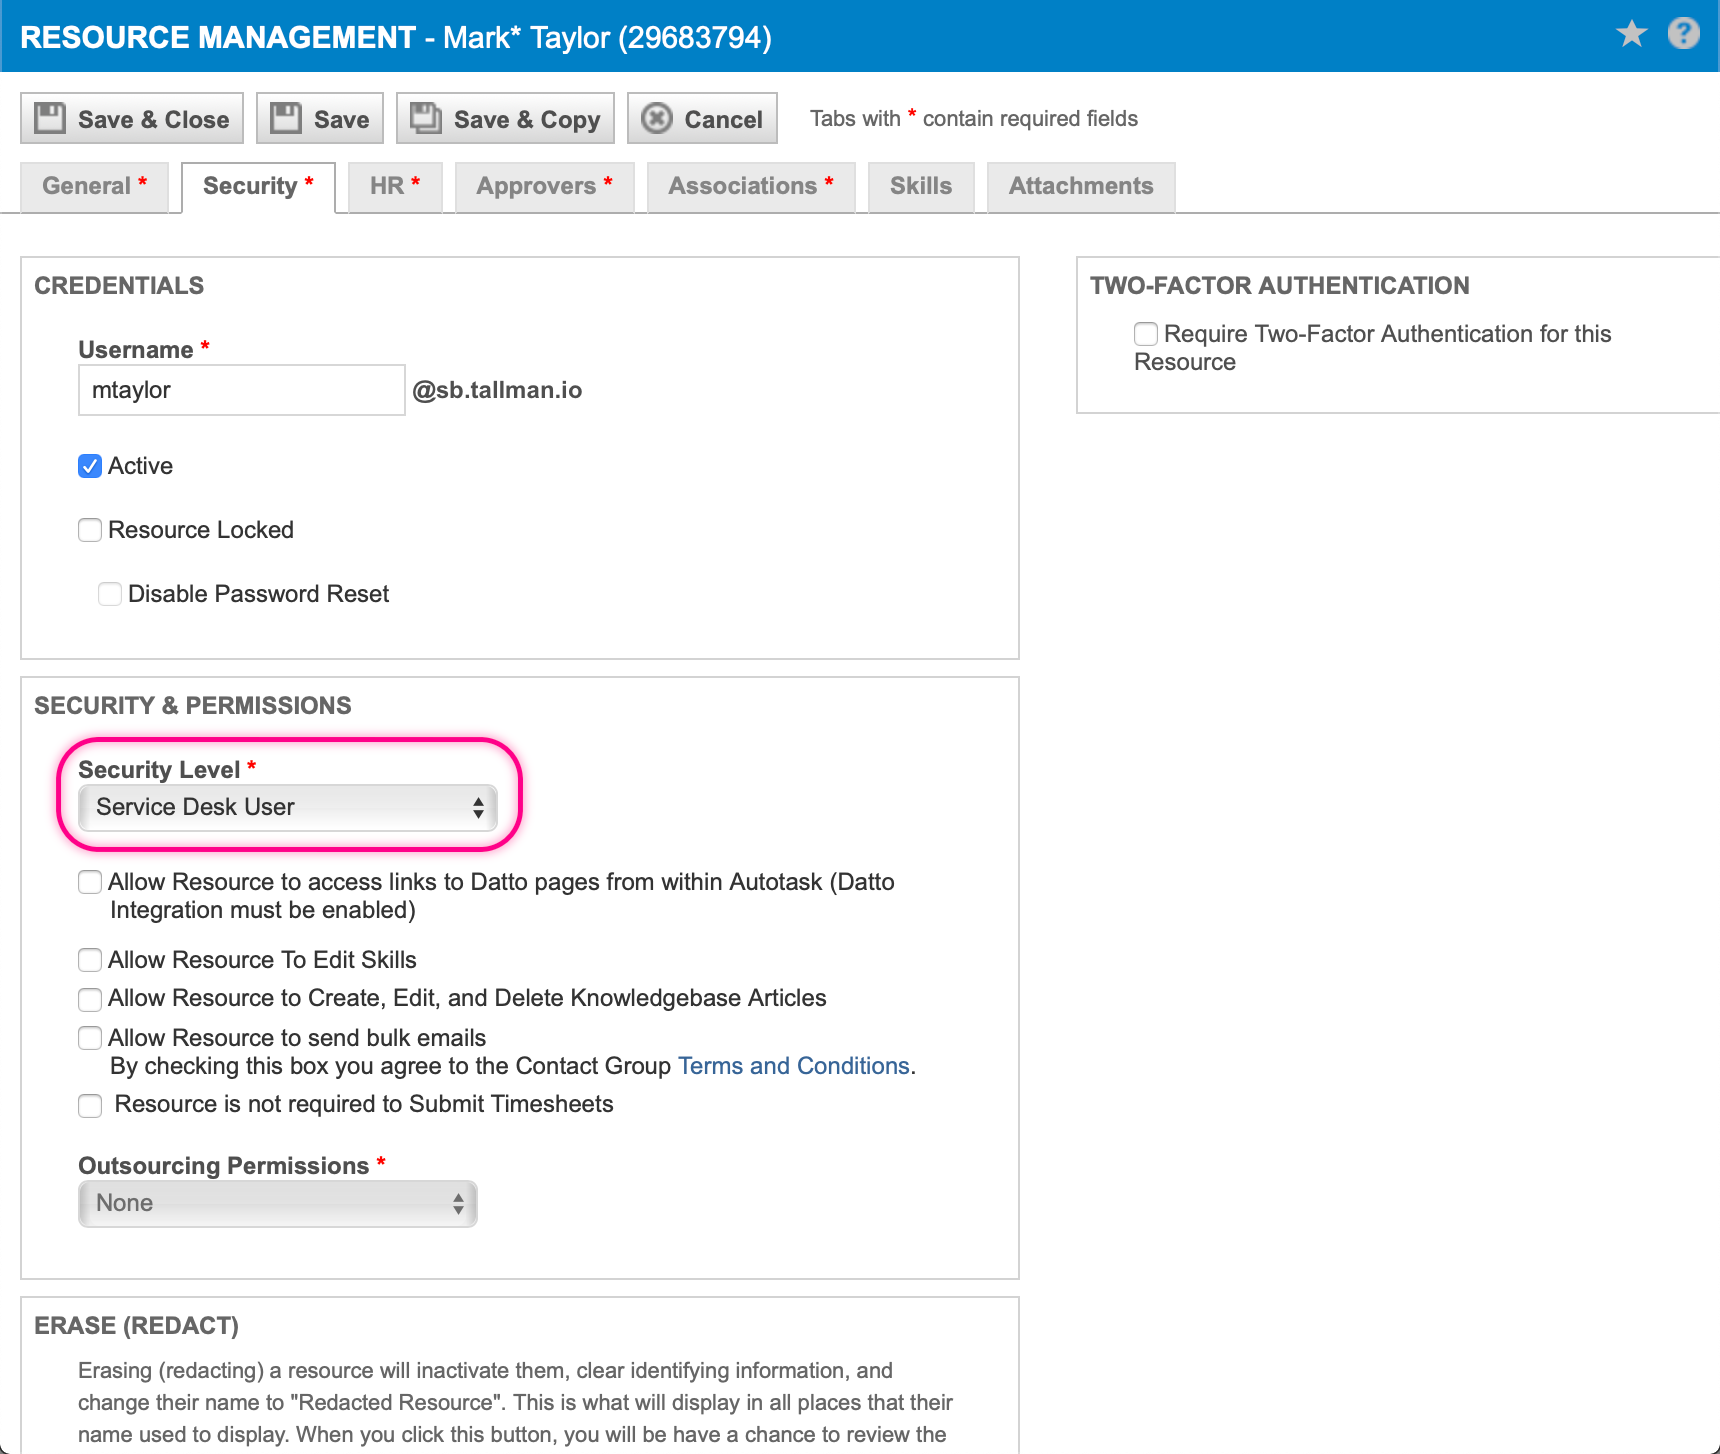
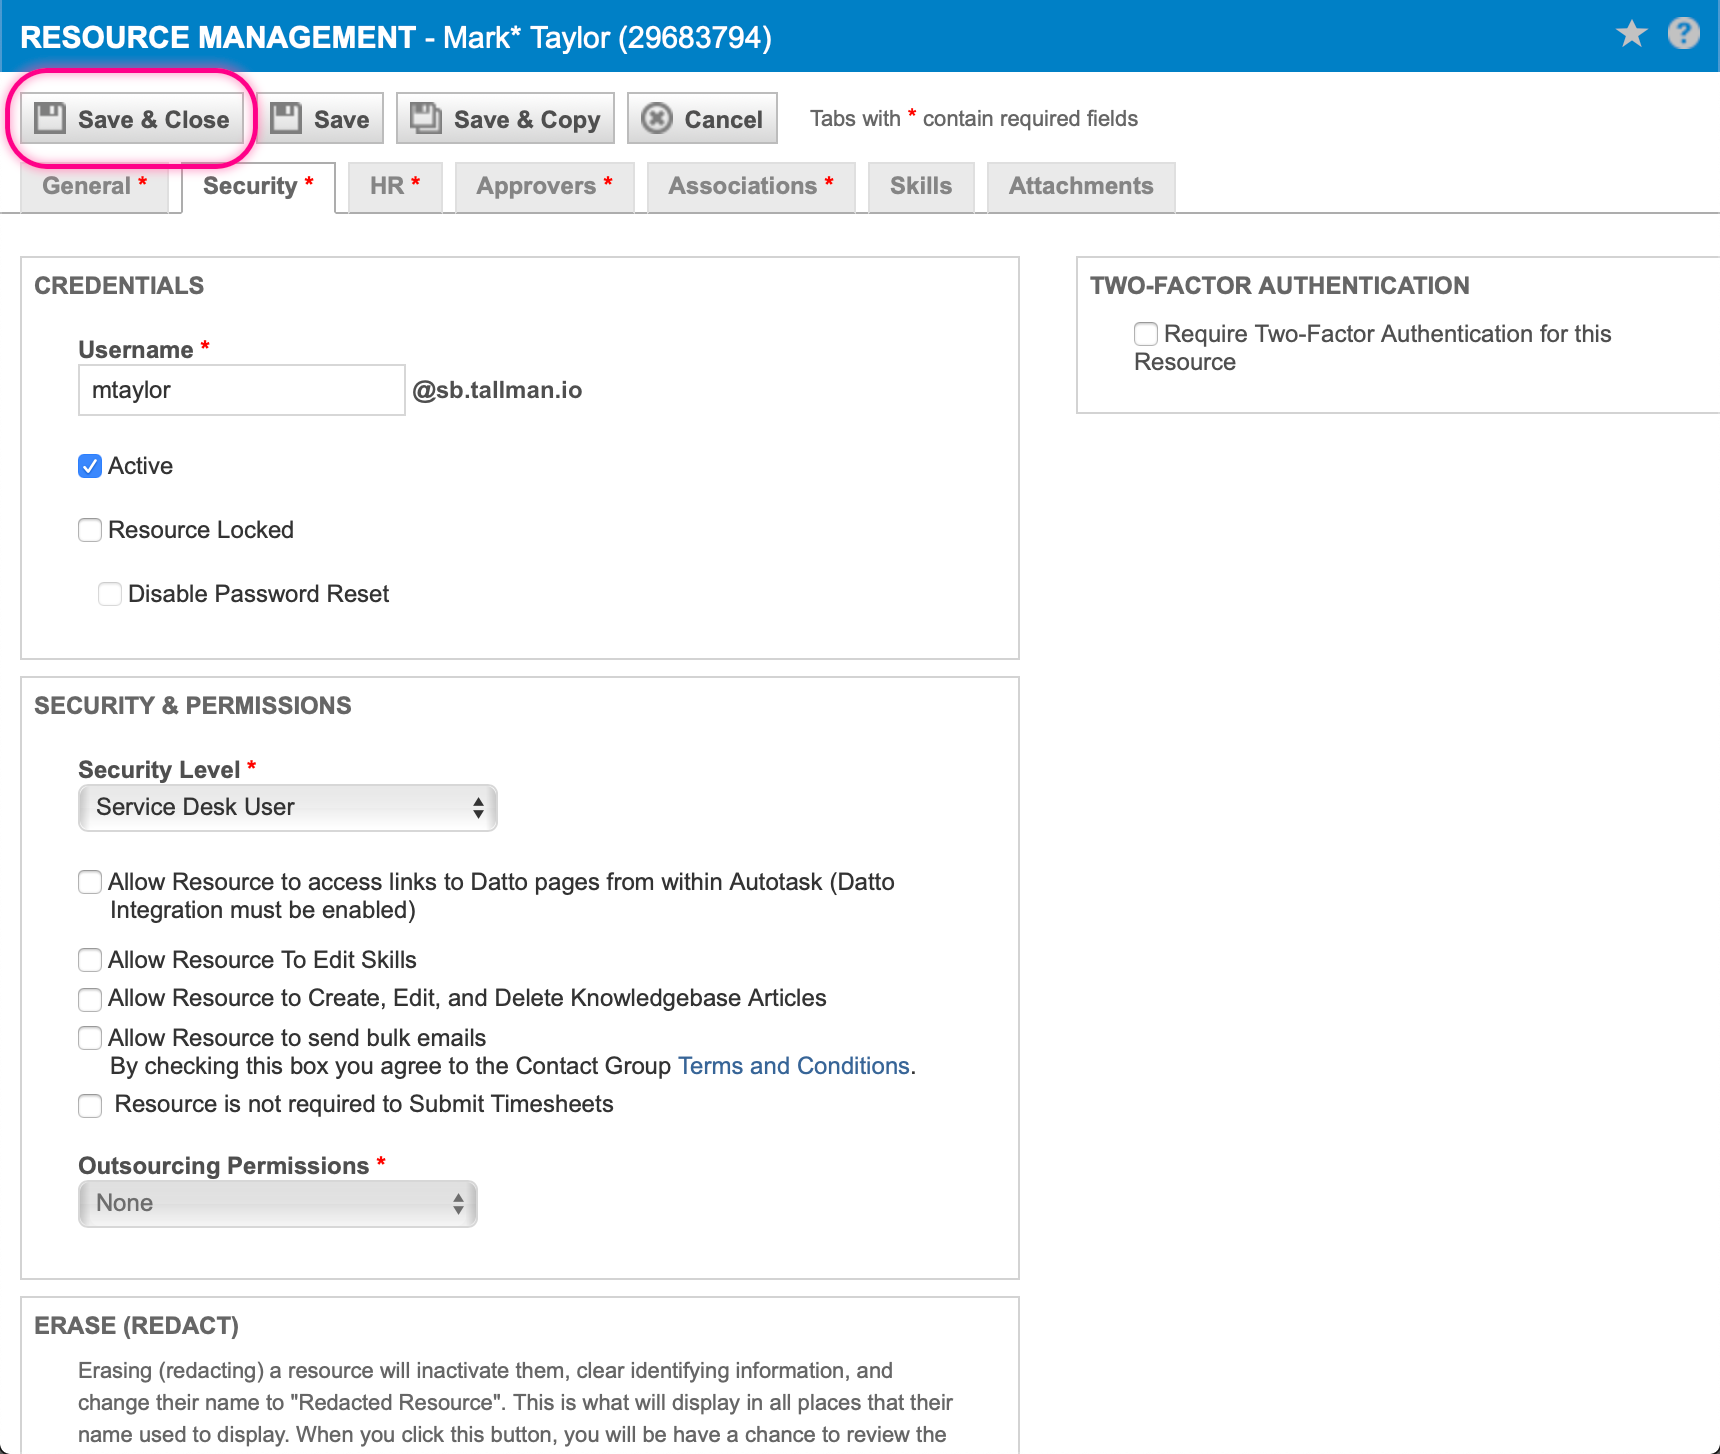
Save the updated resource
5. Update "API User" Credentials
Tasky's Autotask configuration needs to be updated to switch to using the 1.6 API version. Updating the Autotask credentials also verifies that the credentials are up-to-date in Tasky's configuration.
Note: If you created a new "API User" resource in Step 3 the username and password will need to be transferred to Tasky's configuration while updating the API version.
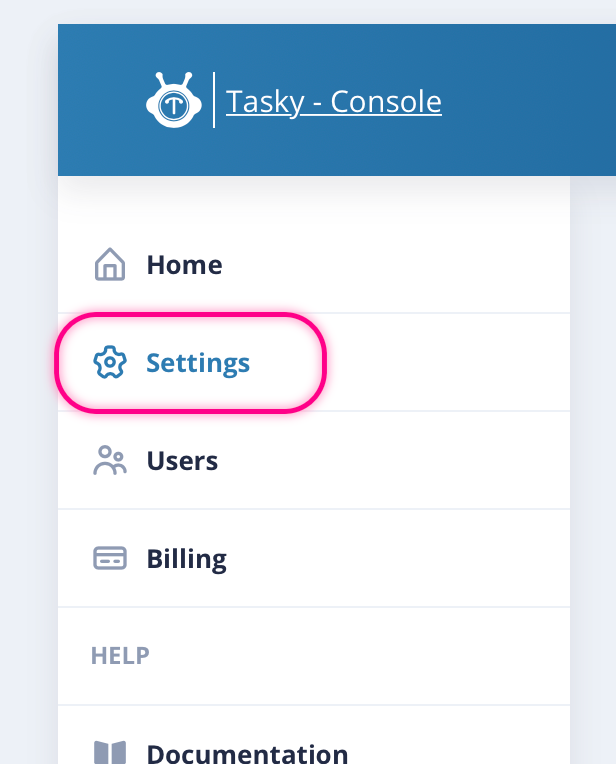
First, login to the Tasky Console
Select the Settings navigation menu option
Select the 1.6 API Version, if necessary updating the username and password values accordingly. Save the updated credentials once testing succeeds.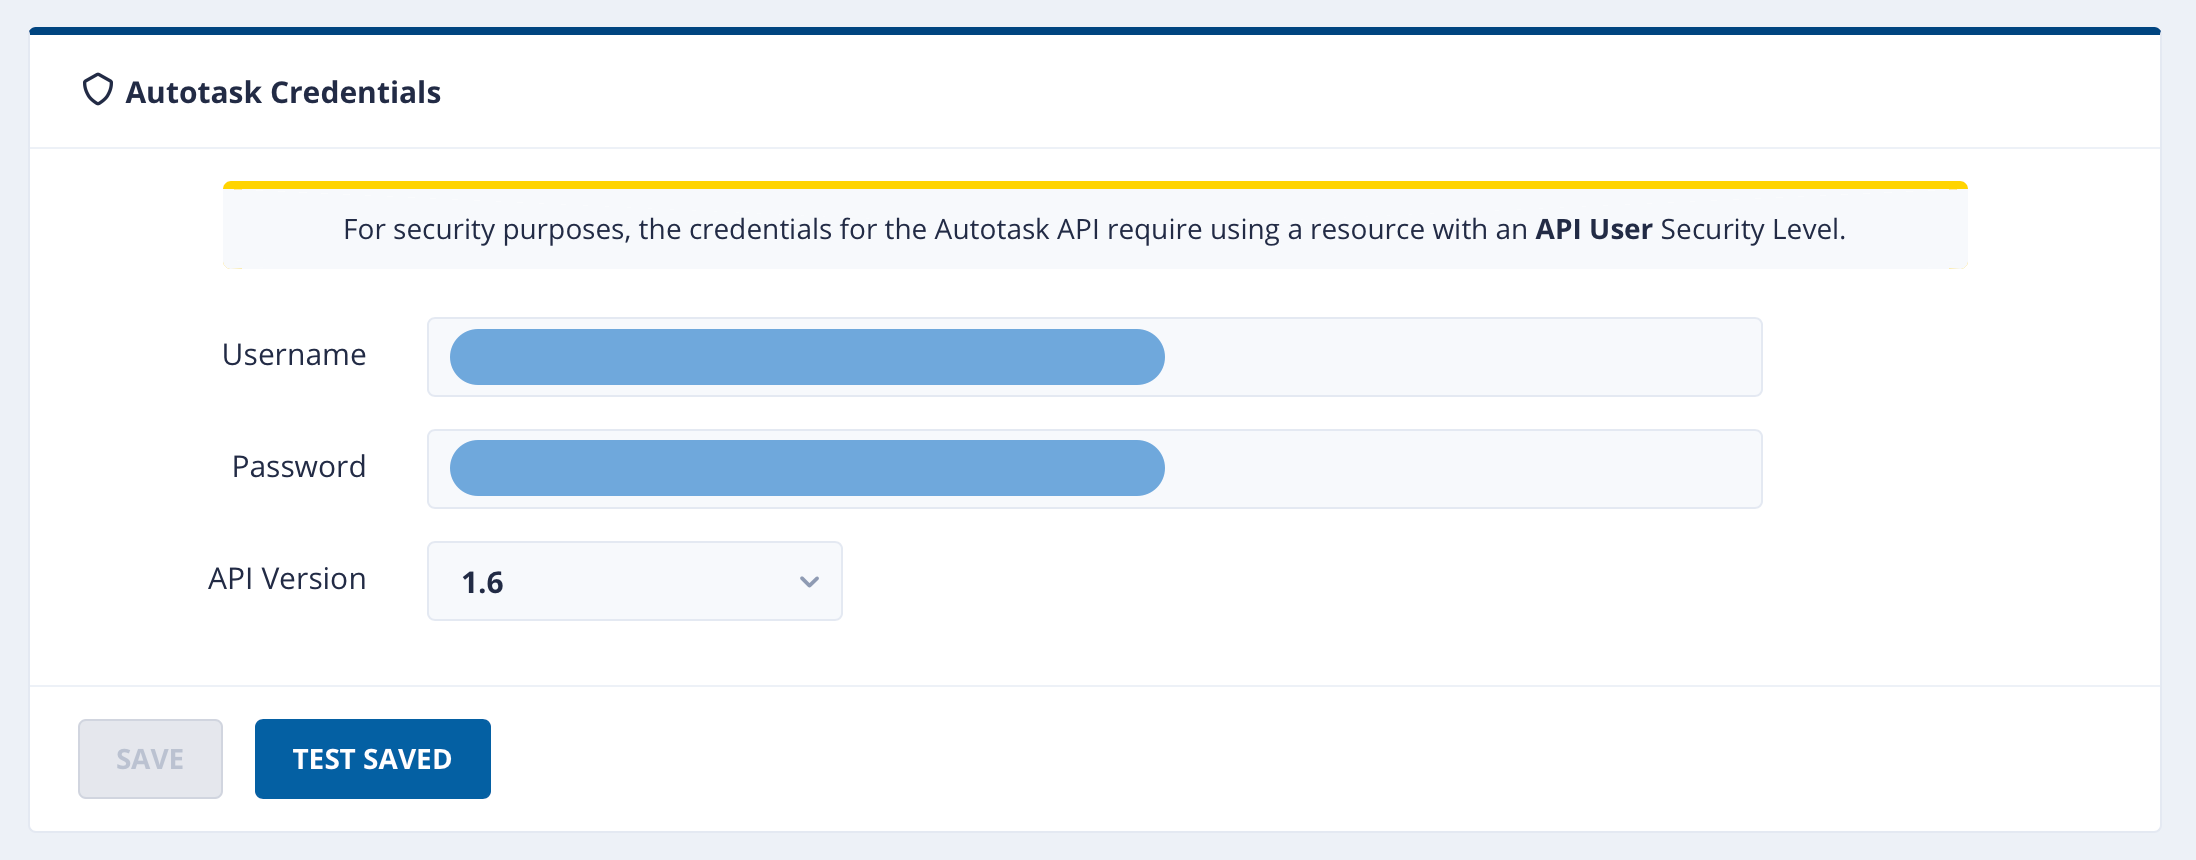
6. Test Resource Impersonation
With the configuration completed and credentials updated & verified, the final step is to attempt to create a new Ticket and add a Note to the ticket to ensure that the proper permissions are working correctly.
- In Slack, use Tasky's Create Ticket slash command (/ticket) to create a new ticket
- Visit the ticket channel created by Tasky and add a note to the ticket using Tasky's Add Note slash command (/note)
Creating a ticket and adding a note should complete successfully!
If Tasky reports permissions errors during the testing, check that the Security Levels are setup correctly and assigned to Tasky users appropriately.
Comments
0 comments
Please sign in to leave a comment.